CDS 210: Fall 2026

Welcome to DS210!
This site holds the syllabus, schedule, lecture notes, and handouts for assignments and discussion sections.
Lectures meet Monday, Wednesday, and Friday in 871 Commonwealth Ave, CGS 505.
- Section A1: 11:15am - 12:05pm
- Section B1: 12:20pm - 1:10pm
Both sections cover the same material.
Discussion sections meet for 50 minutes. A sections (A2, A3, A4) meet Wednesday afternoons. B sections (B2, B3, B4) meet Tuesdays.
Where to find things
- Syllabus - policies, grading, and what the course covers
- Schedule - week by week, with due dates
- Lecture notes are in the sidebar, one page per lecture
- Projects, Discussions, and Activities will also be added as they are released
What this course is about
CDS 210 builds on CDS 110 by moving from Python to a systems language. You will learn how a computer actually stores and manages data, why that matters for the programs you write, and how Rust's approach to memory lets you write fast code without the crashes that come with managing memory by hand.
By the end, you will be able to take a slow piece of Python, rewrite the expensive part in Rust, and call it back from Python.
CDS 210 - Fall 2026 Syllabus
- Course description
- Teaching Staff
- Meeting Times and Rooms
- Office Hours and Coffee Chats
- Course Websites
- Course Content Overview
Overview
Course description
This course builds on DS110 (Python for Data Science) by expanding on programming language, systems, and algorithmic concepts introduced in the prior course. The course begins by exploring the different types of programming languages and introducing students to important systems-level concepts such as computer architecture, compilers, file systems, and using the command line. It then introduces a high-performance language (Rust), how it manages memory, and how to use it to implement fundamental data structures and algorithms. Then it covers how to use Rust in conjunction with Python and external libraries to perform data manipulation and analysis.
Prerequisites: CDS 110 or equivalent
BU Hub units: this course meets requirements for Quantitative Reasoning II, Creativity/Innovation, and Digital/Multimedia Expression. For details on how the course meets the learning outcomes for each, see the appendix.
Teaching Staff
Instructor (both sections): Lauren Wheelock
Email: laurenbw@bu.edu
Office: CDS 1506
| Teaching Assistants | Course Assistants |
|---|---|
| Matthew Morris mattmorr@bu.edu | Kesar Narayan kesar@bu.edu |
| Emir Tali etali@bu.edu | Lingjie Su sljleo@bu.edu |
| Kristen Bestavros kbest@bu.edu | |
| Gabriel Burr gsb@bu.edu | |
| Nivedhaa (Nia) Naresh Kumar nkmar@bu.edu |
Our TAs and CAs have all taken 210 themselves and are passionate about the subject and teaching it. They are a great resource, so lean on them when you need to!
For anything about the course, Piazza is usually faster than email and helps us track open loops, so please use it over email when possible.
See Office Hours and Coffee Chats below for when we are available.
Meeting Times and Rooms
Both lecture sections meet Mondays, Wednesdays, and Fridays in 871 Commonwealth Ave, CGS 505.
A1 Lecture: 11:15am-12:05pm
B1 Lecture: 12:20pm-1:10pm
Section A Discussions (Wednesdays, 50 min):
- A2: 1:25pm - 2:15pm, 871 Commonwealth Ave CGS 525 (led by Matt)
- A3: 2:30pm - 3:20pm, 871 Commonwealth Ave CGS 525 (led by Gabriel)
- A4: 3:35pm - 4:25pm, 871 Commonwealth Ave CGS 525 (led by Gabriel)
Section B Discussions (Tuesdays, 50 min):
- B2: 11:00am - 11:50am, 111 Cummington St MCS B31 (led by Emir)
- B3: 12:30pm - 1:20pm, 111 Cummington St MCS B31 (led by Kristen)
- B4: 2:00pm - 2:50pm, 665 Comm Ave CDS 164 (led by Nia)
Note: the official schedule lists the B discussion sections as running until 12:15pm, 1:45pm, and 3:15pm, because that is the full length of those time slots. We will typically only use 50 minutes, ending at the times listed above. On code review weeks, B3 and B4 may use the full time.
Note: You must attend the lecture and discussion sessions you are assigned to. We can make one-off exceptions with sufficient notice but, in general, showing up to a different lecture or section without notice will result in no attendance credit and may cause other issues (especially for code reviews and exam corrections).
Office Hours and Coffee Chats
Prof. Wheelock's office hours
Drop-in, no sign-up needed, in CDS 1506.
- Mondays 9:30 - 10:30am
- Wednesdays 9:30 - 10:30am
Come with a question, to work on the project near other people, or to listen to what others are asking. If you want to speak privately let me know in advance.
Staff office hours
All TA and CS office hours will be in the CDS building's 5th floor Pavillion:
- Mon 5-6: Kesar @ East Side
- Wed 4-5: Lingjie @ East Side
- Wed 5-6: Gabriel @ East Side
- Thu 4-5: Kristen @ South Side
- Thu 5-6: Matt @ East Side
- Fri 1:30-2:30: Nia @ West Side
- Fri 2:30-3:30: Emir @ East Side
Coffee chats with Prof. Wheelock
Coffee chats are 20 minute appointments you can book with me, individually or in small groups. There will literally be coffee (or new this semester - tea or hot chocolate). Coffee chats have one rule: we do not talk about the course. No discussion of grades, assignments, or the material. They are for talking about life, career plans, research, what you want to do after this, existential philosophy, whether AI is going to take over the world, or whatever is on your mind.
- Fridays 9:30 - 10:30am
- Every other Tuesday 2:00 - 3:00pm, starting September 8
Sign up at https://calendly.com/laurenbw-bu/coffee-chats. If nobody has signed up for a slot by that morning, it becomes drop-in. To ensure everyone has a chance, please sign up no more often than once every 2 weeks, but you can always drop in.
If none of these times work, let me know and we will work something out individually. Send a private note on Piazza with a few suggestions for times you are available. We may need to use Zoom. Other courses and discussions overlap the times above, so if you have a standing conflict, please do say something, I would love to meet with you.
Course Websites
| Site | What it is for | Link |
|---|---|---|
| Course Website | This syllabus, the schedule, lecture notes, project info and other supporting documents | rust4ds.github.io/ds210-fa26-lectures |
| Piazza | Announcements, questions and discussion | http://piazza.com/bu/fall2026/ds210 |
| Gradescope | Where you track assignments, submit your work, and see exams and course standings | https://www.gradescope.com/courses/1356101 |
| Echo360 | Will house lecture recordings | A1 link and B1 link |
| GitHub | Base repositories for each assignment, which you fork, and where you push your work | Multiple links, to be released |
Course Content Overview
By the end of the course you should be able to read and write programs in a compiled, statically typed language (Rust); explain how a program uses memory and why that affects its speed; form well-reasoned preferences between programs that produce the same output; and use the everyday tools of software work including the command line, version control, and automated testing. More than any single topic, the goal here is for you to come away able to explain what your code does and why you wrote it that way.
- Part 1: Tools and Your First Program (Weeks 1-3)
- Part 2: Building and Judging Programs (Weeks 3-4)
- Part 3: Structuring Data (Week 5)
- Review and Midterm 1 (Week 6)
- Part 4: Memory (Weeks 7-9)
- Part 5: Borrowing and Working with Data (Weeks 9-10)
- Review and Midterm 2 (Week 10)
- Part 6: Collections and Abstraction (Weeks 11-12)
- Part 7: Practice and Payoff (Weeks 13-15)
- Final exam: Monday, December 14, 12:00-2:00pm, in our room (CGS 505)
For a complete list of topics that will be kept up-to-date as we go through the term, see the Schedule.
How the course works
Grading
How your grade is calculated
Your grade will be determined as:
| Category | Weight | Breakdown |
|---|---|---|
| Exams | 50% | 15% midterm 1, 15% midterm 2, 20% final exam |
| Active engagement | 20% | 15% in-class activities, 5% pre-work and surveys |
| Code reviews | 15% | 5% each, for Projects 1, 2, and 3 |
| Autograded work | 15% | 5% each, for Projects 1, 2, and 3 |
All three projects use the same point structure:
| Each project | |
|---|---|
| Checkpoint 1 | 1% |
| Checkpoint 2 | 1% |
| Final submission - known tests | 2% |
| Final submission - secret tests | 1% |
| Code review | 5% |
| Total | 10% |
We will use Gradescope to track grades over the course of the semester, which you can verify at any time and use to compute your current grade in the course for yourself. I will also publish "standings" files periodically on Gradescope which will include your attendance and other graded records, along with course average projections after the first and second midterm periods.
Curves
I will use the standard map from numeric grades to letter grades (>=93 is A, >=90 is A-, etc). For the midterms and final, we may add a fixed number of "free" points to everyone uniformly to effectively curve the exam at our discretion - this will never result in a lower grade for anyone. However, I make an effort to design exams such that they result in a fair distribution without adding curve points, and only use this policy in exceptional circumstances. If this comes into play, it will be added after exam corrections, and exam grades will be capped at 100%.
Lectures and Discussions
Lectures will involve extensive hands-on practice. Each class includes interactive presentations of new concepts, small-group activities on paper and on laptops, and built-in review periods. Laptops (and tablets) stay closed unless we are actively coding, so I will print handouts of the lecture notes for you to write on. Because of this active format, regular attendance and participation are important and count for a significant portion of your grade (15%).
Discussions
Discussions will review lecture material, host project code reviews, and run proctored exam corrections. They will also adapt over the semester to the needs of the class.
Pre-work
Pre-work will be assigned before most lectures to prepare you for in-class activities. These typically include readings plus a single quiz question. We will also periodically ask for feedback and reflections on the course between lectures.
Mid-semester update: The pre-work grade will now be calculated by dividing the semester up into third and dropping 2-3 pre-works from each third, accounting for occasional conflicts and forgetting, similar to the attendance policy.
Attendance and participation
Since a large component of your learning will come from in-class activities and discussions, attendance and participation are essential and account for 15% of your grade.
Lecture attendance is recorded in a few different ways, and which one we use varies from day to day:
- In-class activity sheets, where your group writes down everyone's name and turns in the sheet
- In-class Gradescope tasks, submitted individually or as a group during lecture. Some of these ask for a password that I say out loud in the room and post nowhere else
- Cold-calling, which doubles as a check that the people marked present are the people in the room
I also take a headcount most days. If the headcount and the names I collect stop lining up, we will move to stricter methods, and they will be more annoying for all of us. Please do not sign in for someone who is not there.
Discussion attendance is similar, will be taken on weeks when we do not have code review or exam corrections, and will be done on paper or via gradescope or other tools, depending on the week.
This course follows BU's policy on religious observance - if you are absent due to a religious conflict let me know and this will not count against you. If you cannot attend classes for a while, please let me know as soon as possible so we can make a plan so you don't fall behind. If you miss a lecture, please review the lecture notes and lecture recording. If I cannot teach in person myself, I will send a Piazza announcement with instructions.
How attendance is calculated
The 15% is split evenly across three attendance periods, 5% each. Within a period, every session is worth points:
- Lecture is worth 1 point
- Discussion is worth 2 points
Each period contains 18 points of sessions, and you need 16 points to earn the full 5%. That creates an excused-absence allowance of 2 points per period, which is equivalent to two lectures or one discussion, no questions asked and no need to notify me. Extra points do not roll over to the next period.
| Period | Sessions | Points available | Points for full credit |
|---|---|---|---|
| 1 | Lectures 1-12, Discussions 1-3 | 18 | 16 |
| 2 | Lectures 13-27, Discussions 4 and 7 | 18 | 16 |
| 3 | Lectures 29-40, Discussions 9 and 11, plus your broken-week session | 18 | 16 |
Some discussions are not on this list, because they already carry their own consequences and do not need attendance points on top: the three code review sessions (D5, D8, D12) and the two exam corrections sessions (D6, D10).
Your broken-week session counts toward period 3 regardless of when it takes place (October for A and November for B).
Cold-calling
Sometimes in class I will ask folks to raise hands to answer questions, and at other times I will call on people who have not volunteered. Since this makes a lot of people nervous, I wanted to share a bit of detail here about how and why I do this.
Why I do it. In most classes, only a few people answer everything while everyone else listens, and it gets worse over the course of the semester. Cold-calling lets us hear more voices, and it tells me what is actually landing for the average student. It also helps folks get comfortable speaking up. Sometimes students who are "called in" this way turn into more engaged participants later. It also serves as a cross-check on attendance.
How I pick people. Each class, I generate a random list, weighted towards students who have not been called on recently or who have been absent. So if you answered something on Monday, you are unlikely to come up again on Wednesday, but it is always possible.
The questions are low-stakes. Some questions are open-ended, like asking about what you noticed or what you think will happen. At other times I might ask a review question with a clear right answer, but give you the chance to think and talk to a neighbor before I call on you.
You can always pass. "I don't know" is a fine answer. I might prompt you with a more basic question, or ask someone else to volunteer, but there is no penalty for passing or getting something wrong. I only track if I called on you and if you spoke, not what you said.
Projects
Projects are three assignments that make up all of your non-exam work. Each includes checkpoints, final automated tests, and a code review in your discussion section.
There are three projects, and they all run on the same four-week rhythm between exams:
- Released on a Friday
- Two checkpoints, on the next two Fridays, each worth 1%
- Due the Friday after that
- Code review, in your discussion section the following week
Projects are graded once. There is no process for improving your project grade after submission.
Checkpoints
Each project has two checkpoints: earlier deadlines where we run your code against a subset of the tests. Checkpoints exist to encourage and reward work on a project over time, and they let us find out who needs help well before the final deadline.
Missing a checkpoint is not the end of the world. Half of the final visible test points come from re-running the checkpoint tests at the final deadline. So a missed checkpoint costs you that checkpoint's point for being late, but the code itself still earns credit when you submit it. Checkpoints reward being on time; they do not punish you a second time for the same thing.
Checkpoint dates are listed on the schedule, and checkpoint tests will be marked as such in the project base repo.
Visible and secret tests
Some of the tests we grade you on are ones you can run yourself, and some are not.
- Visible tests come with the base repo. You can run them as often as you like and know exactly where you stand.
- Secret tests are run by us after the deadline. You will see your score on them, but not which ones failed.
Secret tests serve two purposes: to get you to think about the overall project and its edge cases in a realistic manner, and to mitigate the overuse of AI.
Working with other people's code
All three projects are individual work.
That said, learning git and GitHub is a major goal of this course, and git exists because real software is written by groups. So each project will involve realistic collaboration "events" staged by the teaching team to practice the tools and moves you'll need in the real world (more on that later).
You are always welcome to talk through approaches with classmates. See the collaboration policy below for where the line is.
Submitting your work
For each task, checkpoint, and project, we publish a Gradescope assignment. For coding work this will link to a base repository on GitHub. You fork it, do your work there, and commit as you go.
To submit, you paste the URL of your fork into Gradescope. We download your repository from that URL and run tests against it.
(If this language is new to you, that's okay! We'll go over all of it in Week 2.)
Everything you submit runs through GitHub, which means your commit history is part of what we see and evaluate.
Code reviews
Code reviews happen during your discussion section in the week following each deadline. A member of the course staff will go through your code and your commit history with you, ask you to explain specific choices, ask "what if" questions, and give you feedback.
You must attend your code review. If you need to reschedule, give us at least 2 days' notice and we will work with you to find another time.
We will review late submissions in whatever state they are in at the time of the code review - we will not postpone review because submissions are delayed.
If you do not attend a code review, you will receive a zero on the entire project, including the autograded portion, even if your tests passed. The code review is where you demonstrate that you understand the work you submitted, and passing tests does not show that on its own. This principle is reflected in the GenAI policy below.
Deadlines and late work
| What | Due |
|---|---|
| Checkpoints and projects | 11:59pm on the date specified in Gradescope |
| Lecture pre-work | 11am on the morning of each lecture |
Everything is due at midnight except pre-lecture work, which is due before the lecture it prepares you for.
If your work is up to 48 hours late, you can still qualify for up to 80% credit for the assignment. After 48 hours, late work will not be accepted unless you have made prior arrangements due to extraordinary circumstances.
Note that late project submissions still get reviewed on the normal schedule, in the discussion section following the deadline.
Exams
Exams are two midterms and a cumulative final exam covering theory and short hand-coding problems (which we will practice in class!).
| Exam | When | Where |
|---|---|---|
| Midterm 1 | Friday, October 9 | In class, normal lecture time, each section takes its own |
| Midterm 2 | Friday, November 6 | In class, normal lecture time, each section takes its own |
| Final | Monday, December 14, 12:00-2:00pm | CGS 505, our usual room. Combined across both lecture sections |
No external resources may be used in exams: no calculators, reference sheets, scrap paper, or electronic devices of any kind. Smart watches and glasses must not be worn, even if switched off.
If you have a valid conflict with a test date, you must tell me as soon as you are aware, and with a minimum of one week's notice (unless there are extenuating circumstances such as a medical emergency) so we can arrange a make-up test.
If you have accommodations for exams, please schedule all three dates (October 9, November 6, and December 14) with the testing center now, in the first two weeks of class. Historically, the testing center has booked up quickly. See below for more about accommodations.
Second chances
Exam corrections. About two weeks after each midterm, we hold proctored corrections during discussion section. You will have the opportunity to redo specific questions in person with your old, completed exam alongside a blank exam. Your final grade for that midterm will be the average of your original and corrected scores. (That is, you can earn back up to 50% of your lost points via corrections.)
A strong final exam counts for more. If you are struggling in the beginning of the course and make an effort to catch up, your grade will reflect that improvement. If your final exam score is higher than your midterm average, we reweight your exams automatically:
| Normally | If your final is higher | |
|---|---|---|
| Midterm 1 | 15% | 10% |
| Midterm 2 | 15% | 10% |
| Final exam | 20% | 30% |
You do not need to request this or do anything differently. We compute your grade both ways and use whichever is better for you. Your midterm average here is your score after any corrections.
Regrading
You have the right to request a re-grade of any assignment or test. All regrade requests must be submitted using the Gradescope interface. If you request a regrade for a portion of an assignment, then we may review the entire assignment, not just the part in question. This may result in a lower grade. We only restore missed points when a factual error was made in grading (such as misreading handwriting, or misclicking in Gradescope), not to respond to arguments for more partial credit. This keeps grading consistent and fair to all students.
Policies
Academic honesty
You must adhere to BU's Academic Conduct Code at all times. Please be sure to read it here. In particular: cheating on an exam, passing off another student's work as your own, or plagiarism of writing or code are grounds for a grade reduction in the course and referral to BU's Academic Conduct Committee. If you have any questions about the policy, please send me a private Piazza note before taking an action that might be a violation.
Collaboration
You are free to discuss problems and approaches with other students but must do your own code writing. If a significant portion of your solution is derived from someone else's work (your classmate, a website, an AI, etc.), you must cite that source in your writeup or comments. You will not be penalized for using outside sources as long as you cite them appropriately.
You must also understand your solution well enough to be able to explain it if asked.
AI use
You are allowed to use GenAI (e.g., Claude, ChatGPT, GitHub Copilot, etc.) to help you understand concepts, debug your code, or generate ideas. You should understand that this may help or impede your learning depending on how you use it.
This course is designed so that, largely, I do not have to police that choice. The parts of your grade that carry the most weight - exams and the code reviews on your projects - all require you to explain your work in person. If you lean on AI in a way that leaves you unable to explain what you built, that will become apparent during code review and on exams.
If you use GenAI on a project, you must cite what you used and how you used it (for brainstorming, autocomplete, generating comments, fixing specific bugs, etc.) in your project's README. You must also understand your solution well enough to explain it during a code review or in a follow-up conversation if asked. If it is determined that you overused GenAI to the extent that you fundamentally do not understand the code you submitted, you will receive a zero on the entire assignment, including the autograded portion, even if the autograded tests passed.
Your professor and TAs/CAs are happy to help you write and debug your own code during office hours, but we will not help you understand or debug code generated by AI.
For our departmental policy, see the CDS policy on GenAI. Note that this policy is in the process of being updated and parts of it do not apply in this course (for example, we do NOT require you to submit your entire chat history as an appendix). If you have any questions about the policy let us know.
Accommodations
If you need accommodations, let me know as soon as possible. You have the right to have your needs met, and the sooner you let me know, the sooner I can make arrangements to support you.
This course follows all BU policies regarding accommodations for students with documented disabilities. If you are a student with a disability or believe you might have a disability that requires accommodations, please contact the Office for Disability Services (ODS) at (617) 353-3658 or access@bu.edu to coordinate accommodation requests.
If you require accommodations for exams, please schedule all three dates, October 9, November 6, and December 14, at the BU testing center within the first two weeks of the semester while they still have plenty of availability.
Appendix: BU Hub Learning Outcomes
This course carries three units in BU's Hub: Quantitative Reasoning II, Digital/Multimedia Expression, and Creativity/Innovation. Each Hub area publishes a set of learning outcomes, and here we describe how this course meets those objectives. For students of the course, reading this section is not required.
Quantitative Reasoning II (QR2)
Outcome 1. Students will frame and solve complex problems using quantitative tools, such as analytical, statistical, or computational methods.
Every project asks students to work from a problem statement to a working program. Lectures give students the analytical tools to reason about candidate solutions, and about computational speed and cost, on the way to solving complex problems.
Outcome 2. Students will apply quantitative tools in diverse settings to answer discipline-specific questions or to engage societal questions and debates.
This course applies the quantitative tools of algorithm analysis (considering speed and asymptotic complexity) to many problems: search, sorting, memory layout, graph and game-tree traversal, and concurrency. Late in the term, the lectures on querying data and on calling Rust from Python connect this material back to the rest of the data science pipeline. We also discuss the impact of computing costs on energy use.
Outcome 3. Students will formulate, and test an argument by marshaling and analyzing quantitative evidence.
Each project asks students to make and test hypotheses and argue for their design choices. They must use quantitative evidence from their computational experiments to defend their decisions.
Outcome 4. Students will communicate quantitative information symbolically, visually, numerically, or verbally.
Symbolically, we use Big-O notation, which is how we state a claim about scaling. Numerically and visually, we use benchmark tables and plots, in lecture and in project writeups. Verbally, students defend their work in code reviews, where they explain out loud how their program works and answer questions from the teaching staff about their work.
Outcome 5. Students will recognize and articulate the capacity and limitations of quantitative methods and the risks of using them improperly.
This course focuses on programs that don't just work, but scale and work effectively and efficiently. In projects and on exams, students are asked to make judgements between similar programs that have the same output but that have different limitations around complexity, speed, and memory use. Students must also think holistically about their design decisions, recognizing that some metrics (speed, test coverage, memory use, code simplicity) trade off against each other, and good design requires good judgement in addition to quantification.
Digital/Multimedia Expression (DME)
Outcome 1. Students will be able to craft and deliver responsible, considered, and well-structured arguments, statements, or expressions using appropriate digital media.
Student projects are complex repositories including source code, documentation (a README), a test suite, potentially other media such as images, and a commit history. Projects are evaluated not only by an autograder for correctness, but by a conversation with a teacher who can assess the arguments, style, and the repo as a whole.
Outcome 2. Students will be able to reflect on the ethical use of digital media, considering relevant issues such as accessibility, intellectual property rights, citational practices, and other discipline-specific concerns.
Citations are required for projects in this course. We talk throughout about what it means for code to be "yours", especially in the era of generative AI, and the importance of taking responsibility for your code even if it was derived from multiple sources. We also discuss intellectual property and license types when learning about external crates.
Outcome 3. Students will be able to demonstrate an understanding of the capabilities of one or more digital communication technologies in their assignments.
The technologies of everyday software work are central in this course: the command line, git and GitHub, compilers and interpreters, and automated testing tools. When learning git, students learn best practices about digital collaboration on code projects, and see the version control process as both facilitating communication and producing documentation artifacts for those who come later.
Outcome 4. Students will be able to demonstrate an understanding of the fundamentals of digital communication, such as principles governing design, time-based and interactive media, and the audio-visual representation of qualitative and quantitative data.
Code is a designed artifact with a human audience, and we emphasize that throughout: code is not just something a machine reads, and good code has care put into naming, structure, formatting, and documentation. We frequently consider similar programs side by side and discuss which one we prefer and why. In each project, students collect and present quantitative analysis of their code's performance in defense of their design decisions.
Creativity/Innovation (CRI)
Outcome 1. Students will demonstrate understanding of creativity as a learnable, iterative process of imagining new possibilities.
1A Students practice creative and innovative thinking as an iterative process, for example by revising their ideas or their methodologies in response to feedback from peers or instructors.
The course's projects each run over about four weeks and are built for iteration: the task is released, there are two checkpoints a week apart to ensure progress over time, there is a final deadline with evaluation that overlaps the checkpoints in content to capture iterative improvement, and the project concludes with a code review where students present and defend their ideas and receive further feedback. Indirectly, the course's policy on exam corrections allows for a layer of feedback and reflection after an exam is initially graded, letting students demonstrate growth based on exam feedback.
1B Students will provide a metacognitive reflection, in which they evaluate their choices in relation to risk-taking or experimentation and identify individual and institutional factors that promote and/or inhibit creativity.
Project code reviews are conversations about design choices, where students are asked what they tried, what failed, and what would happen if further changes were made to their code. Each project also requires a written reflection in its README: what the student tried first, why they changed it, and what they would do with more time. The same README must record where generative AI was used and how.
1C Students generate a product based on the above processes.
Each project in this course is such a product.
Outcome 2. Students will be able to exercise their own potential for engaging in creative activity by conceiving and executing original work either alone or as part of a team.
All three projects are individual, and all three leave room for original design. Each also requires students to use a new software tool (git) to combine their own work with changes made by others, which is how software is built in practice. Project 3 adds a competitive component: students enter the strategies they designed into an automated tournament. There is no single correct answer there, and the strategies that perform well are usually the ones with an out-of-the-box approach.
Schedule
Everything in this table that occurs in the future is subject to change. Please check the pre-lecture tasks before each class. Project and exam dates should be stable; we will announce clearly if any need to move.
At a glance
| Week | Dates | Project milestones | Exams | Participation |
|---|---|---|---|---|
| 1 | Sep 2 - 4 | Getting set up. Nothing due | ||
| 2 | Sep 7 - 11 | Install session in discussion Project 1 released | ||
| 3 | Sep 14 - 18 | Project 1 checkpoint 1 | ||
| 4 | Sep 21 - 25 | Project 1 checkpoint 2 | ||
| 5 | Sep 28 - Oct 2 | Project 1 due | End of period 1 Wed Sep 30 | |
| 6 | Oct 5 - 9 | Project 1 code review Project 2 released | Midterm 1, Fri Oct 9 | |
| 7 | Oct 12 - 16 | Project 2 checkpoint 1 | ||
| 8 | Oct 19 - 23 | Project 2 checkpoint 2 | Midterm 1 corrections | |
| 9 | Oct 26 - 30 | Project 2 due | ||
| 10 | Nov 2 - 6 | Project 2 code review Project 3 released | Midterm 2, Fri Nov 6 | End of period 2 Wed Nov 4 |
| 11 | Nov 9 - 13 | Project 3 checkpoint 1 | ||
| 12 | Nov 16 - 20 | Project 3 checkpoint 2 | Midterm 2 corrections | |
| 13 | Nov 23 - 27 | Thanksgiving recess. Nothing due | ||
| 14 | Nov 30 - Dec 4 | Project 3 due | ||
| 15 | Dec 7 - 11 | Project 3 code review | End of period 3 Wed Dec 9 | |
| Finals | Dec 14 | Final exam, Mon Dec 14, 12-2pm, CGS 505 |
Participation periods split the attendance portion of your grade into three equal parts, 5% each. Each period holds 18 points of sessions (a lecture is 1 point, a discussion is 2) and you need 16 for full credit, so you have room to miss two lectures or one discussion in each. Points do not carry over between periods, so the dates above are worth knowing. Full details are in the syllabus.
Week by week
This table is wide, so you may need to scroll right to see all columns.
| Date | Lecture | Topic | Due | Discussion |
|---|---|---|---|---|
| Week 1 | No discussion | |||
| Wed Sep 2 | 1 | Welcome: what this course is, and why Rust | ||
| Fri Sep 4 | 2 | Hello shell: talking to your computer | ||
| Week 2 | Mon Sep 7: Labor Day, no class | Install session. Bring your laptop | ||
| Wed Sep 9 | 3 | Hello Rust: your first program, and why it is fast | ||
| Fri Sep 11 | 4 | Hello git: save points for your code | Project 1 released | |
| Week 3 | Git basics | |||
| Mon Sep 14 | 5 | Start to finish: build it, break it, fix it | ||
| Wed Sep 16 | 6 | Variables: types and their properties | ||
| Fri Sep 18 | 7 | Functions: parameters, returns, and expressions | Project 1 checkpoint 1 | |
| Week 4 | Leetcode practice | |||
| Mon Sep 21 | 8 | Control flow: branching and looping | ||
| Wed Sep 23 | 9 | Complexity: how to compare two programs | ||
| Fri Sep 25 | 10 | Sorting: complexity and recursion | Project 1 checkpoint 2 | |
| Week 5 | Project 1 work session | |||
| Mon Sep 28 | 11 | Structs: bundling data with methods | ||
| Wed Sep 30 | 12 | Enums: variants and match | End of participation period 1 | |
| Fri Oct 2 | 13 | Errors: Result, Option, and reading a file | Project 1 due | |
| Week 6 | Project 1 code review | |||
| Mon Oct 5 | 14 | Read and review code: a real repo, and your own | ||
| Wed Oct 7 | 15 | Review: everything before Midterm 1 | ||
| Fri Oct 9 | MIDTERM 1 | Project 2 released | ||
| Week 7 | Mon Oct 12: Indigenous Peoples Day, no class | A sections only: leetcode / extra practice | ||
| Tue Oct 13 | 17 | The stack: frames, and why it is fast | ||
| Wed Oct 14 | 18 | The heap: allocation, and why it is slower | ||
| Fri Oct 16 | 19 | Pointers: references, dereferencing, and unsafe | Project 2 checkpoint 1 | |
| Week 8 | Midterm 1 corrections | |||
| Mon Oct 19 | 20 | Pointer danger: five ways C loses your memory | ||
| Wed Oct 21 | 21 | Ownership: the three rules, moves, and copies | ||
| Fri Oct 23 | 22 | Owning collections: Vec, String, and capacity | Project 2 checkpoint 2 | |
| Week 9 | TBD | |||
| Mon Oct 26 | 23 | Strings: why text is harder than it looks | ||
| Wed Oct 28 | 24 | Borrowing: using data without owning it | ||
| Fri Oct 30 | 25 | Borrow checker: the rules and the errors | Project 2 due | |
| Week 10 | Project 2 code review | |||
| Mon Nov 2 | 26 | Tests: writing them, and what to test | ||
| Wed Nov 4 | 27 | Review: everything before Midterm 2 | End of participation period 2 | |
| Fri Nov 6 | MIDTERM 2 | Project 3 released | ||
| Week 11 | TBD | |||
| Mon Nov 9 | 29 | Traits: shared behavior across types | ||
| Wed Nov 11 | 30 | Generics: one function, many types | ||
| Fri Nov 13 | 31 | Collections: Vec, HashMap, and what they cost | Project 3 checkpoint 1 | |
| Week 12 | Midterm 2 corrections | |||
| Mon Nov 16 | 32 | Heaps: building a collection from a Vec | ||
| Wed Nov 18 | 33 | Linear structures: stacks, queues, ring buffers | ||
| Fri Nov 20 | 34 | Box: recursive types, lists, and trees | Project 3 checkpoint 2 | |
| Week 13 | Wed Nov 25 - Fri Nov 27: Thanksgiving recess | B sections only: leetcode / extra practice | ||
| Mon Nov 23 | 35 | Ship your code: modules, crates, and Python | ||
| Week 14 | TBD | |||
| Mon Nov 30 | 36 | Iterators: closures, laziness, and files | ||
| Wed Dec 2 | 37 | Threads: doing two things at once | ||
| Fri Dec 4 | 38 | Sharing data: Arc, Mutex, and data races | Project 3 due | |
| Week 15 | Project 3 code review | |||
| Mon Dec 7 | 39 | Review: rapid fire across the term | ||
| Wed Dec 9 | 40 | Review: long form, and your questions | End of participation period 3 | |
| Mon Dec 14 | FINAL EXAM, 12:00-2:00pm, CGS 505, both sections together |
Notes
- Tuesday Oct 13 is a Monday schedule. Lecture meets as usual but B discussions don't meet that week.
- Wednesday Nov 11 (Veterans Day) is a regular class day.
- Lecture A discussion sections do not meet during Thanksgiving week.
- The two weeks where only one set of discussion sections meets (Week of Oct 12 and Thanksgiving week) we will run standalone practice sessions that are not tied to that week's lecture material.
- Nothing is due over Thanksgiving break.
- Checkpoints are a week apart, two per project, for all three projects. Project 3 has Thanksgiving between its last checkpoint and the deadline.
- Weeks 1 and 2 have nothing due. They are for getting your tools installed and working, and we will be monitoring your progress via pre-lecture tasks and discussion. By the time Project 1 starts you will have everything you need to work on it.
Projects
Posted so far
Nothing yet. Each project's instructions appear here as a page of its own when the project is released, on the dates in the table below.
About projects
Three projects make up most of your non-exam work (alongside pre-lecture tasks). Each project is graded on correctness and performance (via automated tests) and on a code review conducted by the teaching staff during discussion section.
All three projects are individual work. Each one also gives you practice with git and GitHub beyond just committing your own code: we will push updates to the base repository that you have to merge into work you have already changed, and you will open pull requests and have them reviewed.
There is no separate homework. The short warm-up exercises that would otherwise be homework are early checkpoints of each project.
| # | Topic | Released | Checkpoints | Due | Code review |
|---|---|---|---|---|---|
| 1 | Number guessing game | Fri Sep 11 | Sep 18, Sep 25 | Fri Oct 2 | Week of Oct 5 |
| 2 | Build your own Vec | Fri Oct 9 | Oct 16, Oct 23 | Fri Oct 30 | Week of Nov 2 |
| 3 | Tic Tac Toe, and a class tournament | Fri Nov 6 | Nov 13, Nov 20 | Fri Dec 4 | Week of Dec 7 |
Project 1 is a search problem. You will write several strategies for guessing a hidden number, then measure which one is fastest and explain why.
Project 2 is where we start working closely with memory and data structures. You will build your own version of Vec, first the easy (slow) way and then the way the real one works, with memory you allocate and manage yourself.
Project 3 will be a tournament. You will write an agent that plays Tic Tac Toe, then a harder version on a 5x5 board with walls and a time limit, and at the end of the term all of your agents play each other.
Checkpoints
Checkpoints are earlier deadlines where we run your code against a subset of the final tests. They exist to encourage a few weeks of steady work, rather than cramming, and so we can find out who needs help well before the final deadline. Checkpoints also align with the most recent lecture material and help ensure you don't fall behind.
Each project has two checkpoints, each worth 1% of your course grade.
Half of the final visible test points come from re-running the checkpoint tests at the final deadline, so a missed checkpoint costs you that checkpoint's point for being late, but the code itself still earns credit when you submit it.
Code reviews
Code reviews happen during your discussion section in the week following the deadline. A member of the course staff will go through your code and your commit history with you, ask you to explain specific choices, and give you feedback.
The code review is worth 5% of your course grade per project, which is half of each project's total and as much as all of its automated tests combined.
Project 1: Guessing Game
Welcome to your first project!
Here's a game that is probably familiar. Somebody picks a number and will not tell you what it is. You can ask questions, and only two kinds are allowed: is it exactly this? and is it bigger than this? How can you find the number using as few questions as possible?
It's a simple game, but it captures some of what you'll face throughout your career: a search space larger than you can reasonably check one at a time, and rewards for being clever and thrifty.
Over three weeks you will implement several strategies for playing this game, run all of them thousands of times, and make an argument about which method is best.
You will also practice with the software development tools you're learning while you're at it. You will make your own copy of a repository, clone it, commit as you go, and at one point in the middle we will change the code underneath you and you will have to merge our changes into yours. You will practice working at the command line, first in a toy exercise, and then as a way of navigating git and doing your development work on the rest of the project.
So... Checkpoint 1 is not actually about the guessing game. It is a shell-based role-playing dungeon (!), and it is here to give you practice moving around on your computer at the command line before taking on the full project. It shares the repo so that you only set things up once, but it's really separate work, and you can finish it before you write any real Rust.
What is due when
- Checkpoint 1, Friday September 18. The dungeon only
- Checkpoint 2, Friday September 25. Implementing four guessing strategies
- The project, Friday October 2. Everything else, and the writeup
- Code review, in discussion the week of October 6.
Meet your project repo
Your starting point is https://github.com/rust4ds/ds210-fa26-project-1.
On GitHub, click Use this template, then Create a new repository. Name it ds210-fa26-project-1, the same as ours, and set it to Private. Then clone it. Work in your copy and push to it. That repo is what you submit at each checkpoint.
The template repo arrives in two pieces. To start, what you clone has checkpoint 1 in it. The guessing game itself, and the tests for it, come in an update you will merge around September 21. Files marked (Sep 21) below are not in your clone at first.
src/
  dungeon.rs        your answers from checkpoint 1
  game.rs           play a game yourself against the computer
  measure.rs        run many games and report what happened (Sep 21)
  plot.rs           run every strategy, draw the plot, print the table            (Sep 21)
  secret_keeper.rs  the other side of the game: who knows the number, and answers (Sep 21)
  strategies.rs     every guessing strategy, examples plus ones you write         (Sep 21)
  tests.rs          every test in the project
  version.rs        which release of the base repo you have
dungeon_transcript.txt   your bashcrawl session from checkpoint 1 goes in here
.gitignore          a gitignore file that already takes out `target` and some cruft
Cargo.lock          for now, you can ignore - it's about dependencies
Cargo.toml          for now, you can ignore - it's about dependencies
README.md           it starts as some instructions, and is where you'll put your write-up
From checkpoint 2 onward, everywhere you have to write code is marked todo! and the program will stop there if it reaches one. Only change the functions marked todo!. Checkpoint 1 has no todo!s: there, the things you change are the constants in dungeon.rs, your session in dungeon_transcript.txt, and the Author line of README.md.
Getting the update
The rest of the project arrives as a second commit on our template repo, and you pull it into your own copy. You'll do this once, the first time you start working towards checkpoint 2.
First, tell git where our repo is. origin is already your copy; upstream will be ours. From your repo, you can paste this into the terminal:
git remote add upstream https://github.com/rust4ds/ds210-fa26-project-1.git
git fetch upstream --tags
Becuase your repo was made with Use this template, you started with a clean history of your own. That means git doesn't know your repo and ours are related, and it will refuse to merge two histories it thinks are strangers. This next command tells git how they are related, by matching up the beginning of your repo with the beginning of the template. You can also paste this in exactly:
git merge -s ours --allow-unrelated-histories phase1 -m "connect this repo to the template"
Now you're ready for the merge itself:
git merge upstream/main
Expect one conflict, in src/dungeon.rs. We changed a line that you also changed to pass checkpoint 1, and git will refuse to guess which version you meant. Run git status to see it, then open the file. Like we practiced in Discussion 2, the two versions are marked off like this:
<<<<<<< HEAD
what your copy says
=======
what our copy says
>>>>>>> upstream/main
Your job is to decide how to combine those versions and delete all the marker lines. (This might take a second to think about - try to figure out why each side made a change, and whether you want to take one version, the other, or a hybrid of the two.) When it looks right:
cargo test --bin game cp1
should all pass again. And then you save as usual:
git add src/dungeon.rs
git commit -m "merge the project update"
git push
Then run cargo test --bin game cp2. It should run and fail, because you have not started the checkpoint 2 work yet! If it says there are no tests to run, you didn't successfully merge the update yet.
Running your project
cargo run --bin game -- --strategy random          # play a game yourself
cargo run --bin game -- --strategy bad --min 2 --max 6
cargo run --bin game -- --help                     # every option
cargo run --bin plot                               # writes plot.png and prints the table
Playing against your own strategy is the fastest way to see what it does. Use a small range and you can follow every question.
None of these work until the September 21 update arrives. For checkpoint 1 the only command you need is cargo test --bin game cp1.
Running the tests
cargo test --bin game cp1     # your dungeon answers
cargo test --bin game cp2     # do your strategies work, and work as asked?
cargo test --bin game cp3     # everything else
cargo test --bin game         # all the tests at once
Each test is named for a single function and a single thing that can go wrong with it, so a failing test can point you specifically to what's broken. The filter is a substring of the test's name, so
cargo test --bin game cp2::binary and cargo test --bin game shifted both work if you want to just run individual or a small set of tests.
When you first clone your repo, every test will fail and you'll see a lot of warnings, and that's to be expected until you start writing your code.
Things you will see before we teach them
A couple things in this repo come from lectures you haven't had yet, and you don't need to understand them fully.
&mut in front of the secret keeper. Every strategy is handed keeper: &mut SecretKeeper. The &mut says the function is allowed to change the keeper, which it does. We will cover this properly in October.
The tests themselves. src/tests.rs uses #[test] and assert_eq!, neither of which you have seen. You are not writing any tests in this project, so you only need to be able to read them, and you can probably get the gist of them without knowing exactly how testing works in Rust. We'll learn how to write tests in November.
There is also a lot of Rust in secret_keeper.rs and plot.rs which will look unfamiliar, but you'll never modify these and aren't responsible for understanding their details.
Submitting
To submit a checkpoint and your final project, see the appropriate Gradescope assignment which will prompt you to log into GitHub and then point to your project repo. That's it! Your repo can stay private, you are just granting Gradescope permission to read it.
There is one Gradescope assignment per checkpoint. Push your work to GitHub before you submit, because Gradescope reads your GitHub repo and not your local copy.
Checkpoint 1: the dungeon
Before you can write Rust you have to be able to get around a computer without a mouse.
Bashcrawl is a dungeon you explore from the command line. Rooms are directories, and you navigate with cd, look around with ls and read files with cat. There are no graphics and nothing to install beyond the game itself.
Play the game, answer the questions it raises, and keep a record of what you typed.
Getting the dungeon
Clone our copy, not the one you might find by searching:
git clone https://github.com/rust4ds/bashcrawl.git
cd bashcrawl
cat README.md
Ours has a few fixes in it, and the answers the tests expect are the ones our copy gives.
Recording your session
You have to hand in a transcript of everything you typed. Don't tidy it up, since wrong turns, typos and dead ends are all fine, and demonstrate your process. Save the transcript to a file called dungeon_transcript.txt in your project repo (outside of src).
On Mac, press command-S and save the window's contents to a file.
On Git Bash (Windows), right-click inside the terminal window and choose Select All from the menu, then right-click again and choose Copy. (Dragging to highlight the whole window works too.)
Either way, paste what you get below the line in dungeon_transcript.txt.
Whatever you do, do not close the terminal until you have saved. There is no way to get the session back afterwards. If you are playing in more than one sitting, save at the end of each one and paste them in one after the other in the transcript.
Explore and take notes!
Look at src/dungeon.rs for the questions you're trying to answer as you go to guide your exploration. Take notes on your answers as you go and enter them as values in dungeon.rs. Once you get to the last answer you've gone far enough, but as a bonus (and maybe for bonus credit on a secret test...) try to beat the game completely.
A few hints for if you get stuck (try first on your own!):
- Take the treasure in the cellar. If you are back at the entrance and there is nothing new to see, you may have missed this.
- Quick portal to the pit. Once you have taken the treasure, a scrap of paper turns up back at the entrance describing how to summon a portal. A portal is a symbolic link, which is a shortcut from one place to another (like an alias). The spell written on the scrap only works from one particular room deep in the dungeon, so if you would rather not go hunting for that room, run this from
entranceinstead:
ln -s ./.rift portal
cd portal
- The robot is optional. In the satellite there are four pieces of a robot and a notebook explaining how to put them back together. There's a right way to check, but you can also just try both remaining options to see which one works. Moreover, none of the graded answers are behind the robot, so this is just for fun.
- The graveyard is also optional. There is nothing you need for the answers in there, so visit it if you are interested and otherwise skip it.
- Winning the game depends on decisions you made earlier and a bit of luck, and is not required for passing the checkpoint tests.
Checklist
- Make your own private copy of the Project 1 repository with Use this template, then clone it to your own machine (done in Lecture 4's Activity)
-
Put your name on the Author line of
README.md - Clone bashcrawl and start recording your session
- Play bashcrawl through to answer the questions
-
Fill in the constants in
src/dungeon.rswith what you found -
Check
dungeon_transcript.txthas your session in it -
Check that
cargo test --bin game cp1passes - Commit, push, and submit your repo on Gradescope
Hints and tips
cd ..goes back up one roomlsdoes not show you everything.ls -aalso shows hidden files, the ones starting with.- Read every file you find with
cat - If you get lost,
pwdtells you where you are - Try tab-completing to speed things up and prevent typos
- Use the up arrow to bring back previous commands, and down to go the other way
- If you get stuck mid-command (like in a
dquote!) control-c is your friend
Checkpoint 2: four strategies
Somebody picks a number and writes it down. You do not get to see it. All you can do is ask them questions, and only two kinds are allowed:
- "Is it exactly 7?" They answer yes or no.
- "Is it bigger than 7?" They answer yes or no.
A strategy is a plan for which questions to ask, and in what order, so that you end up knowing the number. You write it as a function. It plays one whole game, from the first question to the answer:
#![allow(unused)]
fn main() {
pub fn binary(keeper: &mut SecretKeeper, min: u32, max: u32) -> u32
}
keeperis the person who knows the number. You ask them thingsminandmaxare the range the number is somewhere inside,minincluded andmaxnot- the
u32you return is the number you have worked out
Two things about that signature:
- Each question comes back as a
bool, but the strategy returns a number. - The whole game happens inside one function call. You don't call your function once per question, but once per game.
All four strategies will get the right answer, but what separates them is how many questions that takes, and in checkpoint 3 you will be able to measure how much it matters.
What you are writing
You'll complete most of the functions in src/strategies.rs for this checkpoint. Read bad and random at the top first which can serve as templates. The four functions in Search strategies and the constant are yours to edit at this point. More about each:
linear. Try min, then min + 1, upward, asking ask_if_equal each time.
binary. Ask ask_if_greater about the midpoint and throw away the half that cannot contain the number. Narrow until one number is left, and do not spend a question confirming it.
jump. Step forward STRIDE at a time with ask_if_greater until the number is behind you, then go back to the stretch you jumped over and check the numbers in it one at a time with ask_if_equal, working upward from the bottom of that stretch. STRIDE comes set at 1, which works and is the worst possible choice. Pick something better and be ready to explain why.
lucky. Binary search, but before narrowing, spend one question asking outright whether the midpoint is the number. Sometimes that wins the game on the spot. Whether it is a good trade overall is a checkpoint 3 question, so do not decide yet.
What if you run out of numbers? Every strategy assumes the answers it gets are honest, and if they are, linear and jump will always find the right answer before the end of their loops. The compiler can't know that, though, so needs to be told what to do if the loops finish without encountering a yes answer, and what it does has to be compatible with the function's return type. You have a couple valid options here - how you handle it matters less than that you handle it so the code compiles.
The tests ask two things. Eight tests check that a strategy finds the secret number. The other four count how many questions it spent doing it to make sure you're writing the right strategy for each. For example, if binary passes binary_finds_every_number and fails binary_costs_log_of_the_range, it is finding the number, just not guessing the numbers in the correct order for the binary strategy.
Checklist
-
linearworks.cargo test --bin game cp2::linear -
binaryworks.cargo test --bin game cp2::binary -
jumpworks, andSTRIDEis something better than 1.cargo test --bin game cp2::jump -
luckyworks.cargo test --bin game cp2::lucky -
cargo test --bin game cp2is entirely green, twelve tests - Commit, push, and submit your repo on Gradescope
Hints and tips
Here is an example run of binary finding the number 73 on the range [0, 100):
Q1: is it greater than 49? -> YES
Q2: is it greater than 74? -> no
Q3: is it greater than 62? -> YES
Q4: is it greater than 68? -> YES
Q5: is it greater than 71? -> YES
Q6: is it greater than 73? -> no
Q7: is it greater than 72? -> YES
returns 73, after 7 questions
Notice that it never asks whether the number is 73.
Here is jump on the same number, with STRIDE set to 10:
Q1: is it greater than 0?  -> YES     jump forward to 10
Q2: is it greater than 10? -> YES     jump forward to 20
Q3: is it greater than 20? -> YES     jump forward to 30
...
Q9: is it greater than 80? -> no      stop: it is somewhere in 71..80
Q10: is it exactly 71? -> no
Q11: is it exactly 72? -> no
Q12: is it exactly 73? -> YES
returns 73, after 12 questions
More tips:
- Play against your own code to watch it run:
cargo run --bin game -- --strategy binary --min 0 --max 16. Sixteen numbers is small enough to follow every question and check the answers yourself - Remember that some of the final tests are not in this file, they're "secret". The final autograder runs your strategies on ranges you have not seen: bigger ones, smaller ones, and ones somewhere else on the number line. Make sure your functions don't just pass the tests, but are correct for any inputs we could give.
- Commit each strategy as you finish it. It will give you a checkpoint to come back to if you get lost, and it will help tell your development story when it comes time for code review.
- Read your compiler errors. Remember that even if you know your function is exhaustive and will hit a
returninside a loop, the compiler doesn't know that and you may need toreturnat the end of your functions even if that is never reached. The error you might encounter for this though is a bit obscure - it will look likemismatched types: expected u32, found ()or similar (you'll understand more about why it looks like that later!)
Checkpoint 3: measuring, and one more strategy
You have four strategies that work, now you'll find out which one is the best (if you haven't already guessed).
In this checkpoint you will write the thing that runs thousands of games and reports what happened, and then one last strategy that beats binary search by noticing something about the game the other four have so far ignored.
What the other four ignore. The dealer never uses the same secret twice until it has used them all (have you noticed?). So by the 50th game of 100, half the numbers cannot possibly be the answer, and that gives you an advantage. Binary searches all 100 anyway, but you can do better. We won't guide you to the optimal strategy (though you should think about it!) but we'll make a clever little improvement with this information to create a strategy called... clever (clever name, huh?).
To use clever you need to be able to ask two things about a range of numbers: how many
numbers in it could still be the secret, and which is the first one that could. These are both calculations based on the historical games you've seen so don't "cost a question". So you'll write those two helpers first and then clever on top of them.
What you are writing
Six things, in three files.
1. measure and is_better_than, in src/measure.rs. Play rounds games of one strategy and report the best, the mean, the worst and the standard deviation across them. match on approach to decide which strategy plays. Read the doc comment above the function before you start: it says where the games come from. Decide what to return when rounds is 0, and be ready to explain why.
Underneath it, is_better_than compares two of those reports and says which strategy you would rather use. The signature is written for you, so you only write the body, and you decide what better means: a lower mean, a better worst case, some combination, etc. Many rules will pass as long as they're reasonable, and you'll just have to defend your decision if asked at code review.
2. possible_count and first_possible, in src/strategies.rs. The two questions described above, as functions. One counts how many numbers in a range could still be the secret; the other finds the first of them.
first_possible returns an Option<u32> rather than a plain u32, because there is a case where it has no answer to give, and a function forced to return something ends up returning a number it does not mean. Work out when that case happens, and what you want the None arm to do about it.
3. clever, in src/strategies.rs.
We're not going to rework the whole algorithm, just the end. Binary keeps going until one number is left between min and max. You can stop as soon as one possible number is left, because at that point there is nothing else it could be. You'll need to change two things from the code for binary and can use first_possible and possible_count to get there.
4. Refactor jump. Look at the second half of the jump you wrote for checkpoint 2. It walks the numbers it skipped, one at a time, asking ask_if_equal about each. That is basically your linear strategy! So just make jump call linear instead.
One thing does have to change under the hood. linear counts upward, so the walk has to run upward too: from the bottom of the stretch you jumped over, not backward from the number you overshot. But nothing in the statistics or tests changes when you do this (do you know why?). Your Checkpoint 2 tests should still pass after this!
5. Fix your midpoint, in src/strategies.rs. binary and lucky both work out a midpoint. If you wrote yours as (lo + hi) / 2 in CP2 it passed then but now fails the new test binary_survives_the_top_of_u32. Figure out what the issue is and find a way to reach the same midpoint without computing (lo + hi) to pass the test.
6. The writeup, in the README of your repo. Copy over the questions at the end of this page into your README and answer them. They ask you to explain your own numbers, so you cannot answer them until your code runs and plot.png exists. This counts towards the first part of your code review grade.
Checklist
-
measurereports all four numbers.cargo test --bin game cp3::measure -
is_better_thanpicks a winner.cargo test --bin game cp3::is_better_than -
possible_countandfirst_possiblework.cargo test --bin game cp3::possibleandcp3::first_possible -
cleverworks and beats binary over a sweep.cargo test --bin game cp3::clever -
jumpcallslinear.cargo test --bin game cp3::jump_calls_linear -
binarysurvives a range at the top ofu32, and you fixedluckythe same way.cargo test --bin game cp3::binary_survives -
cargo run --bin plotproducesplot.png, and you have committed it -
cargo test --bin gameis entirely green - The writeup is answered in your README
- Commit, push, and submit your repo on Gradescope
Hints and tips
- Read the
cp3tests before you start writing. They make it clear how long each strategy is supposed to take measureneeds the mean before it can work out the standard deviation, and you cannot replay the games for a second look, because the dealer has moved on. Keep running totals instead: the counts, and their squares. Variance is the mean of the squares minus the square of the mean.- If
cleverreturns the wrong number, the bug is probably in what you return at the end rather than in when you stop - Run
cargo run --bin plotearly, even with strategies half finished to get a feel for what's happening
The writeup
Your writeup goes in the README of your repo, under the headings that are already there. Leave the rest of that file alone.
You can write 2-3 sentences per question unless it says otherwise.
Reading the plot
Look at plot.png. The X axis is max, the range the strategy had to search. The Y axis is how many questions it needed.
1. Which strategy is best according to plot.png? Refer to the curve and define what you mean by "best". Then look at the ranking printed under the table, which is your own is_better_than putting the same strategies in order: what rule did you give it, and does the order it produced agree with what you just said about the plot? If they disagree, which one do you believe, and why?
2. Look at linear. If max = 110, how many questions will it ask? What about max = 120? Now write it as a function of n.
3. Look at binary. Many values of max give the same number of questions, and then it steps up. Where do the steps happen? Counting max = 1, there are seven of them on this plot. Is there a pattern? Predict where the next one is, then write binary's cost as a function of n. Hint: it has something to do with powers of 2.
4. Jump search sits between the other two. Its curve is neither flat like binary's nor straight like linear's. What shape is it, and why? What stride did you pick, and what happened when you tried a different one?
Reading the table
5. The lucky strategy can find the number in one question where binary needs six, and yet lucky's mean is much higher. Explain why the extra question costs more than it gains, in terms of what each of the two questions tells you when the answer is no.
6. Now look at the best column of your table. Linear, lucky, and random can all find the number in a single question if they get lucky. Binary never can (but it beats the rest four on average anyway). Jump can't get it in one step either. Explain why.
Going further
7. Suppose we gave you a third question, ask_if_even, costing one question like the others. Could you use it to beat binary search? Say why or why not.
8. plot.png does not have a curve for clever. Why do you think it was excluded, and if we did include it, what do you think it would show? Hint: Take a look at the plot.rs code and investigate the role of the dealer and history there.
Process
9. What's something you tried that failed at first on this project, and how did you adapt?
10. Before checkpoint 2 we changed the base repo underneath you and you had to merge it. How did you decide what to keep when the changes conflicted, and how did you check that you were right?
Your AI citation. Who and what you used, and how. Course policy is in the syllabus.
Discussion Sections
Discussion sections meet for 50 minutes each week. A sections (A2, A3, A4) meet Wednesday afternoons. B sections (B2, B3, B4) meet Tuesdays. (B3 and B4 meet with extended time on code review weeks.)
Discussions are used four ways:
- Content review and practice, reinforcing the week's lecture material
- Project code reviews in the week after each project deadline
- Proctored exam corrections about two weeks after each midterm
- Standalone practice sessions during the two weeks when only one set of sections meets
Posted so far
The rest appear here as they are released, alongside any materials that go with them.
Discussion 1: Setup
Tue Sep 8 (B sections) / Wed Sep 9 (A sections)
By the end of today you should have five things working and talking to each other:
- A terminal to run commands in
- A GitHub account, so you have somewhere to submit work
- VS Code with rust-analyzer, for editing and debugging
- Git, so you can track your work
- Rust, so you can compile and run a program
You should go step-by-step. On Macs the first step starts a download that blocks steps 4+5, but you can work on 2+3 in the meantime.
1. Terminal
The terminal is where you type commands instead of clicking. Everything else today gets installed and checked from here. This step is different depending on your machine, so find your part below.
On Mac
The Terminal app comes built-in on Mac. Press Cmd+Space, type Terminal, and press Enter. You can also find it in Applications, then Utilities.
Check it works by typing this and pressing Enter:
pwd
It prints the folder you are currently in. If you get a path back, you have a working terminal.
Now start installing Homebrew, which is a helpful utility for installing other applications (that you'll probably find yourself using a lot in the future). Run this line:
/bin/bash -c "$(curl -fsSL https://raw.githubusercontent.com/Homebrew/install/HEAD/install.sh)"
Three things to know before you start it:
- It asks for your Mac password in the first minute so keep an eye on it. Nothing appears on screen as you type the password, which is normal
- It may install Apple's command line developer tools if you don't have them yet.
- When it finishes it prints a "Next steps" list with some commands in it. Go ahead and run them! These put
brewon your PATH so that your shell can find it in the future.
Check it worked:
brew --version
While it's downloading, you can continue to the next step. Just press Cmd+N to start a second Terminal window (and now you know you can have more than one at a time!)
On Windows
Before you install anything, you will need to know if your machine uses x64 or ARM. If you're not sure, you can look in Settings > About > Device Info where you should see "System Type" indicates x64 or ARM.
Install Git for Windows from git-scm.com/download/win, taking the default options. That gives you a program called Git Bash, which is the terminal we will use all semester. It behaves the way Mac and Linux terminals do, so the commands in class will work on your machine. It also installs git, which is step 4, so you get both at once.
Use Git Bash, not PowerShell or Command Prompt, whenever these instructions say "terminal", even if you have the others installed.
Check it works by typing this and pressing Enter:
pwd
It prints the folder you are currently in. If you get a path back, you have a working terminal (and as a bonus, with Git Bash you already have git).
2. GitHub account
Create an account if you do not have one, at https://github.com.
You can use either your personal email address or your BU one. You will want to keep this account after you graduate. You may also want to use a professional-sounding name, not a silly one, since this can become a public presence and part of your resume / professional portfolio. But you're all adults, and we don't care ourselves if you name it after a pokemon.
You will fork your first repository in Lecture 4 on Friday, and Project 1 is submitted by pasting the URL of your fork into Gradescope. So the account has to exist and you have to be able to log in.
Turn on two-factor authentication while you are here. If you don't do it now you'll be forced to when you're in the middle of something later and you will be annoyed.
3. VS Code
VS Code is a free code editor. Install it from code.visualstudio.com, taking the default options. If you are passionate about a different IDE already feel free to use it.
Install the rust-analyzer extension
This is what makes VS Code understand Rust, so it can color the text and detect possible errors before the code compiles or runs.
- Open VS Code
- Open the Extensions panel: the icon of four squares in the left-hand bar, or Ctrl+Shift+X (Cmd+Shift+X on Mac)
- Search for rust-analyzer
- Install the one published by The Rust Programming Language, not a lookalike
Turn on autosave
VS Code does not save your file when you click over to the terminal. Git only ever sees what is saved, so an unsaved file is invisible to it. Without autosave, you might make a change to a file, try to commit it, and get confused by the responses that there's nothing to commit. So let's do this:
- Open the File menu
- Click Auto Save
A check appears beside it once it is on, and from then on VS Code saves your changes about a second after you stop typing.
Turn on the code command: Mac only
This lets you type code . in a terminal to open the folder you are standing in. You will use it all semester. (The VS Code installer already set this up for Windows users.)
From VS Code:
- Press Cmd+Shift+P to open the Command Palette
- Type
shell command - Click Shell Command: Install 'code' command in PATH
- Give it your Mac password if it asks
To test, close your terminal, open a new one, and run:
code --version
Make VS Code's terminal Git Bash: Windows only
VS Code has a terminal built into it, and on Windows it opens PowerShell, not Git Bash, by default. We want it to use Git Bash instead. (The default for Mac users is already what we want.)
From VS Code:
- Press Ctrl+Shift+P to open the Command Palette
- Type
default profile - Run Terminal: Select Default Profile
- Choose Git Bash
If a terminal was already open, close it with the trash can icon and open a new one. The change only affects terminals opened afterwards.
4. Git
You now almost certainly have git already. Windows users installed it in step 1 along with Git Bash. Mac users got it from the developer tools that Homebrew installed. So this step is mostly configuration.
Check:
git --version
If this prompts you to install the Xcode command line tools, say yes and let it finish. That means Homebrew has not got there yet, so give it a minute.
Then tell git who you are. This gets attached to every commit you make, so use your real name and the email address you use for your GitHub account:
git config --global user.name "Your Full Name"
git config --global user.email "your.email@example.com"
git config --global init.defaultBranch main
Check it was saved:
git config --global user.name
5. Rust
Install Rust from: https://www.rust-lang.org/tools/install
For this you will have to use the terminal. Once you enter the command that the website provides, choose the default option.
On Windows only, the site will point you to also install Visual Studio and C++ development packages inside it. You'll want to select the option called "Desktop development with C++".
When you run the installer, your computer might "protect" you by preventing the installer from running.
- On Windows, you can get around this by clicking on "more info" and then "run anyway".
- On Mac, you can try right-click (or Control-click) to see "Open", or after you tried to open the installer and couldn't, go to Settings > "Privacy & Security" and you might see a note there that the installer was blocked and there's a button there to click called "Open Anyway".
The installer might take some time, especially on Windows to install the C++ dependencies. In the meantime, you can get started with Step 6.
Check that it worked
Run this in your terminal (Terminal on Mac, Git Bash on Windows):
cargo --version
You should see a version number, 1.97.0 or later.
Now we'll build and run something. Navigate to a folder of your choosing, say your desktop (cd ~/Desktop or similar) before continuing. (Especially for Windows users, as the default starting location in Git Bash is not where you want to save things.)
# cd into where you want to build your project
cargo new hello_world
cd hello_world
cargo run
If it worked, you will see:
Hello, world!
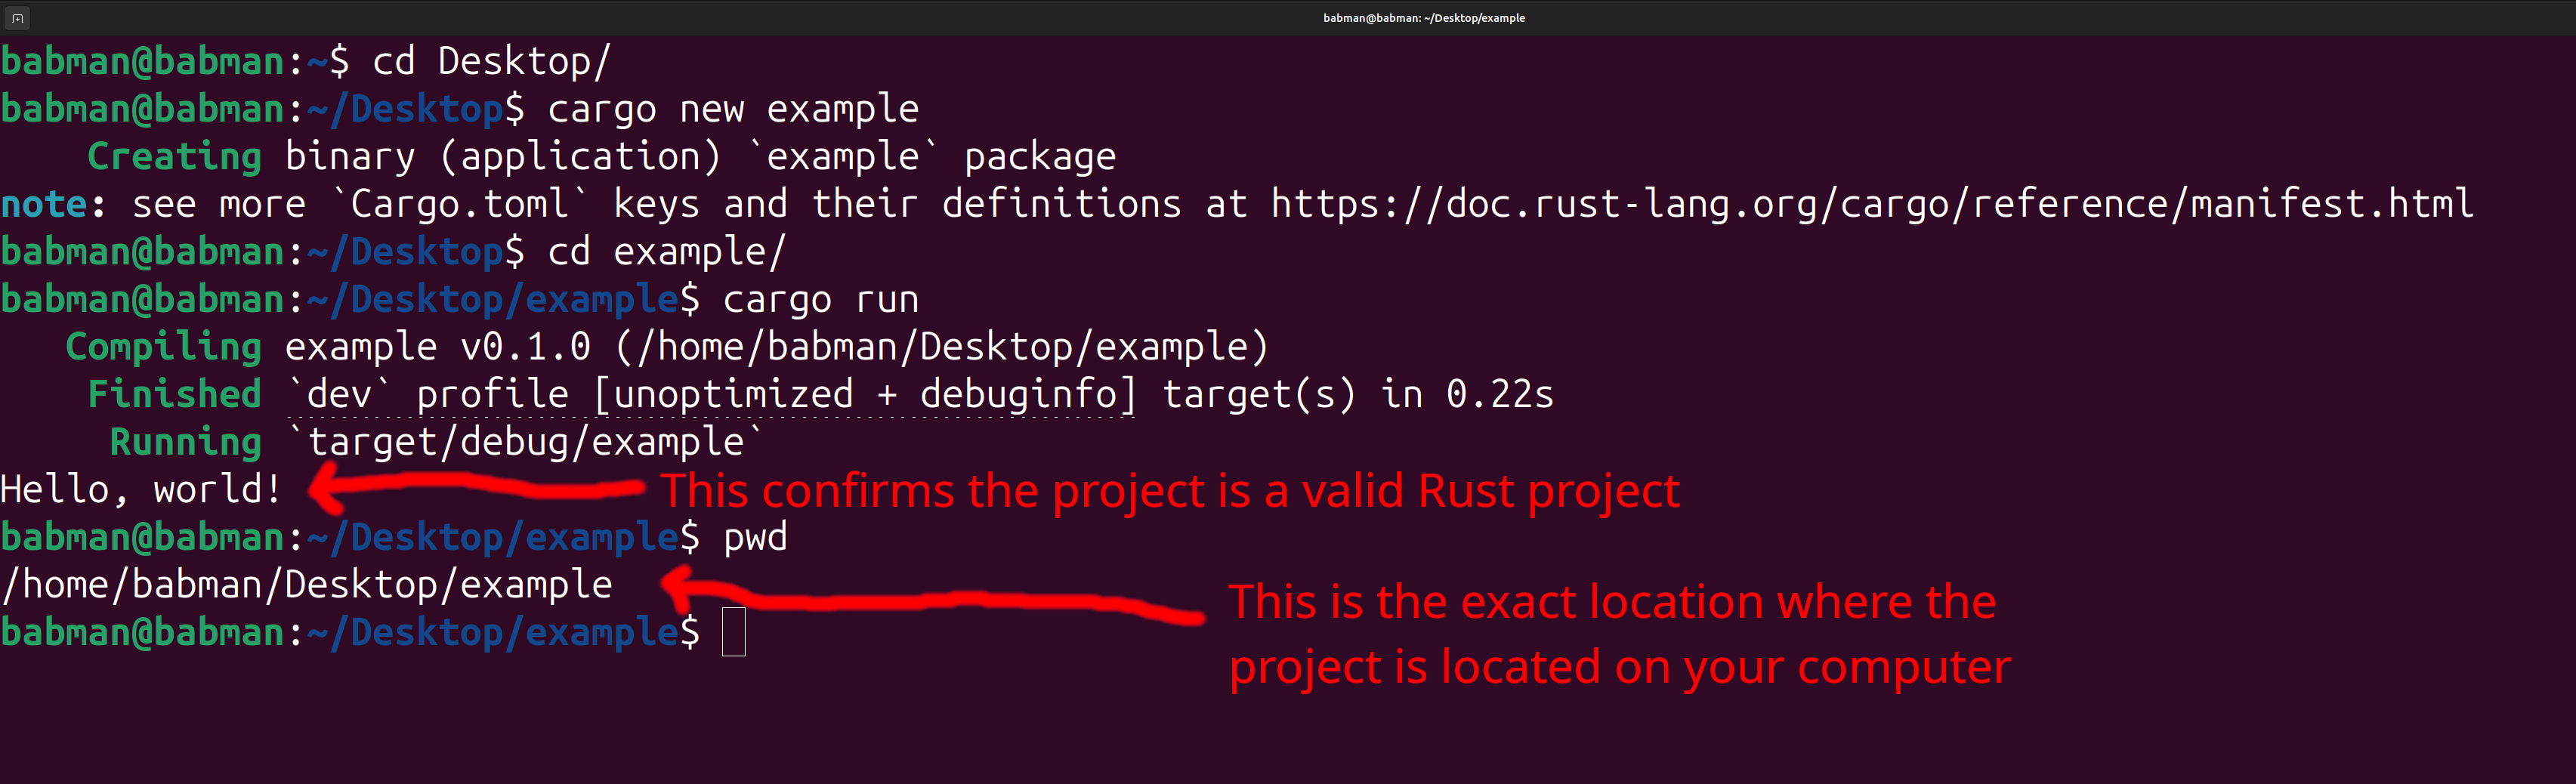
Troubleshooting common issues on Windows
"cargo: command not found" or "not recognized"
Rust installed, but your shell does not know where to look. Add %USERPROFILE%\.cargo\bin to your PATH environment variable.
For help editing your PATH, see youtube.com/watch?v=gb9e3m98avk for an example showing how to edit your PATH to add a python directory - don't copy the python path exactly, but add %USERPROFILE%\.cargo\bin instead.
It compiles nothing, and mentions link.exe
You are missing the C++ build tools, which include the linker Rust needs. Install the Windows SDK and the MSVC C++ Build Tools from https://visualstudio.microsoft.com/downloads/, choosing the latest version compatible with your machine.
This one is a large download and will not finish in this session. Talk to a TA, start the download, and you are covered for today's attendance.
Rust seems installed but fails when it runs
You may be missing Microsoft's Visual C++ redistributable package. Install it from https://learn.microsoft.com/en-us/cpp/windows/latest-supported-vc-redist?view=msvc-170.
6. Connect your computer to GitHub
Install the GitHub CLI
This is the way we recommend, and it is what GitHub's own documentation recommends.
On Mac once Homebrew is done installing:
brew install gh
On Windows, it does not come with Git Bash, so install it. If you have winget, which ships with Windows 10 and 11, this is the fast way:
winget install --id GitHub.cli
Otherwise download it from cli.github.com and take the default options.
Either way, close Git Bash and open it again afterwards. A terminal that was already open will not know the new command exists.
Then, on either machine:
gh auth login
Answer the prompts:
- GitHub.com, not an enterprise server
- HTTPS as the protocol
- Yes when it asks whether to authenticate Git with your GitHub credentials. This is the step that matters, so do not skip it
- Login with a web browser, then copy the one-time code it shows you and paste it into the browser window that opens
Check it worked:
gh auth status
You should see that you are logged in to github.com as your username.
If you would rather not install the CLI
Git Credential Manager also works and needs no setup on Windows, where it is installed along with Git Bash. The first time you push, a browser window opens, you log in once, and it remembers you after that. On Mac you can install it with Homebrew if you have it: brew install --cask git-credential-manager.
SSH keys are a last resort. They work, and you may see them recommended in older tutorials, but they are more setup and more to go wrong. Only use them if both options above have failed you, which should not happen. GitHub's guide is here if you need it, and please tell a TA if you end up going this route.
7. Putting it all together
Everything above was installed separately. This is the check that the pieces talk to each other, and it is what you show your TA before you leave.
Open your toy project in VS Code
Use File, then Open Folder. Do not use Open File, since Rust tooling needs the whole project folder, not one file. (These screenshots are taken on a Mac, and things might be a bit different for Windows users.)
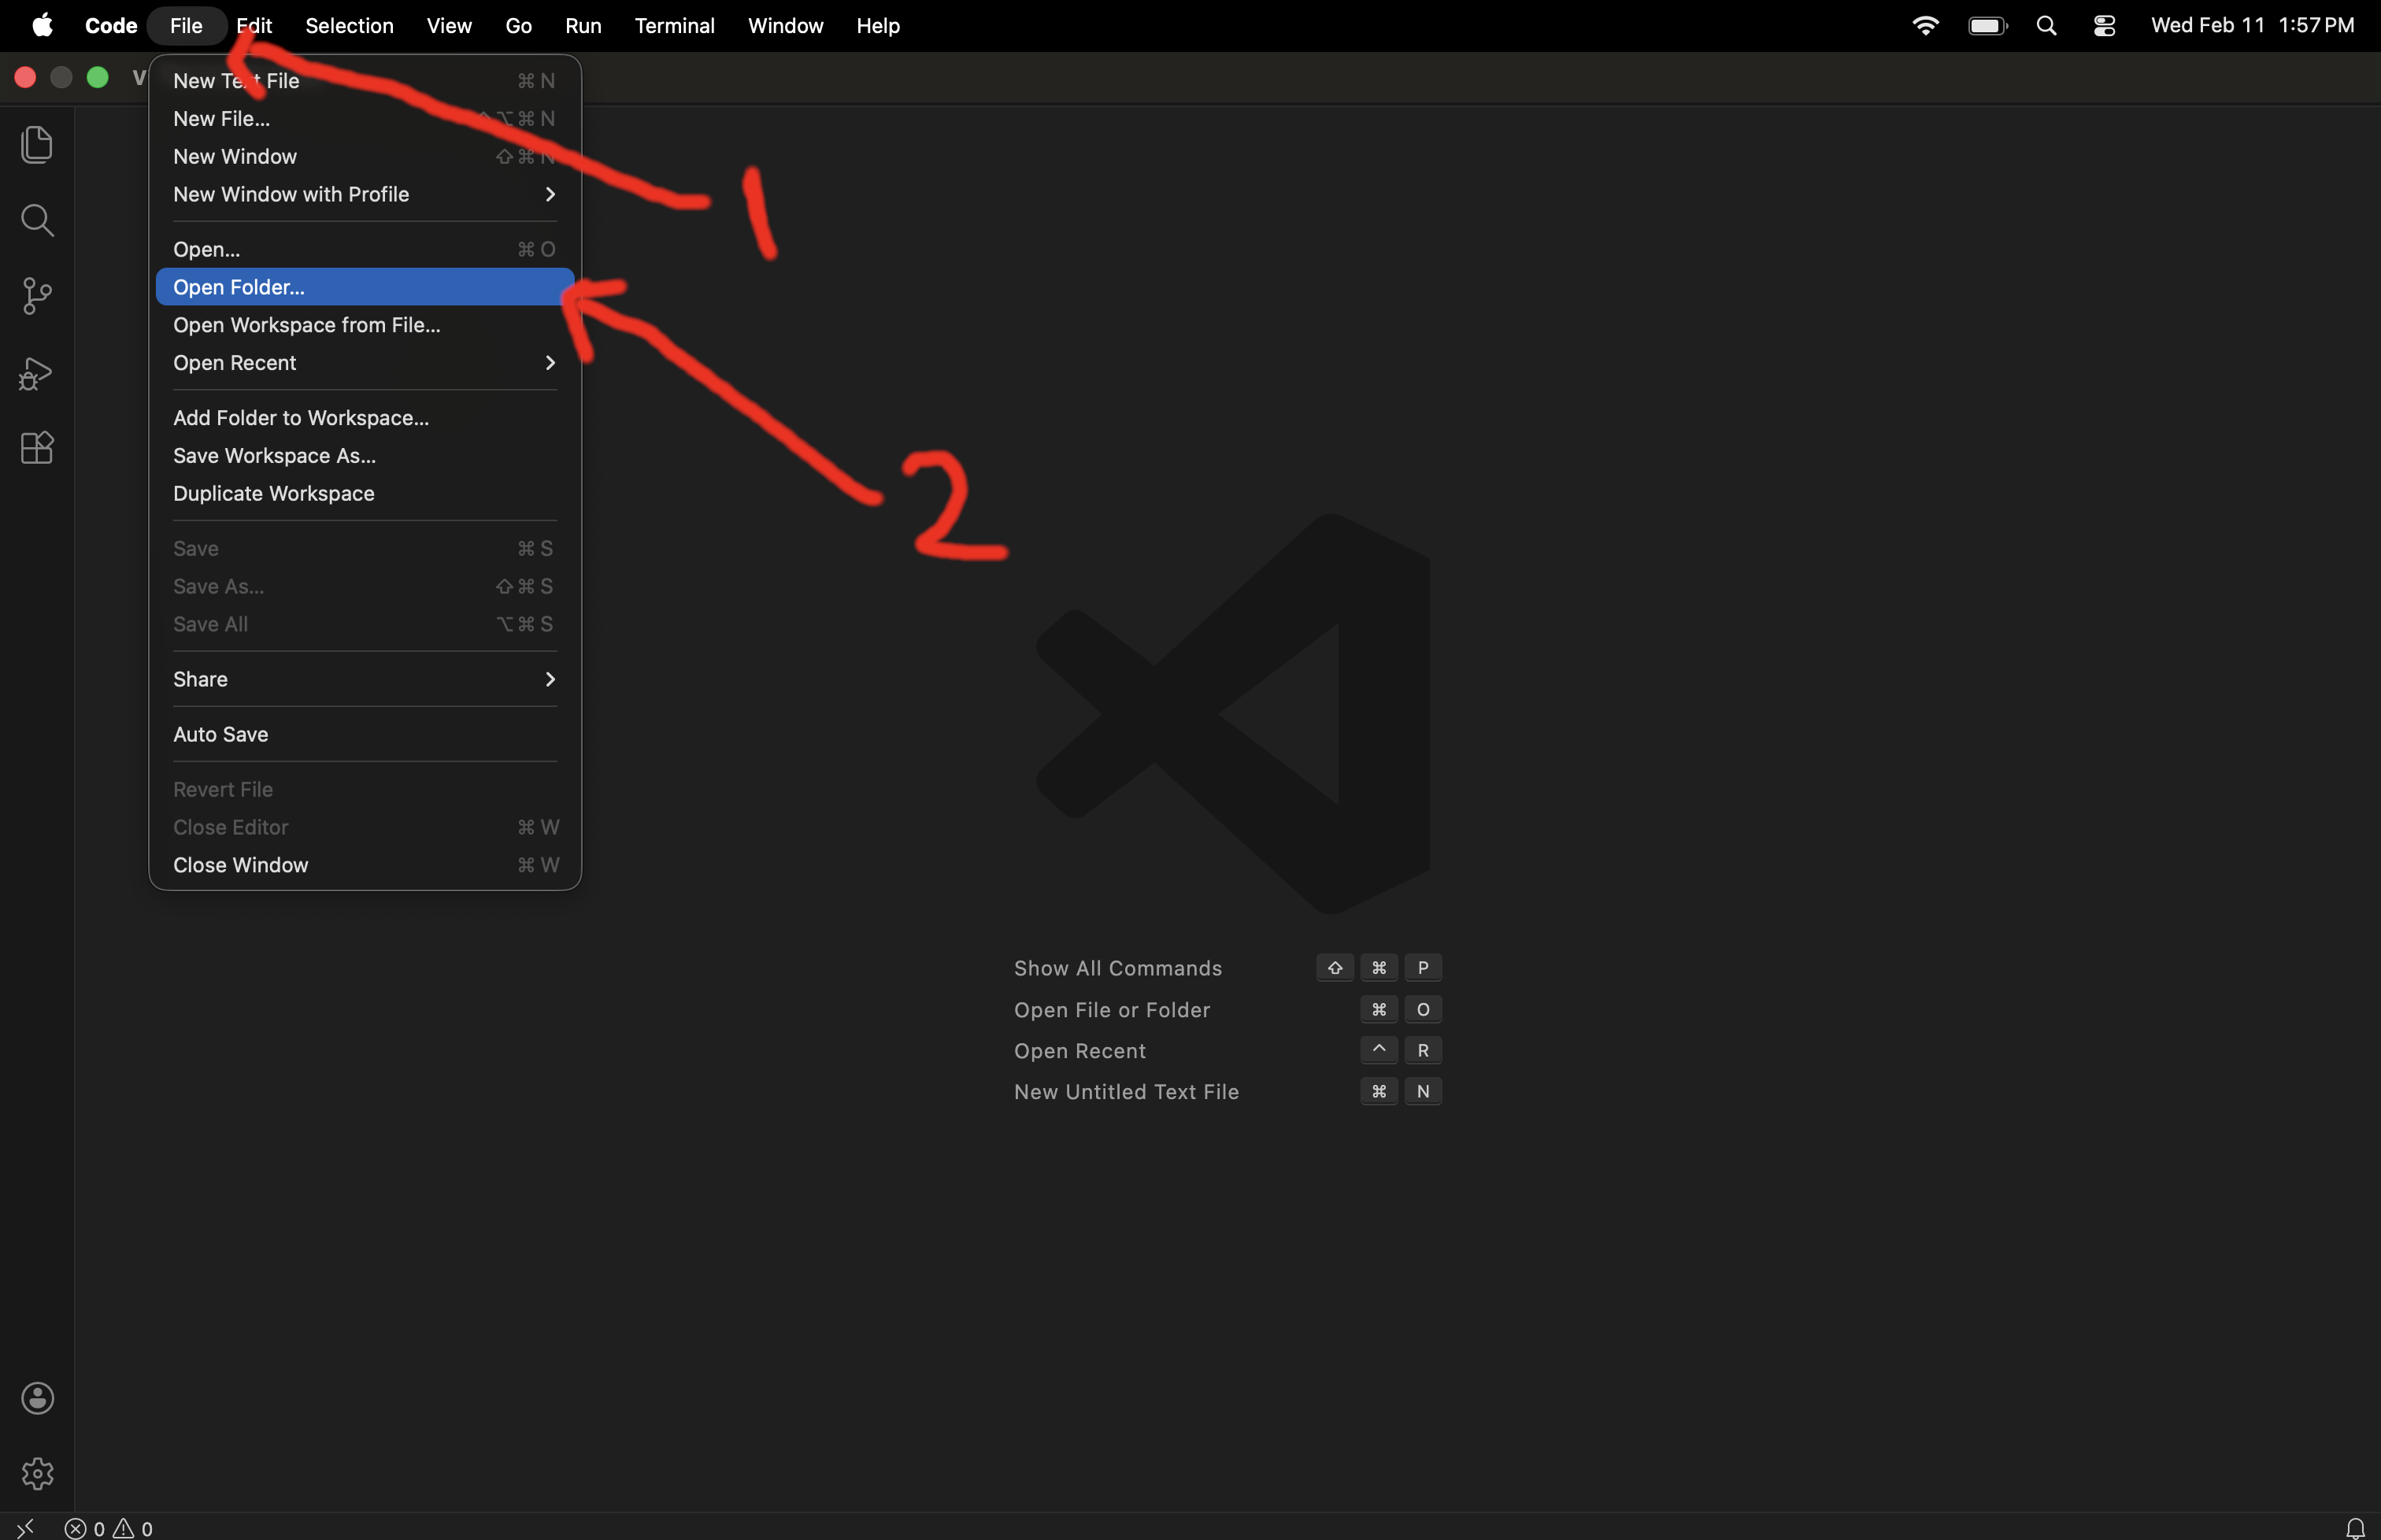
Choose the hello_world folder you made in step 5, and press Open.
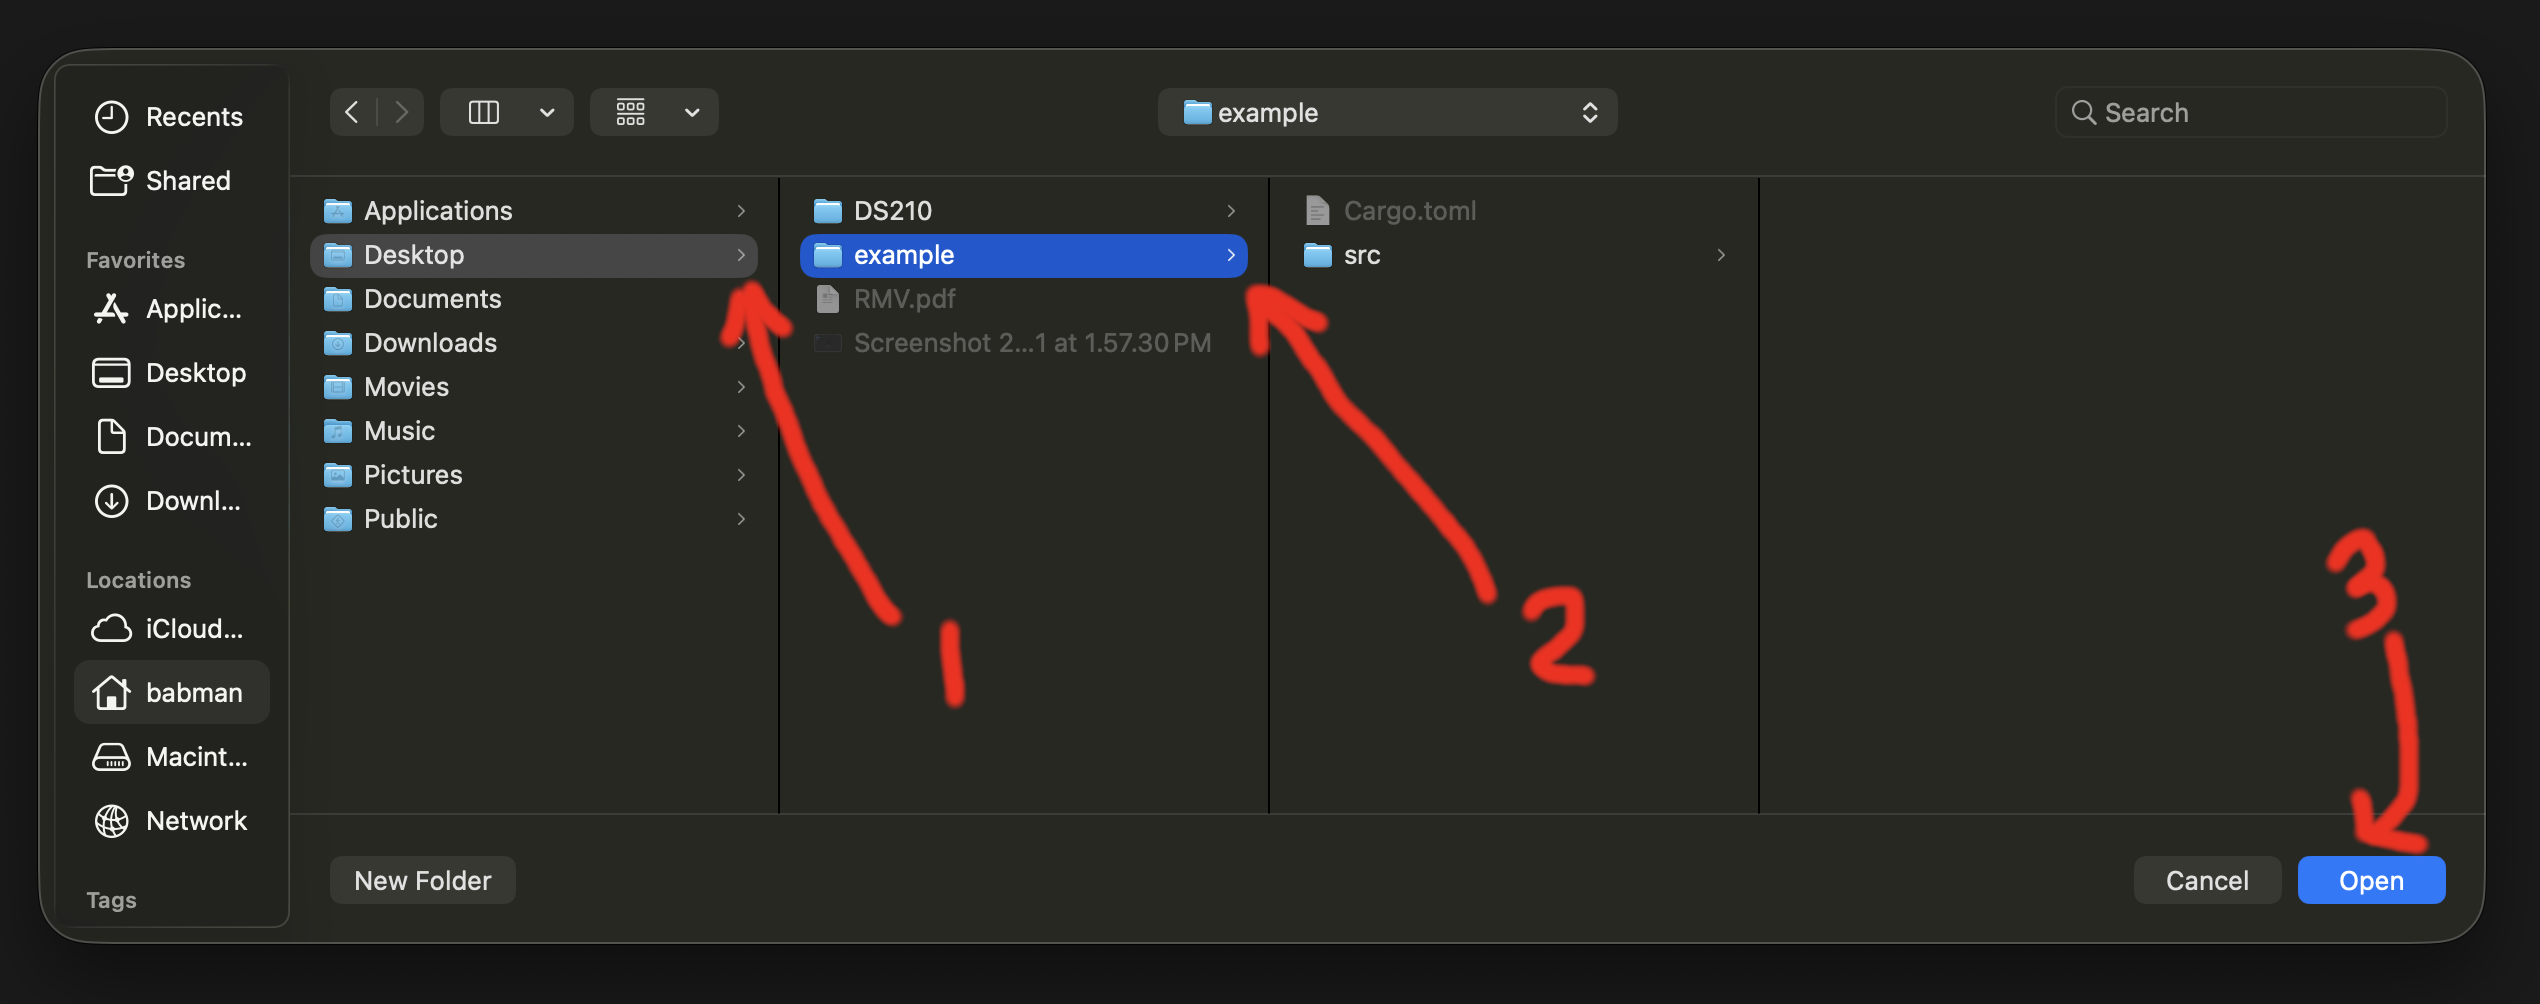
You should now see the project in the sidebar. Open src, then main.rs.
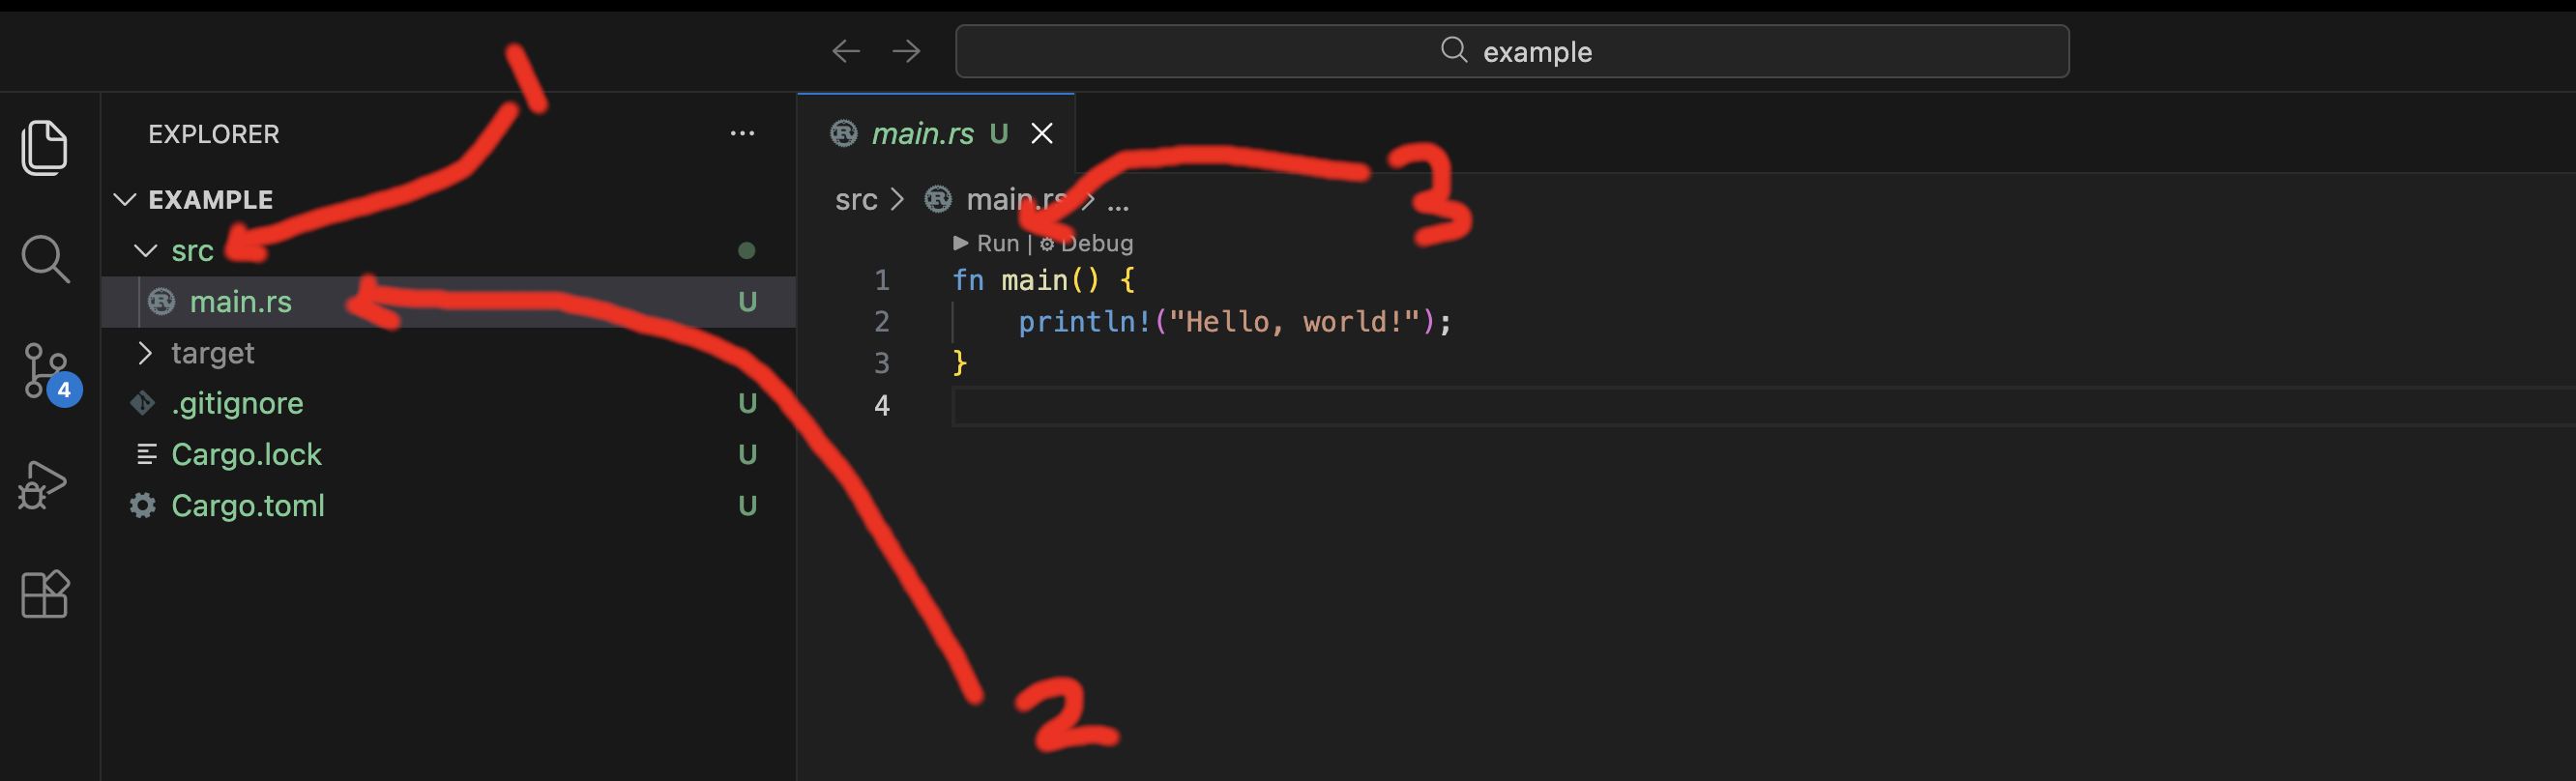
Check Rust and rust-analyzer
Replace the contents of main.rs with this:
fn main() {
    let x = 10;
    let y = 15;
    let sum = 10 + 15;
    println!("{x} + {y} = {sum}");
}
Two things should happen, and both mean rust-analyzer is running:
- Greyed-out type labels appear next to your variables, showing
: i32, even though you did not type them - A small Run | Debug line appears just above
fn main(). Click Run, and the output shows up in a panel at the bottom
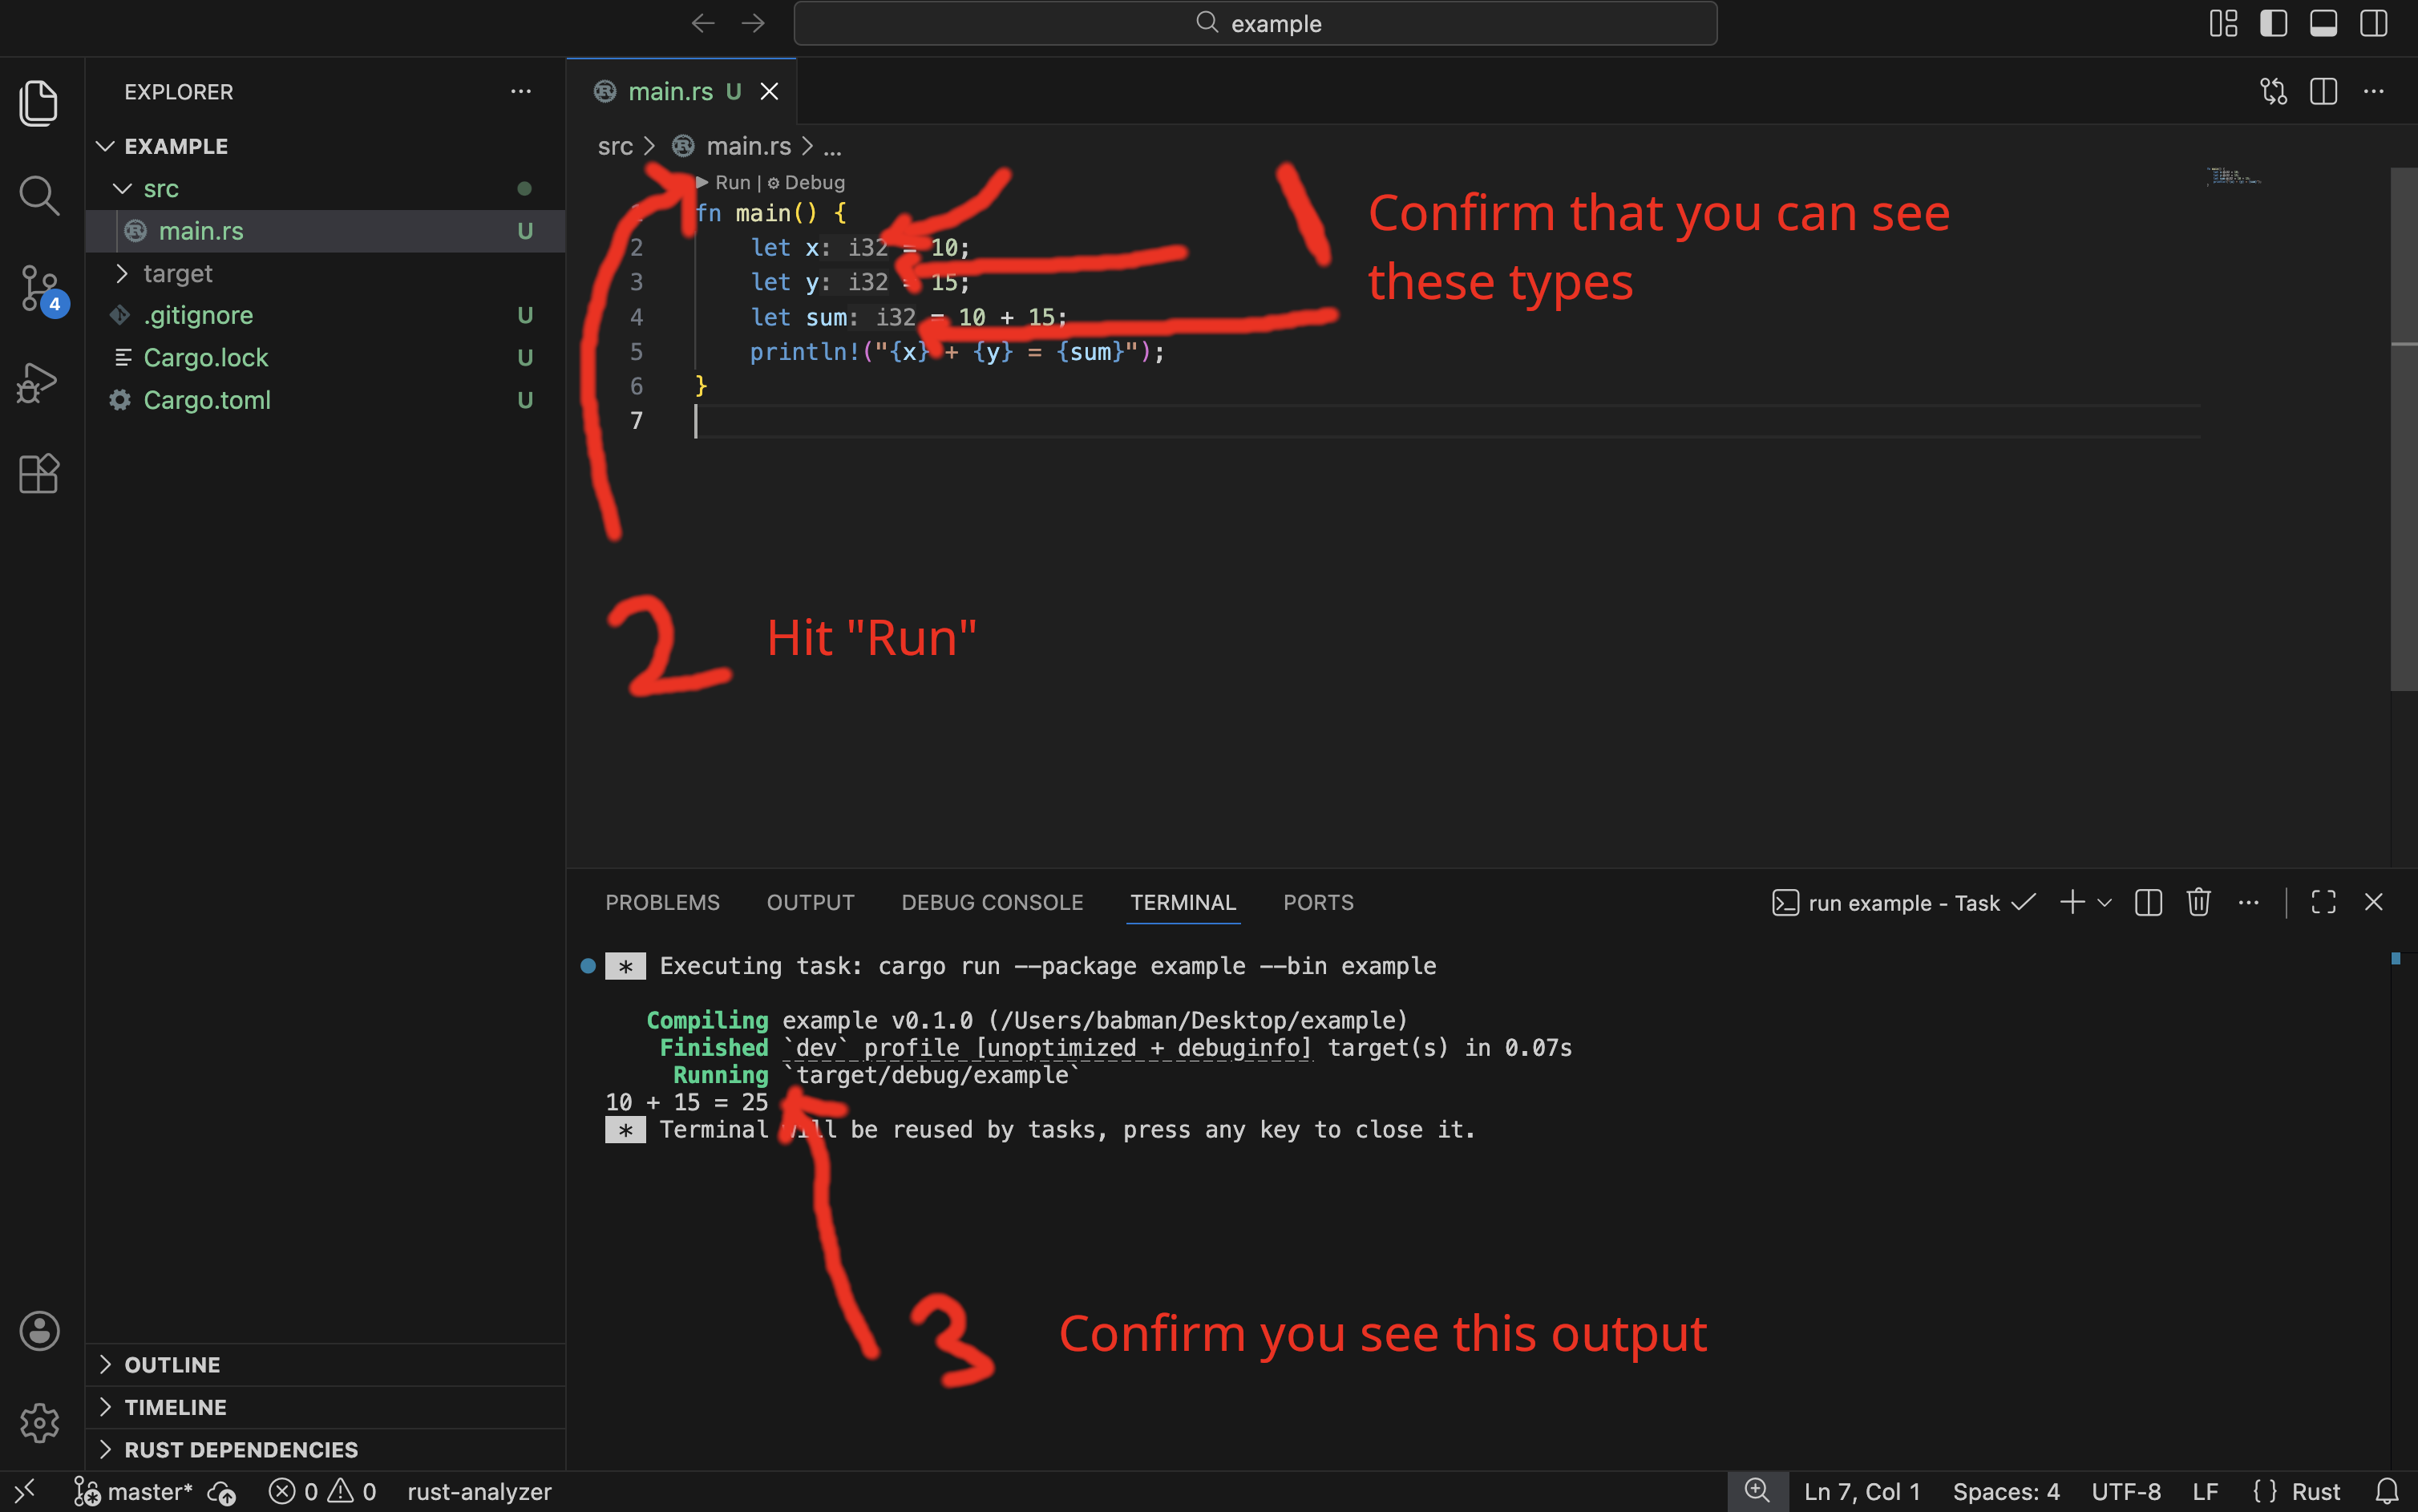
If you see 10 + 15 = 25 at the bottom, Rust and rust-analyzer are both working.
If rust-analyzer isn't working yet you may need to add the folder as a trusted workspace. Try hovering over rust-analyzer in the bottom of VS Code and click "reload workspace" which will prompt you to add the project as a trusted workspace. You may need to reload workspace a second time after that to get code highlighting and the run button to appear.
Check git, without leaving VS Code
VS Code has a terminal built into it, and it opens already sitting in your project folder. Press Control and the backtick key together (top left of the keyboard, under Escape) to show it. This is Control on Windows and on Mac, not Command.
On Windows this should say Git Bash, because you set that in step 3. If it says PowerShell, go back and set the default profile.
Then run:
git status
You should see On branch main, No commits yet, and a short list of untracked files.
That branch exists because cargo new quietly turned this folder into a git repository when you created it. You did not ask it to. What that means is Friday's lecture.
Show your TA
Three things, all on one screen:
- The greyed-out
: i32type hints 10 + 15 = 25in the output- Your
git statusoutput in the built-in terminal
They'll mark your work as complete for the day.
If you weren't able to finish, that is fine and it is why we are here. Talk to your TA about what is going wrong and make a plan for finishing by Friday. You get the credit for showing up and having the conversation, not for a perfect machine.
8. If you finish early
Make the terminal your own
Your shell reads a configuration file every time it starts, and anything you put there is waiting for you in every future session. Aliases let you make short names for things you type constantly.
alias ll='ls -la'
alias ..='cd ..'
The appendix to Lecture 2 walks through this, including which file to edit on your platform.
Discussion 2: Git Skill Practice
Tue Sep 15 (B sections) / Wed Sep 16 (A sections)
Today you and a partner collaborate on a single repo. You will create branches, merge them two different ways, collide with each other on purpose, and come to a resolution.
You have done all the individual pieces already in class: fork, clone, commit, push. This time you'll see what happens when multiple people are trying to do this at the same time.
Work in pairs if you can. If your section has an odd number, talk to your TA to make a plan.
Part 1: One repository, two people
Decide which of you will be "Person A" and which will be "Person B" for the rest of this exercise. Then follow these steps:
-
A goes to https://github.com/rust4ds/ds210-git-practice and clicks Use this template, then Create a new repository. Name it whatever you like and make it public.
-
A opens the new repo's Settings, then Collaborators, then Add people, and adds B by their GitHub username.
-
B accepts the invitation (it arrives by email and/or by notification on github.com depending on your settings).
-
Both of you clone the repo. It is A's repo, so you both use A's URL:
git clone <A's repo URL>
cd <the folder it made>
cargo run
You should both see the same crew with nobody on it.
-
Both of you run these two lines in your terminal. You'll never have to do these again:
git config --global pull.rebase false
git config --global core.editor nano
The first tells git pull to combine work by merging, which is what we have taught you. Without it, you'll have issues with git pull.
The second means that when git needs you to write something, you get nano, which you have used, instead of vi, which you have not (and which is much harder to use).
Both of these options will also be helpful for you for Project 1.
Part 2: A branch you merge yourself
In this part, you'll create a new branch, edit it, and try to send your edits up to your shared repo. Whoever does it first will be fine, but whoever gets there second will have to face the fact that your versions have diverged.
Both of you, around the same time, create a new branch by running:
git checkout -b <your-name>-notes
Make a new file called <your-name>.md and write a sentence in it. Then you'll commit your change to your branch, switch back to main, merge your change into main, and push the updated main back up to GitHub:
git add <your-name>.md  # or git add .
git commit -m "Add <your name>'s notes"
git checkout main
git merge <your-name>-notes
git push
The second person who gets there will get an error on that last line. Read it. Git is telling you the other person got there first and you do not have their commit yet. Do what it says:
git pull
git push
Two things to expect from that pull. If it complains about "divergent branches", you skipped step 5 of Part 1: run it and pull again. And when it works, an editor opens with a commit message git has already written for you. You do not have to change it. Save and close, which
in nano is Ctrl+X and then Y and the merge finishes.
Check in with each other about what just happened. That pull merged your partner's work into yours and you didn't have to do much to fix the issue. Since you edited different files, git was smart enough to combine the edits without your involvement. Let's make it more interesting...
Part 3: A conflict on your own machine
Same idea, but this time you will edit the same line.
From main (run git status to make sure you're on the main branch still), without telling each other what you are typing, open src/main.rs and change MOTTO to a motto you like. Then:
git add .
git commit -m "Add our motto"
git push
One of you pushes fine. The other is rejected again, so pull like last time:
git pull
This time the pull does not go quietly. Git says CONFLICT (content): Merge conflict in src/main.rs and stops in the middle of the merge. Open the file:
<<<<<<< HEAD
const MOTTO: &str = "Measure twice, push once";
=======
const MOTTO: &str = "Ship it and see";
>>>>>>> 0cf7a8d
Above ======= is what you wrote. Below it is what arrived from GitHub. The letters and numbers at the end is the commit ID ("hash") it came from.
For fun, before you fix the conflict, go ahead and run
cargo run
It won't compile and the compiler says error: encountered diff marker and tells you where. Which is a helpful reminder that we still need to fix this!
You now need to "resolve" the conflict by picking which motto to keep (or creatively combine them), delete all three marker lines, and check your work again with cargo run to make sure it compiles.
Then finish the merge and push:
git add .
git commit -m "Merge mottos"
git push
Remember this moment - something like this is going to come up during Project 1!
Part 4: A branch that goes through a pull request
In Part 2 you merged one branch into another locally by running git merge branch-name from the branch you wanted to merge into. This time we'll see how merging works in GitHub, where you might want to ask your collaborators for feedback or permission before you merge into a critical or even production/operating version of your code.
Both of you:
git checkout main
git pull
git checkout -b <your-name>-crew
Make these two edits, and only these:
-
In
src/main.rs, changeCREW_NAMEto a crew/team name you like. -
In
src/main.rs, replace the(nobody has signed on yet)line with one for yourself like:#![allow(unused)] fn main() { println!(" - Your Name"); } -
In
README.md, fill in the crew name under## Crew nameand put yourself under## Members.
Then commit and push the branch itself to github:
git add .
git commit -m "Name the crew and sign on"
git push -u origin <your-name>-crew
git push -u origin branch-name sets up the link between your local branch and GitHub, and is only needed the first time you push after creating the branch. If you update your branch further all you'll need to do in the future to track it is run git push.
Now both of you go to GitHub, and you should both see a banner offering to open a pull request. (If you don't see the banner, you can create a Pull Request by going to the Pull Requests tab, then "New Pull Request" and setting "base" to main and "compare" to your own branch.)
In the right-hand sidebar, under Reviewers, request your partner by their GitHub name (since they're a collaborator, it should pop up quickly). Then submit your pull request.
Now review each other. Open your partner's pull request (you should have gotten an email as a reviewer, and can also find it in the pull requests tab), click Files changed, then Review changes. Leave a comment on a line, choose Approve, and submit.
Then merge only ONE of them. Decide together which pull request goes first and merge it with Merge pull request.
Part 5: The second pull request
Go and look at the one you did not merge, and refresh the page. GitHub now says "This branch has conflicts that must be resolved." You both changed the same lines, and git will refuse to pick a winner.
Whoever submitted the pull request that's still open now needs to fix it. Go back to your machine, and first merge in the other person's edits:
git checkout main
git pull
git checkout <your-name>-crew
git merge main
Note you had to go back to main and pull from there. git pull only updates the branch you are standing on.
Now, git will stop and list the files it could not merge. Open src/main.rs. You will again find markers like this:
<<<<<<< HEAD
const CREW_NAME: &str = "Team Segfault";
=======
const CREW_NAME: &str = "The Borrow Checkers";
>>>>>>> main
Above ======= is your version. Below it is what is already on main. Like before, you need to decide what the file should say in the end, and delete all the markers. There are two of these in src/main.rs and one in README.md.
When you're done, check with cargo run. When it prints both of you under one crew name, you can finish:
git add .
git commit -m "Resolve conflicts: keep both names, one crew"
git push
Refresh the pull request, and you'll see the conflict banner is gone. Now the other person can approve and merge it.
Part 6: Look at what you built
Both of you can try this now:
git checkout main
git pull
git log --graph --oneline
Find the merges and pull requests in the tree.
Talk about it with your partner:
- Both routes put a branch onto
main. What does the pull request give you thatgit mergeon your own machine does not? - Nobody reviewed the Part 2 merge. When would that be fine, and when would it not be?
- Realistically, how could you think about organizing your collaborations to prevent conflicts like the ones that arose today before they happen?
Submitting
Both partners submit, separately, on Gradescope (the assignment called Discussion 2 Activity). You will need to write:
- The URL of the repository you worked in. Both of you submit the same one.
- The output of
git log --graph --onelinefrommain. - One or two sentences: what your conflict was, and how you decided to resolve it.
More git practice
None of these are required, but can provide some additional opportunities to practice (though the best way to practice is just to do it for real!)
Browser, nothing to install
- Learn Git Branching is a visual sandbox for branching, merging, rebasing, and remotes. Start with the Introduction sequence, then Remote. It draws the commit graph as you type which helps you picture what's going on.
- Git Mastery is a level-based game covering staging, branches, stash, reset, and rebase. May feel a little fast at first and its ability to simulate real merging and collaboration is limited.
Desktop apps
- Oh My Git! teaches basic git as a card game, with the commit graph drawn live. Good if the command line is still the part slowing you down (and it gives extra gold stars if you go back and do it at the command line after).
- Git-It walks you through the basics against your real GitHub account. Worth doing for challenges 1 through 7. Stop after "Branches Aren't Just For Birds." Challenges 8 and 10 check your work against a server that has been down recently so that part cannot be completed.
Reading
- Pro Git is the free official book. Chapter 3 is branching, and it has an especially clear explanation of merging.
- GitHub Docs for pull requests, reviews, and everything from Part 3.
- Git Immersion is a guided command-line walkthrough. The examples are in Ruby but the git is the same.
Discussion 3: Rust practice
Tue Sep 22 (B sections) / Wed Sep 23 (A sections)
This discussion included review slides GimKit practice, and code debugging as a group. Those activities are not available online.
Discussion 4: Handcoding and mock code review
Discussion 4 on Sep 29-30 comes the week before the project 1 code review, and a week and a half before the first midterm. To prep for both, we will work through some hand-coding problems and then peer code-review each other's work.
Students should work in pairs, with each person in a pair working on a different problem before swapping for feedback and questions.
The problems are described first, below, and then the code review instructions are available after that for reference.
Problem 1: How much room is left
#![allow(unused)]
fn main() {
struct Backpack {
    weights: Vec<u32>,
    limit: u32,
}
}
weights holds the weight of each item in the backpack, in grams. limit is the most the backpack can carry.
Write two methods.
(a) room_left gives back how many grams of room are left. If the backpack is already at or over its limit, it gives back 0.
(b) try_add takes the weight of one new item and tries to put it in. If it fits, it goes in and the method gives back true. If it does not fit, the backpack is left alone and the method gives back false.
#![allow(unused)]
fn main() {
impl Backpack {

}
}
Worked examples for room_left:
weights | limit | room_left() |
|---|---|---|
[300, 450, 120] | 2000 | 1130 |
[900, 800, 700] | 2000 | 0 |
[] | 2000 | 2000 |
Worked examples for try_add, each call picking up where the last one left off, starting from weights = [300, 450, 120] and limit = 2000:
| call | gives back | room_left() afterwards |
|---|---|---|
try_add(500) | true | 630 |
try_add(700) | false | 630 |
try_add(630) | true | 0 |
try_add(1) | false | 0 |
Problem 2: How many halvings
Write a function halvings that takes a u32 and gives back how many times you can halve it before it reaches 1, using whole-number division. Write both a version with a loop and a version with recursion. Which do you prefer?
Worked examples:
n | halvings(n) | because |
|---|---|---|
| 1 | 0 | already there |
| 8 | 3 | 8, 4, 2, 1 |
| 10 | 3 | 10, 5, 2, 1 |
| 64 | 6 | |
| 1000 | 9 |
Discussion 4 Handcoding Guide
Overview
The actual code review for the project include a rubric that is split across several categories, such as "explain this to me" questions, "what if this were different" questions, Git questions, etc. Due to practical constraints, this mock code review only has 3:
- Explain this to me.
- What if this were different?
- Did you actually write this code?
You will grade each other in an identical manner to how we will grade you for the actual code review, with the following criterion:
| Points | Criterion |
|---|---|
| 3 | Correct, and explains why without prompting. Points at their own code. |
| 2 | Correct after one nudge, or right about what happens but not why. |
| 1 | Partly right. Needs a lot of guidance, or describes the code without explaining it. |
| 0 | Unable to supply any coherent answer. |
There will be two questions for each section, and answering the question correctly should account for the bulk of the grade, the follow-up mostly seperates a two from a three.
Note: This grading criterion only pertains to the first two sections here. The last one will also be graded out of three, but by evaluating how well the student did at climbing the question ladder (see below).
Explain this to me
This section pertains to reasoning through code and explaining your thought process behind writing it.
Problem 1: How much room is left?
Primary Question: What happens when an item fits exactly, such that no space is left over? What does this tell you about using < vs <=?
Secondary Questions:
- Checking the limit in
room_left()with>=vs>doesn't matter here, but why might you want one vs the other, philosophically? - Did try_add call
room_left(), or recompute the total from scratch? Both work, why did you do it the way you did?
Problem 2: How many halvings?
Primary Question: Which do you prefer and why? Do you expect one to be faster than the other, or similar?
Secondary Questions:
- What is your base case in your recursive implementation? What does the recursive call and subsequent stack look like?
- For the iterative case, did you first check if current <= 1? If not, why isn't it necessary to separate it out like in the recursive version?
What if this were different
This section pertains to evaluating hypothetical counterfactuals and explaining how they would have changed your code had they been true.
Problem 1: How much room is left?
Primary Question: How might the composition of our Backpack and its implementation been different if weights were represented as a fixed length array instead of a vector array?
Secondary Questions:
- If we wanted to implement some method
retrievetoBackpackwhich allows us to take out items from the top of the backpack, what abstract data structure shouldweightsbe? - If the first item we put in the bag is the maximum value storable in a
u32representation, what will happen when we add another item?
Problem 2: How many halvings?
Primary Question: Consider the answer you gave to the preference question posited in the first question. What problem might warrant the other option?
Secondary Questions:
- Whole number division in Rust naturally truncates the decimal value, meaning it always rounds down. Would the speed of your algorithm be affected if it instead rounded up?
- Instead of halving the value, assume that we instead quarter the value each time. How do the big O runtimes compare?
Did you actually write this code
This section ensures that you actually wrote your code, and that you can provide actual line-by-line explanations for how it works. In the actual code review, this section is represented slightly differently as a ladder of questions, so this section only contains one question with multiple segments. Allot one point per ladder rung climbed.
Problem 1: How much room is left?
Question Ladder: Point to the line in room_left that ensures you consider every item in the backpack, weight wise. Why did you choose to implement it this way? Are there alternative ways?
Problem 2: How many halvings?
Question Ladder: Point to the line in both of your solutions that ultimately keeps track of how many halvings it takes. What is different about how each is stored? Are each mutable or immutable? Explain.
Answer key
These are what a full-credit answer should touch on. Your partner does not need to use these exact words, but if they miss the core idea of the primary question, that's a 1 at most. The "why" parts are what separate a 2 from a 3.
Explain this to me
Problem 1: How much room is left?
Primary: When an item fits exactly, weight == room_left(), so the check has to be weight <= self.room_left(). For instance, with <, try_add(630) would wrongly return false even though the backpack can hold exactly 630 more grams.
Secondary:
>=vs>inroom_left: whentotal == limit, both branches give back 0 so the output is the same. The reason the check exists is so thatu32can't go negative: iftotal > limit,self.limit - totalwould underflow. Either>=or>protects against that.>=says "full or over means no room" explicitly, while>relies on the subtraction happening to give 0.- Calling
room_left()vs recomputing: calling it avoids duplicating the summing loop, so if the rule for "how much room is left" changes, it only changes in one place. Also reduces boiler plate code. Both are O(n) in the number of items.
Problem 2: How many halvings?
Primary: Either preference is fine if it's justified. Both do the same number of halvings, so both are O(log n) time. The loop uses O(1) extra space, while the recursion uses one stack frame per halving, so O(log n) space. For a u32 that's at most 32 frames, so in practice neither is noticeably faster. The recursive version reads closer to the definition ("one halving, plus however many the half needs").
Secondary:
- The base case is
n <= 1, which gives back 0. Forhalvings(10), the calls stack up ashalvings(10) → halvings(5) → halvings(2) → halvings(1), then unwind:halvings(1)gives 0,halvings(2)gives 1 + 0 = 1,halvings(5)gives 2,halvings(10)gives 3. - No separate check is needed in the loop, because the
while current > 1condition is checked before the first pass. Ifnis 0 or 1, the body never runs andcountstays 0. The loop condition plays the role of the base case.
What if this were different
Problem 1: How much room is left?
Primary: A fixed-length array ([u32; N]) has its size set at compile time, so there's no push. The struct would need an extra field such as count: usize to track how many slots are actually filled. try_add would write to weights[count] and bump count, and it would also have to give back false when the array is full, even if the weight fits. room_left would only sum 0..count, not the whole array. A Vec handles all of this for us by growing as needed.
Secondary:
- Taking items out from the top means the last item in is the first item out, which is a stack (LIFO).
- Nothing bad happens if properly implemented.
try_add(u32::MAX)only succeeds iflimitis alsou32::MAX(au32limit can't be any bigger). After that,room_left()is 0, so any latertry_add(w)withw > 0gives backfalseand the backpack is untouched. The danger is in other ways of writing it:- If
try_addcheckstotal + weight <= self.limit, thenu32::MAX + 1overflows. - If someone builds
Backpack { weights: vec![u32::MAX, 1], limit: 2000 }directly, the summing loop inroom_leftoverflows.
- If
Problem 2: How many halvings?
Primary: Any reasonable pairing works. Recursion fits problems that naturally split into smaller copies of themselves, especially more than one copy where a loop would need to manage its own stack. A loop is the better choice when the recursion would get very deep, e.g. counting down by 1 from a large n makes O(n) stack frames and can overflow the stack, while a loop uses constant space.
Secondary:
- Rounding up (
(current + 1) / 2) is still O(log n). It sometimes takes one extra step, e.g. 10 → 5 → 3 → 2 → 1 is 4 halvings instead of 3. It still stops because for any value of 2 or more, rounding up still makes it smaller. - Quartering takes log₄(n) steps, which is log₂(n) / 2, so about half as many. But logs of different bases differ by only a constant factor, so both are O(log n).
Did you actually write this code
One point per rung, as described above.
Problem 1: How much room is left?
- Point to it: the loop header, e.g.
for i in 0..self.weights.len(), together withtotal += self.weights[i]. - Why: any honest reason tied to their code, e.g. indexing is what they're used to from arrays, or they wanted
iavailable. - Alternatives: Any other valid loop header works, i.e.
for w in &self.weights { total += w; }.
Problem 2: How many halvings?
- Point to it: in the loop version,
count += 1. In the recursive version, the1 +in1 + halvings(n / 2). - How it's stored: the loop keeps a single variable,
count, and updates it in place each pass. The recursive version has no count variable at all. The count is built up out of the values given back as the stack unwinds, with each frame adding 1 to what the frame below it gave back. - Mutable or immutable:
count(andcurrent) must belet mutbecause they change. Everything in the recursive version is immutable, since each call gets its ownnand nothing is ever reassigned.
In-Class Activities
Most lectures end with a hands-on activity, taking the last third of class.
Activity numbers match lecture numbers: Activity 3 belongs to Lecture 3.
The rest appear here as they are released, alongside any materials that go with them.
Activity 1: Syllabus Review
Sheet 1: keep this one
By Friday
- Fill out the intro survey linked in your welcome 2a. Install Git Bash (if on Windows)
- Complete the pre-lecture task for Friday on Gradescope
- Bring your laptop Friday!
Where things live
| Course site | rust4ds.github.io/ds210-fa26-lectures |
| Piazza | Announcements and questions |
| GitHub | Receive and work on your assignments |
| Gradescope | Submit work, get feedback, see standings |
| Echo360 | Lecture recordings |
The shape of your grade
50% exams, 20% active engagement, 15% code reviews, 15% autograded work.
You must attend your assigned lecture and discussion to get participation credit.
Finding me
Office hours. Drop-in, no sign-up, CDS 1506. Mondays and Wednesdays 9:30 - 10:30am.
Coffee chats. 20-minute appointments, Fridays 9:30 - 10:30am and every other Tuesday 2:00 - 3:00pm starting September 8. Sign up at calendly.com/laurenbw-bu/coffee-chats. One rule: we do not talk about the course.
Your teaching staff
Course assistants: Kesar Narayan, Lingjie Su Section A TAs: Matt Morris, Gabriel Burr Section B TAs: Emir Tali, Kristen Bestavros, Nia Naresh Kumar
What to bring to every lecture
- Something to write with (we'll provide handouts for notes)
- Your laptop, closed unless we are actively coding
Notes and Announcements
Sheet 2: hand this one in
One sheet per group, with everyone's names on it.
Group members:
Concrete questions:
-
How is project work submitted?
-
What happens if you submit work a day late?
-
What is one way to use AI that is acceptable, and one way that is in violation of course policies?
-
What would it take to get full credit for attendance and participation?
-
If you have accommodations for exams, when should you book with the testing center?
-
How could you get a zero on a project, even if all of your tests pass?
Open-ended questions:
-
What parts of the course policies seem standard and what parts seem unique?
Standard Unique
-
Identify 2-3 things in the syllabus that concern you
-
What strategies could you use to address these concerns?
-
Identify 2-3 things on the syllabus that you're glad to see
-
List three questions you have about the course that aren't answered in the syllabus
Activity 2: Build a Treasure Hunt
Solo/group: Solo submissions but feel free to work together
Submission: On gradescope ("Lecture 2 Activity")
In Class Activity Part 1: Access/Install Terminal Shell
Directions for MacOS Users and Windows Users.
macOS Users:
Your Mac already has a terminal! Here's how to access it:
-
Open Terminal:
- Press
Cmd + Spaceto open Spotlight - Type "Terminal" and press Enter
- Or: Applications -> Utilities -> Terminal
- Press
-
Check Your Shell:
echo $SHELL # Modern Macs use zsh, older ones use bash -
You are ready. Nothing to install today. Go to Part 2.
Windows Users:
Windows has several terminal options. For this class we strongly recommend/require Git Bash, unless you already are very comfortable using another shell on your machine. (PowerShell aliases some commands to be Linux-like, but they are fairly quirky.)
- Download Git for Windows from git-scm.com
- During installation, take the default options
- Open "Git Bash" from Start menu
Verify Your Setup (Both Platforms)
pwd              # Should show your current directory
ls               # Should list files
which ls         # Should show the path to the ls command
echo "Hello"     # Should print Hello
Part 2: Build a Treasure Hunt
You are going to build a small game out of nothing, using only the keyboard. No clicking, no dragging, and no Finder/File Explorer.
At the end you will get to step back and see what you built and... not see what you built?
What you need today - quick reference
pwd                      # where am I?
ls                       # what is here?
ls -a                    # what is here, including hidden things
cd foldername            # go into a folder
cd ..                    # go up one level
mkdir foldername         # make a folder
echo "text" > file.txt   # write text into a file, replacing whatever was there
echo "text" >> file.txt  # add text to the end of a file
cat file.txt             # show me the file
nano file.txt            # edit a file (ctrl-O saves, ctrl-X quits)
Tab completes a path you have started typing. Up arrow brings back your last command. Use both constantly.
There is a much longer cheat sheet at the bottom but you won't need it for this activity.
Your steps
0. Decide where your course work lives, and make it from the terminal.
You will want one folder to hold everything for this course. Pick now and stick with it. Here's how to do it from the command line.
cd ~            # start at home
mkdir ds210     # make the folder
cd ds210        # go into it
pwd             # write this down. This is home base
I (Prof. Wheelock) keep all my code projects in ~/projects, so mine folder is ~/projects/ds210. If you would rather have yours on the Desktop, you can cd ~/Desktop before the mkdir.
Do not make this one by clicking. It's faster now, but once you get good at the command line, you'll work faster than you ever could with point-and-click-ing.
1. Make the hunt, and step inside.
mkdir treasure_hunt
cd treasure_hunt
pwd
That last line should end in /treasure_hunt. If it does not, you are not where you think you are. Sort that out before going on, because everything after this happens here.
2. Sign the guest book.
Make a file called guest_book.txt with your name in it.
echo "Ada Lovelace" > guest_book.txt
cat guest_book.txt
Remember, > means "send this output into that file", creating it if it does not exist. cat shows you it worked.
3. Ask your computer some questions, and keep the answers.
Run each of these. >> adds to the end of the file. > would throw your names away, so the difference matters here.
whoami     >> guest_book.txt   # your username
hostname   >> guest_book.txt   # your computer's name
pwd        >> guest_book.txt   # where you are standing
echo $HOME >> guest_book.txt   # your home directory
Now cat the file again. You should see five lines (and wow, you never opened an editor!)
4. Leave a clue.
Make a new file called clue_1.txt containing: The treasure is hidden in plain sight (you have all the tools you need now to figure out how).
5. Build the secret chamber.
mkdir secret_chamber
cd secret_chamber
Inside it, make clue_2.txt containing: Look for a hidden file
6. Hide the treasure. Then watch it vanish.
Make a file called .treasure_map.txt containing: Congratulations. You found the treasure
Note the dot at the front of the name. Now run these two, in this order, and look carefully:
ls        # what do you see?
ls -a     # now what do you see?
Answer this in writing, appending to the guest book one level up:
echo "A file whose name starts with a dot is ..." >> ../guest_book.txt
.. means the directory above this one, so you are writing into a file you are not standing in.
A hidden file isn't that deep - it's not protected, encrypted, or special. Its name starts with a dot, and ls skips those unless you ask with -a. This is why your folders looks so tidy in Finder or File Explorer and so crowded in the terminal.
7. Stand back and look at what you built.
cd ..
ls -R
That will show you every folder and file you made, all at once. You did all of that without your mouse!
8. Make a zip of it. Change to (cd to) the parent directory of treasure_hunt first. Then, the command is different on each platform:
- Mac:
zip -r treasure_hunt.zip treasure_hunt - Windows, in Git Bash:
tar.exe -a -c -f treasure_hunt.zip treasure_hunt
9. Upload treasure_hunt.zip to Gradescope. Next time we introduce git and GitHub, and we will use that from then on.
10. Optional, for bragging rights. Write a shell script that does all of the above in one go, and upload that too!
Reference: much more than you needed today
Finding the path of something you can already see
Sometimes you will have a folder in Finder or File Explorer and need its path in the terminal. You have a couple options:
1. Drag it into the terminal.
Just drag the folder or file icon into your terminal window annd it will type the path for you. A common use is to first type cd (with a space), then drag a folder from your file browser and hit enter to cd into a folder when you don't know its path.
- Works in Terminal and iTerm2 on a Mac, and in Git Bash on Windows
- Git Bash converts the Windows path into one bash understands, so you get
/c/Users/you/Desktop/ds210and notC:\Users\you\Desktop\ds210 - It is a feature of the terminal window, not the shell, so it may not work in VS Code's built-in terminal or other termminals
2. Ask the file browser.
- Mac: right-click (ctrl-click) the folder/file, hold
Option, and "Copy as Pathname" appears. OrCmd+Ifor Get Info and read "Where" (you can highlight the path there and right click to "Copy as Pathname" as well) - Windows: shift-right-click and "Copy as path". You will get backslashes, so swap them for forward slashes and put
/c/at the front in place ofC:\
Platform-Specific Tips
Mac, Linux, and Windows in Git Bash:
- Your home directory is
~or$HOME. This is the same in Git Bash as it is on a Mac - Hidden files start with a dot (.)
- Try
which commandto find where a command is located - Use
man commandfor detailed help. Git Bash has noman, so usecommand --helpthere instead
Windows outside Git Bash (Command Prompt or PowerShell):
- Your home directory is
%USERPROFILE%(Command Prompt) or$env:USERPROFILE(PowerShell) - Hidden files have the hidden attribute (use
dir /ahto see them) - Use
Get-Help commandin PowerShell orhelp commandin Command Prompt for detailed help - Try
where commandto find where a command is located - A warning: the course notes, the activities, and your TAs all assume Git Bash. We can help you only so far out here. If you are not already comfortable in PowerShell, switching to Git Bash now will save you trouble all semester
Universal Tips:
- Use Tab completion to avoid typing long paths
- Most shells support command history (up arrow or Ctrl+R)
- Combine commands with pipes (
|) to chain operations - Search online for "[command name] [your OS]" for specific examples
Basic Navigation & Listing
# Navigate directories
cd ~                    # Go to home directory
cd /path/to/directory   # Go to specific directory
pwd                     # Show current directory

# List files and directories
ls                      # List files
ls -la                  # List all files (including hidden) with details
ls -lh                  # List with human-readable file sizes
ls -t                   # List sorted by modification time
Finding Files
# Find files by name
find /home -name "*.pdf"           # Find all PDF files in /home
find . -type f -name "*.log"       # Find log files in current directory
find /usr -type l                  # Find symbolic links

# Find files by other criteria
find . -type f -size +1M           # Find files larger than 1MB
find . -mtime -7                   # Find files modified in last 7 days
find . -maxdepth 3 -type d         # Find directories up to 3 levels deep
Counting & Statistics
# Count files
find . -name "*.pdf" | wc -l       # Count PDF files
ls -1 | wc -l                      # Count items in current directory

# File and directory sizes
du -sh ~/Documents                 # Total size of Documents directory
du -h --max-depth=1 /usr | sort -rh  # Size of subdirectories, largest first
ls -lah                            # List files with sizes
Text Processing & Search
# Search within files
grep -r "error" /var/log           # Search for "error" recursively
grep -c "hello" file.txt           # Count occurrences of "hello"
grep -n "pattern" file.txt         # Show line numbers with matches

# Count lines, words, characters
wc -l file.txt                     # Count lines
wc -w file.txt                     # Count words
cat file.txt | grep "the" | wc -l  # Count lines containing "the"
System Information
# System stats
df -h                              # Disk space usage
free -h                            # Memory usage (Linux)
system_profiler SPHardwareDataType # Hardware info (Mac)
uptime                             # System uptime
who                                # Currently logged in users

# Process information
ps aux                             # List all processes
ps aux | grep chrome               # Find processes containing "chrome"
ps aux | wc -l                     # Count total processes
File Permissions & Properties
# File permissions and details
ls -l filename                     # Detailed file information
stat filename                      # Comprehensive file statistics
file filename                      # Determine file type

# Find files by permissions
find . -type f -readable           # Find readable files
find . -type f ! -executable       # Find non-executable files
Network & Hardware
# Network information
ip addr show                       # Show network interfaces (Linux)
ifconfig                           # Network interfaces (Mac/older Linux)
networksetup -listallhardwareports # Network interfaces (Mac)
cat /proc/cpuinfo                  # CPU information (Linux)
system_profiler SPHardwareDataType # Hardware info (Mac)
Activity 3: Put the Program Together
The scenario
You are writing a small program to help you keep track of your quiz scores. It should:
- Start with the scores you already have
- Add a new score you just got back
- Work out the average
- Print a different message depending on how you are doing
You have all the pieces below, but they are in the wrong order. Some of them are commands you type in the shell, and some of them are lines of Rust that go inside your program file.
Directions
- Get in groups of 2-3
- Send one person up to get a packet
- Write everyone's names on the submission sheet
Do a quick check of your strips: you should have 24, all different. If you are missing any, check out the list on the screen and make any you're missing out of scrap.
Sort the strips into two columns on the page:
- Your shell: Things you type at the terminal, in the order you'd type them
- Your file,
src/main.rs: Lines of Rust, in the order they belong in the file
Things to think about as you go:
- Order matters in both columns. Think about what has to exist before each step can work
- Not every strip is essential. If you think something is optional, put it where you would actually use it and be ready to say why
- You won't know what all the Rust stuff means yet, but do you know enough to make an educated guess?
We'll take the last few minutes to share solutions.
The strips
Cut along the dashed lines. One set per group.
println!("Good work! Average: {:.1}", average);cargo runscores.push(88);let average = total as f64 / scores.len() as f64;cargo new grade_calculator} else if average >= 80.0 {nano src/main.rslet total: i32 = scores.iter().sum();if average >= 90.0 {touch README.md./target/debug/grade_calculatorfn main() {cargo buildprintln!("Keep trying! Average: {:.1}", average);let mut scores = vec![85, 92, 78, 96];ls -lacd grade_calculatorecho "This is a grade average calculator" > README.md} else {}}println!("Excellent! Average: {:.1}", average);println!("You have {} scores so far.", scores.len());cat src/main.rs
Sorting sheet
Names: _______________________________________________________________
Sort the strips into the two areas below. Order matters in both, for different reasons. Not every strip is essential; if you think one is optional, put it where you would actually use it and be ready to say why.
src/main.rs
Solution
Shell column:
cargo new grade_calculator
cd grade_calculator
ls -la
touch README.md
echo "This is a grade average calculator" > README.md
nano src/main.rs
cat src/main.rs
cargo run
Or, for the last step, the two-step version:
cargo build
./target/debug/grade_calculator
src/main.rs column:
fn main() {
    let mut scores = vec![85, 92, 78, 96];
    scores.push(88);
    println!("You have {} scores so far.", scores.len());
    let total: i32 = scores.iter().sum();
    let average = total as f64 / scores.len() as f64;
    if average >= 90.0 {
        println!("Excellent! Average: {:.1}", average);
    } else if average >= 80.0 {
        println!("Good work! Average: {:.1}", average);
    } else {
        println!("Keep trying! Average: {:.1}", average);
    }
}
Which strips are optional
Several of the shell strips could be dropped without breaking the program:
ls -laandcat src/main.rsonly look at things - they're good things to do but not essential, and could go a few placestouch README.mdis redundant, becauseecho "..." > README.mdon the next line creates the file anyway. So does>>, which appends but still creates the file if it isn't there.echo "..." > README.md(and so the README entirely) is technically not needed to run the program. It is good practice, though!cargo buildplus./target/debug/grade_calculatoris the alternative tocargo run, not an addition to it. Either path is right, but you don't need both.
Nothing in the Rust column was designed to be optional.
Activity 4: Set Up Your Project Repo
Project 1 has been released as of today. This activity helps you get started.
Work side by side and help each other, but everyone will make their own copy of the repo and submit separately on gradescope.
Part 1: Make your own copy
- Make sure you have a GitHub account.
- Go to the project repo on GitHub: https://github.com/rust4ds/ds210-fa26-project-1. The full project instructions are on the course website, which links there too.
- Click the green Use this template button, then Create a new repository.
- Name it
ds210-fa26-project-1, the same as ours, so it is easy for us to find when you ask for help. Set it to Private. Then click Create repository.
Your copy is yours. Nobody else can see it, including the rest of the class.
Wait, isn't this what forking is for?
Almost, though the difference is worth understanding, because you will eventually encounter forking too.
Use this template makes an independent copy. Your repo starts with our files and then has nothing more to do with ours. That is what we want here: you are starting your own project, and your work should be yours and private.
Fork also makes a copy, but GitHub remembers where it came from. Your fork is listed publicly on the original repo, you get a button to pull in the original's later changes, and you can open a pull request to offer your changes back. The main reason we're not using forks here is it would force everyone's work to be visible to everyone else.
The Fork button sits in the upper right, and you will use it eventually, just not today:
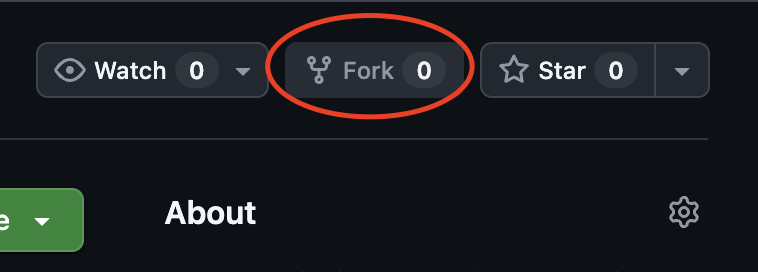
Part 2: Clone
- Still in GitHub, navigate to your own copy of the repo. Above the list of files, click the green "Code" button, select GitHub CLI (assuming you've set up the CLI) and copy the code snippet (if you don't have the CLI, copy the HTTPS link).
- In your terminal, paste the copied code snippet, or type
git cloneand then the HTTPS link if not using the CLI, hit enter to complete the cloning process.
Part 3: Make a change
-
Open
README.mdand put your name on the author line, replacing_your name here_. Two ways, pick whichever you like:- Stay in the terminal.
cdinto your cloned repo, and thennano README.mdopens it right there. Edit the line, then Ctrl+O and Enter to save, Ctrl+X to quit. Those are Control on Mac too, not Command - Use your editor.
code .opens the whole project in VS Code. If that command is not found, you skipped thecodestep in the setup session, so use File, then Open Folder instead
- Stay in the terminal.
-
Before you commit, ask git what you did:
git status     # README.md is modified
git diff       # one - line and one + line reflects one line edit
Part 4: Commit and push
- Save (commit) and move (push) your change to GitHub (
git add,git commit -m "...",git push) - Check GitHub in your browser and confirm your name is on the README
- Submit the URL of your repo to the Gradescope assignment L4 Activity. Two ways to get it if you have lost the browser tab: run
git remote -v, which prints it, or look at the first linegit pushprinted a moment ago, which starts withTo https://github.com/....
Troubleshooting
Most issues should have been prevented by carefully completing the full git/GitHub set up process in Discussion 1 - review Dicsussion 1 first, and you've completed those steps, ask for help.
If you weren't able to complete these steps by the end of class, instead of your repo URL (if you don't have one) please type a short description of how far you got and where you are blocked.
Activity 5: Compiler Error Hunt
What you are doing
Working in pairs, in the Rust Playground: https://play.rust-lang.org
Break the program below as many different ways as you can, and read what the compiler says each time.
Goal: at least 8 different compiler errors. There is room for 12 on your sheet if you get on a roll.
Why we use the Playground
VS Code underlines your mistake before you ever compile. That is useful most of the time, but not today, because today's exercise is all about hitting the errors and reading them!
It's also a lot faster to get going.
The program
Paste this in and Run it first, so you know it works before you touch it.
fn main() {
    let temps_c = vec![14.0, 17.5, 21.0, 19.5, 23.0];
    let mut warm_days = 0;

    for i in 0..temps_c.len() {
        let c = temps_c[i];
        let f = c * 9.0 / 5.0 + 32.0;
        println!("Day {}: {:.1}C is {:.1}F", i + 1, c, f);

        if c > 18.0 {
            warm_days += 1;
        }
    }

    let total: f64 = temps_c.iter().sum();
    let mean = total / temps_c.len() as f64;

    println!("Mean high: {:.1}C", mean);
    println!("Warm days: {} of {}", warm_days, temps_c.len());
}
It should print five days, a mean of 19.0C, and 3 warm days.
The activity loop
- Make one change that breaks the code
- Run it
- Read the error over
- Write it on your half sheet: what you changed, and what the error is (in brief)
- Undo your change, and break it a different way
Make just one change at a time so you can tell what error message belongs to what.
Some ideas
- Change something's type
- Take a keyword away
- Mess with punctuation and variable names
- Ask for something that does not exist
- Give
println!the wrong number of things to print
Warnings are not errors. If you run Clippy from the Tools menu it will suggest ways to rewrite code that already works. Interesting, but it does not count for the hunt.
The compiler errors we found
- Drop
mutfromwarm_days: E0384, cannot assign twice to immutable variable - Type
totalasi32: E0277, a value of typei32cannot be made by summing over&{float} - Drop
as f64: E0277, cannot dividef64byusize - Delete a semicolon: expected
;, foundprintln - Misspell
temps_cin the loop: E0425, cannot find value in this scope - Write
if c > 18: E0277, can't compare{float}with{integer} - Remove one argument from
println!: 3 positional arguments in format string, but there are 2 - Write
warm_days += 1.0: E0277, cannot add-assign{float}to{integer} - Put
"17.5"in the vec: E0308, mismatched types - Rename
main: E0601,mainfunction not found - Delete a closing brace: this file contains an unclosed delimiter
- Index
temps_c[i + 1]: compiles, then panics at runtime with index out of bounds - Delete a
!: E0423: expected function, found macro - Try to index like
0[0]: E0608 cannot index into a value of type{integer} - Add
.len()tomean: E0599, no method namedlenfound for typef64in the current scope
Warnings and non-errors too:
- Add
mut: warns you don't need it - Delete
lnfromprintln!: it still works (but prints funny) - Delete
Vec!: nothing seems to change (but the type oftemps_cchanges)
Activity 6: Variables, Mutability, and Types Exploration
Part 1: Hypothesis Time
You can work solo or in groups, but EACH person write down your predictions for each "What If" question below. Don't look anything up - just discuss and make your best guesses!
Binary and Number Representation
- What is 63 in binary (hint: it's 64-1)?
- What decimal number is
1100in binary (if it's positive)? - In 4-bit two's complement, what would -4 look like?
Type Compatibility - Will These Compile?
For each code snippet, predict: will it compile? (Why or why not?)
-
#![allow(unused)] fn main() { let x: i32 = 42; let y: i16 = 100; let sum = x + y; } -
#![allow(unused)] fn main() { let price = 19.99; let tax_rate: f32 = 0.08; let total = price + (price * tax_rate); } -
#![allow(unused)]
fn main() {
let age: u8 = 25;
let negative_age = -age;
}
Shadowing
-
Are these equivalent? If yes, why, if not, what is different at the end?
let mut x = 5; x = 6;let x = 5; let x = 6;
-
Can you shadow with a different type? What will happen with:
#![allow(unused)] fn main() { let x = 5; let x = "hello"; } -
What will this print?
#![allow(unused)]
fn main() {
let x = 10;
{
    let x = x + 5;
    println!("Inner: {}", x);
}
println!("Outer: {}", x);
}
Overflow Behavior
- What happens when you overflow? Since
u8max is 255, what will this do?
#![allow(unused)]
fn main() {
let x:u8 = 250;
println!("Outer: {}", x+10);
}
Part 2: Test Your Hypotheses
Now visit Rust Playground and test your predictions! For each question, write code to test your hypothesis and record on your paper what you discovered:
- Was your hypothesis correct?
- What did you discover?
- Did anything surprise you?
Testing Strategy:
- Questions 1-3: Skip checking, we'll go over it together
- Questions 4-6: Copy the code snippets and see if they compile
- Questions 7-10: Write small test programs to verify your predictions
Solutions
111111. Six ones, because 64 is 2^6 and 63 is one less121100. The same bits as question 2, which is the point: you need to know what type something is to know how to interpret the bits- No. E0308 mismatched types, then E0277, cannot add
i16toi32. Needsx + y as i32 - Yes, and
totalis21.5892.pricehas no written type, and multiplying by anf32makes it one - No. E0600, cannot apply unary
-tou8, "unsigned values cannot be negated". Switching toi8compiles - Both compile and both end at 6.
mutreuses one variable, shadowing makes a second that hides the first - Yes, prints
hello. Shadowing can change the type,mutcannot Inner: 15thenOuter: 10. The innerletis a newxthat dies with the block.- No, it does not even compile:
deny(arithmetic_overflow)catches it because the compiler can do the sum itself. Only when the value arrives at runtime do you get a panic (behavior here might differ between compiler modes and on the playground).
Activity 7: Hand-coding challenge
In this activity you will hand-write two small functions that work out what someone pays at a check-out counter, given the sticker price, the sales tax, and whether they have a membership card worth 10% off.
Part 1 - Hand-coding on your own
You need to write your own sheet up but can work side-by-side.
You are writing two functions. main is written for you at the bottom, and it only ever calls print_receipt.
print_receipt takes the sticker price, the tax rate, and whether the customer has a membership card. It prints the receipt below, and returns nothing.
The rule: print_receipt does no arithmetic. No multiplying, no subtracting. Every number it prints either arrived as a parameter or came back from the other function.
The other function does all of the arithmetic. You decide what to call it, what it takes, and what it hands back.
A function can only return one value, but that value can be a tuple, so it can carry several numbers back at once.
Design it so that print_receipt has everything it needs.
Example, for print_receipt(100.00, 0.08, true):
Original:  $100.00
Tax:       $8.00
Discount:  $10.80
Total:     $97.20
Start with the function that does the arithmetic, since print_receipt has to call it.
#![allow(unused)]
fn main() {
fn ____________(______________________) -> ____________ {
    // Your implementation here


}
}
Now print_receipt, which calls the function you just designed. Does it need a return type?
#![allow(unused)]
fn main() {
fn print_receipt(______________________) ________ {
    // Your implementation here


}
}
main is written for you. You do not need to change it, but just notice what it calls.
fn main() {
    print_receipt(100.00, 0.08, true);
    print_receipt(100.00, 0.08, false);
    print_receipt(0.02, 0.08, true);
}
Things to think about:
- Did your function hand back anything
print_receiptdid not actually need? - Does it matter in what order the tax and discount are applied?
- What would happen if the sticker price were very low (like 2 cents), or negative?
Part 2 - Swap for feedback
If you worked with someone, get feedback from a different person!
When I announce, you'll swap papers with a neighbor and look at their solution. Take a minute to give them feedback including:
- Any highlights of what they did well
- Any bugs you notice
- Any style feedback
At the end, I will collect papers and pick a couple (anonymized) to show on the screen for discussion.
Solutions
One possible solution:
#![allow(unused)]
fn main() {
fn calculate_totals(price: f64, tax_rate: f64, has_card: bool) -> (f64, f64, f64) {
    let tax = price * tax_rate;
    let subtotal = price + tax;
    let discount = if has_card { subtotal * 0.1 } else { 0.0 };
    let final_price = subtotal - discount;
    (tax, discount, final_price)
}

fn print_receipt(price: f64, tax_rate: f64, has_card: bool) {
    let (tax, discount, final_price) = calculate_totals(price, tax_rate, has_card);

    println!("Original:  ${:.2}", price);
    println!("Tax:       ${:.2}", tax);
    println!("Discount:  ${:.2}", discount);
    println!("Total:     ${:.2}", final_price);
}
}
print_receipt(100.00, 0.08, true) prints $100.00, $8.00, $10.80, $97.20.
This is one good answer, not the only one.
Alternatives:
- Returns the original price as a fourth value,
(price, tax, discount, total). Okay but redundant - Returns only the final price. Then
print_receipthas to work out the tax and the discount (technically violates design requirements) - Returns a subtotal as well. Harmless, but nothing on the receipt prints it
Notes:
- The tuple has to be destructured,
let (tax, discount, final_price) = ..., or reached into with.0,.1and.2 print_receipthas no return type, so it returns()- A
has_cardof false gives a discount of0.0, not a missing value. The tuple is the same shape either way - Tax then discount and discount then tax both give the same total (but different tax and discount values)
- The 2 cent case is interesting: tax is 0.0016 and discount 0.00216, so both print as 0.02. The receipt looks like it does not add up, because
{:.2}is hiding the complete values - A negative price runs but might not give sensible answers
Activity 8: Loops, Functions, and Variables
Your Names:
Part 1: What Does This Print?
Problem 1
#![allow(unused)]
fn main() {
let scores = [85, 92, 78];
for (i, score) in scores.iter().enumerate() {
    println!("Student {} scored {}", i, score);
}
}
Problem 2
#![allow(unused)]
fn main() {
let mut x = 0;
for i in 1..=3 {
    x += i;
}
println!("{}", x);
}
Problem 3
#![allow(unused)]
fn main() {
for i in (0..5).step_by(2) {
    if i == 2 {
        continue;
    }
    println!("{}", i);
}
}
Part 2: Quick Quiz
- Which is a correct function signature for a function
is_positivethat takes an integer and returns whether it's positive?
- What shell command lists all files in the current directory, including hidden files?
- What git command would you use to add all new and modified files to the staging area?
- What shell command would you use to move to your home directory?
Part 3: Fill-in-the-blanks
Problem 1
/// Returns the largest number in the array.
fn find_max(numbers: [i32; 5]) -> _______ {
    let mut max = numbers[0];
    for _______ in _______ {
        if _______ > max {
            max = _______;
        }
    }
    _______
}

fn main() {
    let scores = [85, 92, 78, 96, 88];
    let highest = find_max(_______);
    println!("Highest score: {}", highest);
}
Problem 2
/// Counts the even numbers from 1 up to and including `limit`.
fn count_even_numbers(limit: u32) -> u32 {
    let mut count = 0;
    for i in _______ {
        if i % 2 _______ {
            count _______;
        }
    }
    count
}

fn main() {
    let result = count_even_numbers(10);
    println!("Even numbers from 1 to 10: {}", _______);
}
Problem 3
#![allow(unused)]
fn main() {
/// You start with a personal best of 100 and 3 lives.
/// Each try uses up a life and raises your personal best by 25.
/// Keep trying while your personal best is 210 or less and you still have lives.
/// Then determine whether you got above 210, and then... can you look at the function signature and guess what you might return?
fn try_to_set_a_high_score() -> u32 {
    let mut personal_best = 100;
    let mut lives_left = 3;

    _______ personal_best <= 210 _______ lives_left > 0 {
        personal_best _______ 25;  // You get a little better every time!
        lives_left _______;
        println!("Score: {}, Lives left: {}", _______, _______);
    }

    _______ personal_best _______ {
        println!("High score achieved!");
    } _______ {
        println!("Try again later");
    }

    _______
}
}
Part 4: Debug the Code
The line where you notice a bug is not always the line you change to fix it.
Problem 1 (3 bugs):
#![allow(unused)]
fn main() {
fn calculate_average(numbers: [f64]) -> f64 {  // look here
    let mut sum = 0;
    for num in numbers {
        sum += num;                            // look here
    }
    sum / numbers.len()                        // look here
}
}
Bug 1: ________________________________________________
Fix 1: ________________________________________________
Bug 2: ________________________________________________
Fix 2: ________________________________________________
Bug 3: ________________________________________________
Fix 3: ________________________________________________
Problem 2:
#![allow(unused)]
fn main() {
let arr = [1, 2, 3];
for i in 0..arr.len() {
    arr[i] = arr[i] * 2;    // look here
}
}
Bug: ________________________________________________
Fix: ________________________________________________
Problem 3 (2 bugs):
#![allow(unused)]
fn main() {
/// Find the first occurrence of an even number in the array.
/// If there are no even numbers, return -1 instead
fn find_first_even(numbers: [u32; 5]) -> u32 {
    for num in numbers {
        if num % 2 = 0 {    // look here
            return num;
        }
    }
    return -1;              // look here
}
}
Bug 1: ________________________________________________
Fix 1: ________________________________________________
Bug 2: ________________________________________________
Fix 2: ________________________________________________
Answers
Problem 1
Student 0 scored 85
Student 1 scored 92
Student 2 scored 78
The index starts at 0.
Problem 2
6
Problem 3
0
4
Part 2: Quick Quiz
fn is_positive(n: i32) -> boolls -aorls -lagit add .(orgit add -A)cd ~
Part 3: Fill-in-the-blanks
Problem 1
Two correct answers here. Looping over the values:
fn find_max(numbers: [i32; 5]) -> i32 {
    let mut max = numbers[0];
    for num in numbers {
        if num > max {
            max = num;
        }
    }
    max
}

fn main() {
    let scores = [85, 92, 78, 96, 88];
    let highest = find_max(scores);
    println!("Highest score: {}", highest);
}
Or looping over the indices (0..5 works too):
#![allow(unused)]
fn main() {
fn find_max(numbers: [i32; 5]) -> i32 {
    let mut max = numbers[0];
    for i in 0..numbers.len() {
        if numbers[i] > max {
            max = numbers[i];
        }
    }
    max
}
}
Problem 2
fn count_even_numbers(limit: u32) -> u32 {
    let mut count = 0;
    for i in 1..=limit {
        if i % 2 == 0 {
            count += 1;
        }
    }
    count
}

fn main() {
    let result = count_even_numbers(10);
    println!("Even numbers from 1 to 10: {}", result);
}
Prints Even numbers from 1 to 10: 5
Problem 3
#![allow(unused)]
fn main() {
fn try_to_set_a_high_score() -> u32 {
    let mut personal_best = 100;
    let mut lives_left = 3;

    while personal_best <= 210 && lives_left > 0 {
        personal_best += 25;  // You get a little better every time!
        lives_left -= 1;
        println!("Score: {}, Lives left: {}", personal_best, lives_left);
    }

    if personal_best > 210 {
        println!("High score achieved!");
    } else {
        println!("Try again later");
    }

    personal_best
}
}
Three lives only gets to 175, so it prints "Try again later" and returns 175.
Part 4: Debug the Code
Problem 1
Bug 1: Array parameter needs a size
Fix 1: fn calculate_average(numbers: [f64; 5]) -> f64
Bug 2: sum starts as an integer but gets floats added to it
Fix 2: let mut sum = 0.0;
Bug 3: sum is a float but numbers.len() is an integer
Fix 3: sum / (numbers.len() as f64)
Problem 2
Bug: Array needs to be mutable to modify its elements
Fix: let mut arr = [1, 2, 3];
Problem 3
Bug 1: if num % 2 = 0
Fix 1: if num % 2 == 0
Bug 2: Cannot return -1 from a function that returns u32 (unsigned)
Fix 2: Change the return type to i32. Then return num needs return num as i32, because num is still a u32 (or you could make the input parameter an array of i32 as well)
Activity 9: Big O Complexity Analysis
Instructions
For each problem below, write:
- Time complexity in Big O, for the worst case
- Space complexity in Big O: the extra memory the function uses, not counting its input
- Why, in one sentence
Problem 1: Array Sum
#![allow(unused)]
fn main() {
fn sum_array(arr: &[i32]) -> i32 {
    let mut total = 0;
    for &num in arr {
        total += num;
    }
    total
}
}
Time complexity: ________________
Space complexity: ________________
Why: ________________________________
Problem 2: Finding First Duplicate
#![allow(unused)]
fn main() {
fn find_first_duplicate(arr: &[i32]) -> Option<i32> {
    for i in 0..arr.len() {
        for j in (i+1)..arr.len() {
            if arr[i] == arr[j] {
                return Some(arr[i]);
            }
        }
    }
    None
}
}
Time complexity: ________________
Space complexity: ________________
Why: ________________________________
Problem 3: Tricky Loop
#![allow(unused)]
fn main() {
fn mystery(n: usize) -> usize {
    let mut count = 0;
    let mut remaining = n;
    while remaining > 0 {
        remaining /= 10;
        count += 1;
    }
    count
}
}
Time complexity: ________________
Space complexity: ________________
Why: ________________________________
Problem 4: Multiplying Grids
#![allow(unused)]
fn main() {
fn multiply_grids(a: &Vec<Vec<i32>>, b: &Vec<Vec<i32>>) -> Vec<Vec<i32>> {
    let n = a.len();  // both grids are n by n
    let mut result = vec![vec![0; n]; n];

    for i in 0..n {
        for j in 0..n {
            for k in 0..n {
                result[i][j] += a[i][k] * b[k][j];
            }
        }
    }
    result
}
}
Time complexity: ________________
Space complexity: ________________
Why: ________________________________
Bonus: Trading space for time
Both functions answer the same question: does this array have the same number in it twice? Every value in the array is less than 1,000.
Version A:
#![allow(unused)]
fn main() {
fn has_duplicates_a(arr: &[usize]) -> bool {
    for i in 0..arr.len() {
        for j in (i+1)..arr.len() {
            if arr[i] == arr[j] {
                return true;
            }
        }
    }
    false
}
}
Version B:
#![allow(unused)]
fn main() {
fn has_duplicates_b(arr: &[usize]) -> bool {
    let mut seen = [false; 1000];
    for &value in arr {
        if seen[value] {
            return true;
        }
        seen[value] = true;
    }
    false
}
}
Version A:
- Time: _______ Space: _______
Version B:
- Time: _______ Space: _______
-
When might you prefer Version A?
-
When might you prefer Version B?
Solutions
Problem 1: O(n) time, O(1) space. One pass over the array, and only total is kept.
Problem 2: O(n^2) time, O(1) space. Nested loops over the array; worst case is no duplicate at all. Best case is O(1), when the first two numbers match.
Problem 3: O(log n) time, O(1) space. It counts the digits in n: each pass divides by 10, the bunnies in reverse. mystery(1,000) is 4 and mystery(1,000,000) is 7.
Problem 4: O(n^3) time, O(n^2) space. Three nested loops of n; the result is a new n by n grid.
Bonus, Version A: O(n^2) time, O(1) space.
Bonus, Version B: O(n) time. Space is always 1,000 true/false values no matter how long the array is: O(1) as the array grows, but it grows with the largest value allowed, the same as the sieve's O(limit).
- Prefer A when values could be huge (an array covering every possible value would be enormous), memory is tight, or the arrays are tiny
- Prefer B when arrays are long, values are small, and speed matters
Activity 10: Sorting Race
How it works
Each round is a race. Four people sort at the same time, each with their own cards and their own sort:
- Insertion sort
- Selection sort
- Merge sort
- Freestyle: any strategy you like, including "vibes"
The 5th person has a timer and lets everyone know when to start. When each person is done they say "done" and the timer notes down their time (but keeps the timer running until everyone is done!) then notes the results in the Google Form.
With a 6th person, they're the checker: they supervise to make sure folks are doing the right algorithm, and they check the cards are in order at the end.
Swap roles for round 2, so someone new is timing, and no one does the same algorithm twice.
The sorts, by hand
Lay your cards face up in a row, in the starting order.
Insertion sort. The leftmost card is your sorted row. Take the next card to its right and slide it left past every bigger card. Repeat until no cards are left.
Selection sort. Find the smallest card that isn't sorted yet. Move it to the end of your sorted row. Repeat.
Merge sort. Split the row into two piles. Keep splitting until every pile is one card. Then merge piles in pairs: look only at the smallest card of each pile, and take the smaller of the two. Keep merging until you have one pile.
The space below is for making notes, but you'll need to submit on the Google Form in the end!
Round 1: 8 cards
Starting order: 60 30 80 10 50 20 70 40
Which sort do you predict will win? ______________
| Sort | Sorter | Time (seconds) |
|---|---|---|
| Insertion | ||
| Selection | ||
| Merge | ||
| Freestyle |
Freestyle strategy:
Round 2: 16 cards
Starting order: 110 40 150 80 10 130 60 100 30 160 90 20 140 70 120 50
Which sort do you predict will win? ______________
| Sort | Sorter | Time (seconds) |
|---|---|---|
| Insertion | ||
| Selection | ||
| Merge | ||
| Freestyle |
Freestyle strategy:
While you wait
- Which sort felt easiest to do by hand? Which felt slowest? Why?
- A computer sorting 1,000,000 numbers: which of these sorts would you pick? Is that the same one that won for you?
Activity 11: Design a Struct for Real Data
Sheet A: weather stations
Odd groups. If your number is even, you want Sheet B.
Group members:
How this works
- Design, ~6 minutes. On this sheet, write:
- a struct for one row of your data, with a type for every field
- a separate struct for the whole collection, holding a
Vecof the first one - three method signatures, each marked
&selfor&mut self. One of them has to change something
- Write one method body, ~3 minutes. Real code if you can, pseudocode if you can't
- Swap sheets, ~4 minutes. Trade with a group that did the other task, and do the three jobs at the bottom of this sheet
A worked example, from a different data set
street          species   height_m  healthy
Comm Ave        maple     11.2      yes
Comm Ave        oak       14.8      yes
Bay State Rd    elm        6.4      no
#![allow(unused)]
fn main() {
struct Tree { species: String, height_m: f64, healthy: bool }

struct Block { street: String, trees: Vec<Tree> }

impl Block {
    /// Height of the tallest tree on the block, or 0.0 if there are none.
    fn tallest(&self) -> f64 {
        let mut tallest = 0.0;
        for tree in &self.trees {
            if tree.height_m > tallest { tallest = tree.height_m; }
        }
        tallest
    }
}
}
Your data: five stations report once an hour. Here is the 7am round:
station   temp_f   wind_mph   precip_in   sensor_ok
BOS-01     54.3      12.0       0.00        yes
BOS-02     51.9       8.5       0.12        yes
BOS-03   -999.0       0.0       0.00        no
BOS-04     49.7      15.2       0.31        yes
BOS-05     53.1       6.4       0.00        yes
Design a Reading for one row, and a DailyReport that holds a date and all the readings for that day.
Write this method: average_temp, on DailyReport. The average temperature across the day's readings.
Look at BOS-03 before you write it.
Before you design it
Your collection struct holds the date. Pull one row out of it and hand it to someone else. Does that row still know when it happened?
What else would you want on a row, and where would it come from?
Your design
Row struct:
Collection struct:
Three method signatures, each marked &self or &mut self:
The method body you were asked to write:
If you finish early
- What else would be useful on
Readingitself? One example: the temperature in Celsius. Write the signature and a line of pseudocode for the body - Grouping by day is one choice. What else could you group by? You might want one station followed over time, with summary statistics of its own. Sketch that struct: what does it hold, and what methods would it have?
When you get the other group's sheet
Write on their sheet, and sign your group number.
- Check every
&selfand&mut self. Mark any you disagree with and why - Add one other method that could be useful. Get creative! Signature, the right
self, and a line of pseudocode saying what the body does - Name one field whose type you'd change, and say why
Sheet B: shuttle trips
Even groups. If your number is odd, you want Sheet A.
Group members:
How this works
- Design, ~6 minutes. On this sheet, write:
- a struct for one row of your data, with a type for every field
- a separate struct for the whole collection, holding a
Vecof the first one - three method signatures, each marked
&selfor&mut self. One of them has to change something
- Write one method body, ~3 minutes. Real code if you can, pseudocode if you can't
- Swap sheets, ~4 minutes. Trade with a group that did the other task, and do the three jobs at the bottom of this sheet
A worked example, from a different data set
street          species   height_m  healthy
Comm Ave        maple     11.2      yes
Comm Ave        oak       14.8      yes
Bay State Rd    elm        6.4      no
#![allow(unused)]
fn main() {
struct Tree { species: String, height_m: f64, healthy: bool }

struct Block { street: String, trees: Vec<Tree> }

impl Block {
    /// Height of the tallest tree on the block, or 0.0 if there are none.
    fn tallest(&self) -> f64 {
        let mut tallest = 0.0;
        for tree in &self.trees {
            if tree.height_m > tallest { tallest = tree.height_m; }
        }
        tallest
    }
}
}
Your data: one row per shuttle arrival. Times are minutes after midnight, so 8:05am is 485:
route     stop             scheduled_min   actual_min   riders
CommAve   Kenmore Sq           485             489         31
CommAve   Silber Way           492             492         44
1BU       Danielsen Hall       495             493         12
CommAve   Marsh Plaza          500             514         58
1BU       Agganis Way          505             507          7
Design a Trip for one row, and a ServiceDay that holds a date and all of the day's trips.
Write this method: late_count, on ServiceDay. How many trips arrived more than threshold minutes after they were scheduled. It takes threshold as a second parameter, after self.
Look at the Danielsen trip before you write it.
Before you design it
Your collection struct holds the date. Pull one row out of it and hand it to someone else. Does that row still know when it happened?
What else would you want on a row, and where would it come from?
Your design
Row struct:
Collection struct:
Three method signatures, each marked &self or &mut self:
The method body you were asked to write:
If you finish early
- What else would be useful on
Tripitself? One example: the scheduled time as hours and minutes, so 485 reads as 8:05. Write the signature and a line of pseudocode for the body - Grouping by day is one choice. What else could you group by? You might want one route followed over time, with summary statistics of its own. Sketch that struct: what does it hold, and what methods would it have?
When you get the other group's sheet
Write on their sheet, and sign your group number.
- Check every
&selfand&mut self. Mark any you disagree with and why - Add one other method that could be useful. Get creative! Signature, the right
self, and a line of pseudocode saying what the body does - Name one field whose type you'd change, and say why
Solutions
Sheet A: weather stations
struct Reading {
    station: String,
    temp_f: f64,
    wind_mph: f64,
    precip_in: f64,
    sensor_ok: bool,
}

struct DailyReport {
    date: String,
    readings: Vec<Reading>,
}
Sheet A: average_temp
impl DailyReport {
    fn average_temp(&self) -> f64 {
        let mut sum = 0.0;
        let mut count = 0;
        for r in &self.readings {
            if !r.sensor_ok { continue; }
            sum += r.temp_f;
            count += 1;
        }
        if count == 0 { 0.0 } else { sum / count as f64 }
    }

    fn add_reading(&mut self, r: Reading) {
        self.readings.push(r);
    }
}
BOS-03 reports -999.0. Skip it and the average is 52.25. Average it in and you get -158.0.
Sheet B: shuttle trips
One row per shuttle arrival
struct Trip {
    route: String,
    stop: String,
    scheduled_min: u32,
    actual_min: u32,
    riders: u32,
}

struct ServiceDay {
    date: String,
    trips: Vec<Trip>,
}
Sheet B: late_count
impl ServiceDay {
    fn late_count(&self, threshold: u32) -> u32 {
        let mut count = 0;
        for t in &self.trips {
            if t.actual_min > t.scheduled_min + threshold {
                count += 1;
            }
        }
        count
    }

    fn add_trip(&mut self, t: Trip) {
        self.trips.push(t);
    }
}
The finish-early prompts. Celsius is fn temp_c(&self) -> f64 { (self.temp_f - 32.0) * 5.0 / 9.0 }. Hours and minutes is fn scheduled_hm(&self) -> (u32, u32) { (self.scheduled_min / 60, self.scheduled_min % 60) }, or a String. Both go on the row struct, not the collection: the method lives on whichever type holds the data it needs.
Before you design it. Neither Reading nor Trip carries a date (only the collection holds it). Both answers are defensible though. A date on every row adds lots copies of the same string, but no date means a row is not a standalone piece of info.
Another way to group it. StationHistory { station: String, readings: Vec<Reading> } with something like max_temp or hours_offline, or RouteHistory { route: String, trips: Vec<Trip> } with on_time_rate. This relates to the last question: when you want to regroup by station instead of by day, every Reading needs to know its own hour and date.
Activity 12: Write the Match
How this works
The problems are on this paper, but you'll work through the problems in Rust Playground, and the finished functions go to Gradescope.
- Open play.rust-lang.org
- For each problem, copy the type (struct/enum) and the function signature into the playground
- Write the
matchthat makes the function produce the results in the table - Write a
fn mainthat calls it with the examples, and check you get what the table says - Paste your finished functions into the Gradescope assignment
Work with the people around you. But you'll submit individually.
A worked example
The problem gives you this:
enum Coin { Penny, Nickel, Dime }

fn value(c: Coin) -> u32 {
    // your code here
}| Call | Returns |
|---|---|
value(Coin::Penny) | 1 |
value(Coin::Dime) | 10 |
You write the body, and a main to check it:
enum Coin { Penny, Nickel, Dime }

fn value(c: Coin) -> u32 {
    match c {
        Coin::Penny => 1,
        Coin::Nickel => 5,
        Coin::Dime => 10,
    }
}

fn main() {
    println!("{}", value(Coin::Penny));
    println!("{}", value(Coin::Dime));
}
When you run it, if it prints 1 and 10, the problem is done.
Problem 1: Which way are we going
enum Direction { North, East, South, West }

fn label(dir: Direction) -> String {
    // your code here
}| Call | Returns |
|---|---|
label(Direction::North) | "going north" |
label(Direction::East) | "going east" |
label(Direction::South) | "going south" |
label(Direction::West) | "going west" |
Problem 2: A score that might not exist
fn describe(score: Option<u32>) -> String {
    // your code here
}
Tip: to return an owned string you can use format! instead of println! to create a string with variable values. And to make a String out of a "string literal" like "hello" you need to use "hello".to_string().
| Call | Returns |
|---|---|
describe(Some(95)) | "scored 95" |
describe(Some(0)) | "scored 0" |
describe(None) | "did not take it" |
Problem 3: Class standing
Match on a struct, ignoring the fields you don't need.
struct Student {
    name: String,
    year: u32,
    credits: u32,
}

fn standing(s: &Student) -> String {
    // your code here
}| Call | Returns |
|---|---|
standing(&Student { name: String::from("Kesar"), year: 3, credits: 96 }) | "senior" |
| a student with 72 credits | "junior" |
| a student with 30 credits | "sophomore" |
| a student with 12 credits | "first year" |
Senior is 90 credits or more, junior 60, sophomore 30.
Problem 4: Adding up to n
You'll use recursion here. You'll write a match with a base case and a recursive call.
fn sum_to(n: u32) -> u32 {
    // your code here
}
sum_to(4) is 4 + 3 + 2 + 1 + 0.
| Call | Returns |
|---|---|
sum_to(0) | 0 |
sum_to(4) | 10 |
sum_to(10) | 55 |
Problem 5: The first even number
This one is more challenging. This needs a loop as well as a match, and it returns an Option.
fn first_even(nums: [u32; 5]) -> Option<u32> {
    // your code here
}| Call | Returns |
|---|---|
first_even([1, 3, 6, 7, 8]) | Some(6) |
first_even([2, 4, 6, 8, 10]) | Some(2) |
first_even([1, 3, 5, 7, 9]) | None |
Solutions
Problem 1: Direction
fn label(dir: Direction) -> String {
    match dir {
        Direction::North => String::from("going north"),
        Direction::East  => String::from("going east"),
        Direction::South => String::from("going south"),
        Direction::West  => String::from("going west"),
    }
}
Four arms, one per variant, and no _ needed. The return type is String, so we need this or "going north".to_string() technically.
Problem 2: a score that might not exist
fn describe(score: Option<u32>) -> String {
    match score {
        Some(n) => format!("scored {}", n),
        None => "did not take it".to_string(),
    }
}
Some(n) names the number so you can use it on the right. Two arms covers the whole type: an Option has nothing else in it.
Problem 3: class standing
fn standing(s: &Student) -> String {
    match s {
        &Student { credits, .. } if credits >= 90 => String::from("senior"),
        &Student { credits, .. } if credits >= 60 => String::from("junior"),
        &Student { credits, .. } if credits >= 30 => String::from("sophomore"),
        _ => String::from("first year"),
    }
}
Biggest number first. Put >= 30 at the top and every senior is a sophomore.
.. ignores name and year. The & is there because s is a &Student.
Problem 4: adding up to n
fn sum_to(n: u32) -> u32 {
    match n {
        0 => 0,
        _ => n + sum_to(n - 1),
    }
}
The base case is the arm that does not call itself. Without it, n - 1 runs past zero and a u32 cannot go negative.
Problem 5: the first even number
fn first_even(nums: [u32; 5]) -> Option<u32> {
    for n in nums {
        match n % 2 {
            0 => return Some(n),
            _ => {}
        }
    }
    None
}
return leaves the whole function the moment you find one. None sits after the loop, for when it finishes without finding anything.
Lecture 1 - Welcome: what this course is, and why Rust

What today will look like
- Screen-free space
Agenda
- What is this course, and why Rust?
- Why are you taking it?
- Who we are, and how the class runs
- Grading, projects, and exams
- Syllabus review activity
Everything in 210 is in the service of (at least one of):
- Code development skills - tools and best practices
- Programming in Rust
- Systems concepts (memory, performance, types)
- Data structures and algorithms (to be continued in DS 320)
Why coding development skills matter
- Often never taught explicitly, can be tricky to self-teach
- Vitally important in "the real world", when you'll need to:
- Get out of a "detached head" state without losing your head
- Collaborate with others on code across space and time
- Work on massive codebases and data warehouses
- The more AI takes over the coding part, the more the layer around it matters
Why Systems Programming Matters
Knowing enough to answer
- Why is my code slow?
- Why is my app crashing?
- Why did we get hacked?
Or better yet... not having to answer those questions as often!
Why data structures and algorithms?
Knowing enough to answer
- Why is my model producing weird results?
- Is there a smarter way to do this than brute-force?
- How is this ever going to scale?
And inventing whole net new ways of working with data.
Also -
- Technical interviews
- Intellectual joy
Why are we doing this in Rust?
- A second language
- A compiled language
- A systems programming language
- A modern language
- An increasingly popular language
But why are YOU taking it?
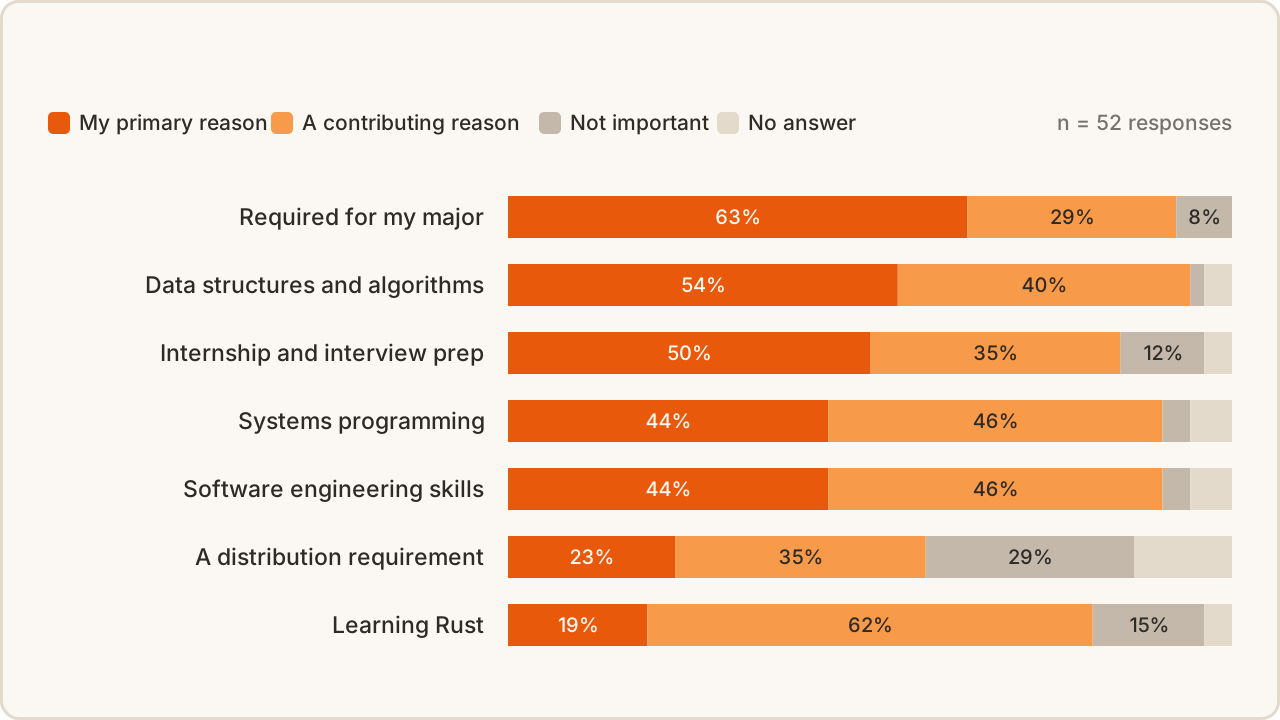
I just want to say - I hear you. Here's my job...
Logistics
What have you heard about the course?
New(ish) Course Changes
- Local dev and focus on development skills
- Mastery vs coverage
- In-class activities in every lecture
- Close alignment between lectures, projects, and exams
- Three exams and code reviews to measure learning w/o AI policing
- Data structures and algs integrated, not tacked on
Why the shift to "active learning"?
- A meta-analysis of 225 studies found students in traditional lecture courses are 1.5 times more likely to fail compared to active learning environments.
- Active learning produces consistent effect sizes of 0.47-0.49 standard deviations, or half a letter grade improvement.
- Active learning reduces achievement gaps between underrepresented and majority students by 33-45%.
Our Teaching Staff
- Instructor: Lauren Wheelock
- Course assistants: Kesar Narayan, Lingjie Su
- A discussion TAs: Matt Morris (A2), Gabriel Burr (A3, A4)
- B discussion TAs: Emir Tali (B2), Kristen Bestavros (B3), Nia Naresh Kumar (B4)
Two things to know about me...
- I am your advocate.
- It's us against the material
- No gotchas
- Lots of practice and review in class
- Please share feedback
- I want to know who you are (coffee chats!)
- If you are struggling, please reach out early so we can help
- I have high expectations for you.
- Grading on an absolute scale (I try not to curve)
- Less weight on autograders, more on exams and code review
- When you're here, you're HERE (no laptops, activities, cold calling, print-outs)
- We will practice being uncomfortable and not knowing
- You CAN learn this stuff!
What this means for grading
50% exams: 15% midterm 1, 15% midterm 2, 20% final
20% active engagement: 15% in-class activities, 5% pre-work and surveys
15% code reviews: 5% each, three projects
15% autograded work: 5% each, three projects
Another way to look at it
35% is about EFFORT: participation, pre-work, coding to pass tests
65% is about MASTERY: exams and code reviews
Half of every project is a conversation
The code review is worth as much as every automated test combined.
Working code you can't explain, in this era, isn't worth much.
We'll share more and help you prepare as we go.
Attendance runs in three periods
- Period 1: Lectures 1-12, Discussions 1-3
- Period 2: Lectures 13-27, Discussions 4 and 7
- Period 3: Lectures 29-40, Discussions 9 and 11 and the skew-week
You can miss up to two lectures or one discussion per period for "free" - no need to explain or email me.
We use a bunch of tools for this: activity sheets, Gradescope tasks, cold-calling, headcounts
Exam dates, so you can check for conflicts
| Midterm 1 | Friday, October 9 | in class, your own section |
| Midterm 2 | Friday, November 6 | in class, your own section |
| Final | Monday, December 14, 12:00-2:00pm | CGS 505, both sections together |
Please check your finals schedule this week
The full finals schedule for all courses is published.
Look for two things:
- A direct conflict, two exams at the same time
- Three exams in a 24-hour window
If you find #1 or if 210 is the middle exam for #2 tell me (or your other instructors) ASAP.
Lectures
Mondays, Wednesdays, Fridays here in 871 Commonwealth Ave, CGS 505
- A1: 11:15am - 12:05pm
- B1: 12:20pm - 1:10pm
Lecture content will be the same, but you must attend the lecture you're registered for.
Discussion Sections
Section A - Wednesdays, 871 Commonwealth Ave CGS 525
- A2: 1:25 - 2:15pm, Matt
- A3: 2:30 - 3:20pm, Gabriel
- A4: 3:35 - 4:25pm, Gabriel
Section B - Tuesdays
- B2: 11:00 - 11:50am, MCS B31, Emir
- B3: 12:30 - 1:20pm, MCS B31, Kristen
- B4: 2:00 - 2:50pm, CDS 164, Nia
Section B discussions only run 50 min, underfilling the official slot, EXCEPT on code review days
You will:
- Get technical support and project help
- Attend code reviews and exam corrections
- Review material and get extra practice for exams
Discussions count towards attendance/participation and you must attend your assigned one.
Syllabus Review Activity
Instructions
In groups of 2-3, spend time answering the worksheet questions on paper.
Please turn in one sheet per group that includes all your names
Wrap up
Any questions from the activity you want to ask before Friday?
By Friday
Please fill out the intro survey linked in the email if you haven't so I can get to know you.
Your first pre-lecture task is due at 11am Friday.
Bring your laptop and come prepared to work with the shell next class!
Lecture 2 - Hello shell: talking to your computer
Announcements
Learning objectives for today
By the end of this lecture, you should be able to:
- Navigate your file system on the command line
- Create, copy, move, and delete files and directories at the command line
- Interpret file permissions
We will also discuss, but you are not responsible for:
- Use pipes and redirection for basic text processing
- Write simple shell scripts
 We'll have one of these slides every lecture and it's a great way to check in on what material you're responsible for for exams!
Let's play a game

That was a conversation with a fixed vocabulary
take lamp worked, but grab lamp didn't.
- The game knows a finite list of verbs
- There is no menu showing you what they are
- Being close does not count
Your shell works exactly the same way.
Commands and arguments
The shell takes commands and arguments, same as the game.
pwd
cd Documents
cat notes.txt
The grammar is a command in English: VERB (NOUN). "run", "drink water", "open door"
pwd is a verb on its own. cd and cat want a noun.
Once you can read those, the weirder ones come apart the same way:
ls -la ~
ls is the command. -la and ~ are both arguments.
What is a computer terminal?
A terminal is an interface between you and a computer, that shows text you typed and text the computer generated back.
It looks pretty similar today as it did fifty years ago.
Let's open one
Demo time.
Shell, Terminal, Console, Command line... and what's Bash?
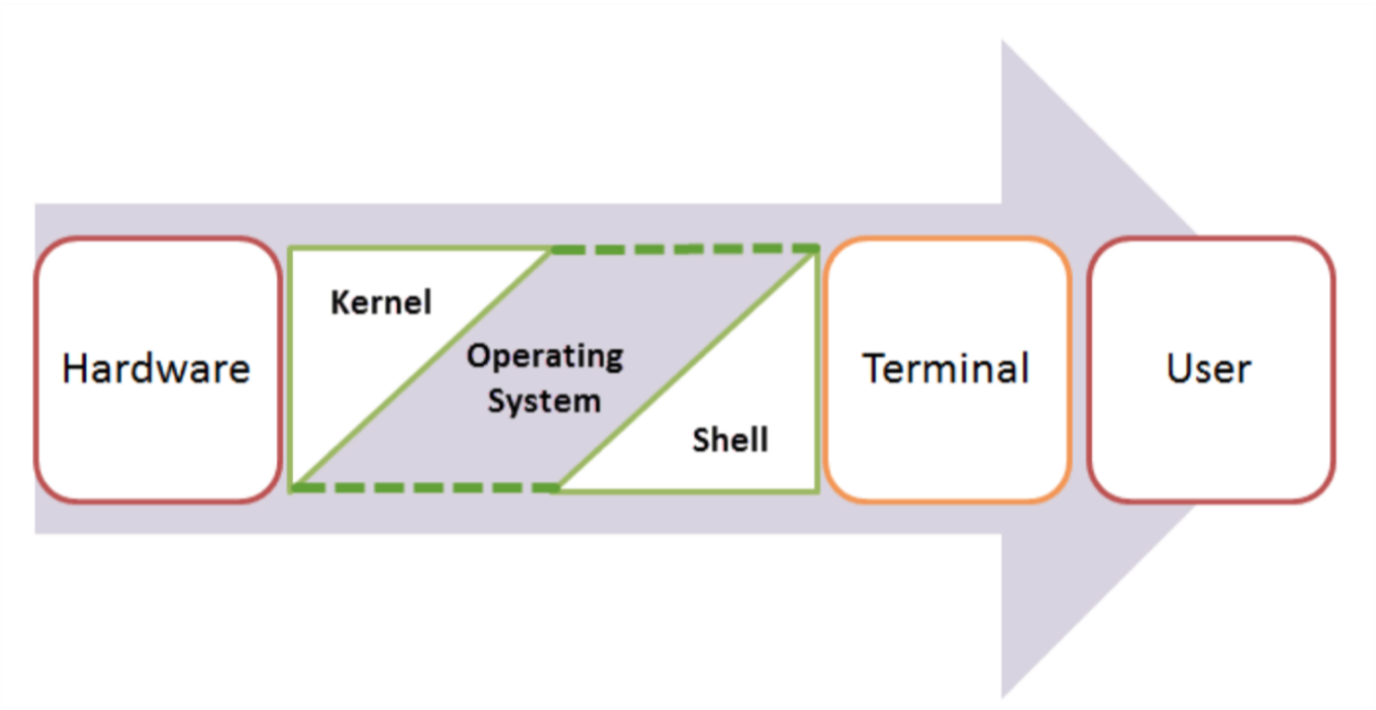
- The command line is the interface where you type commands to interact with your computer.
- The command prompt is the character(s) before your cursor that signals you can type and can be configured with other reminders.
- The terminal or console is the program that opens a window and lets you interact with the shell.
- The shell is the command line interpreter that processes your commands.
Terminals are more like applications and shells are more like languages.
Shell, Terminal, Console, Command line... and what's Bash?
BUT they are often used interchangeably in speech:
- "Open your terminal"
- "Type this command in the shell"
- "Run this in the command line"
- "Execute this in your console"
The distinction matters when something breaks. The rest of the time, nobody is careful.
FYI - None of this lecture is about Rust
- 1971: The Unix Shell
- 1989: Bash
- 2005: Git
- 2015: Rust
If any part of this course will be useful 30 years from now, it's this stuff.
(Your AI is using it all the time too!)
The file system and navigation
Where does a file actually live?
You save something "to your Desktop." Where is it?
Everything starts at the root
Root Directory (/):
In Linux, the slash character represents the root of the entire file system.
(On Windows you may see "C:", on Linux and macOS it's just "/".)
(We'll talk more about Windows in a minute)
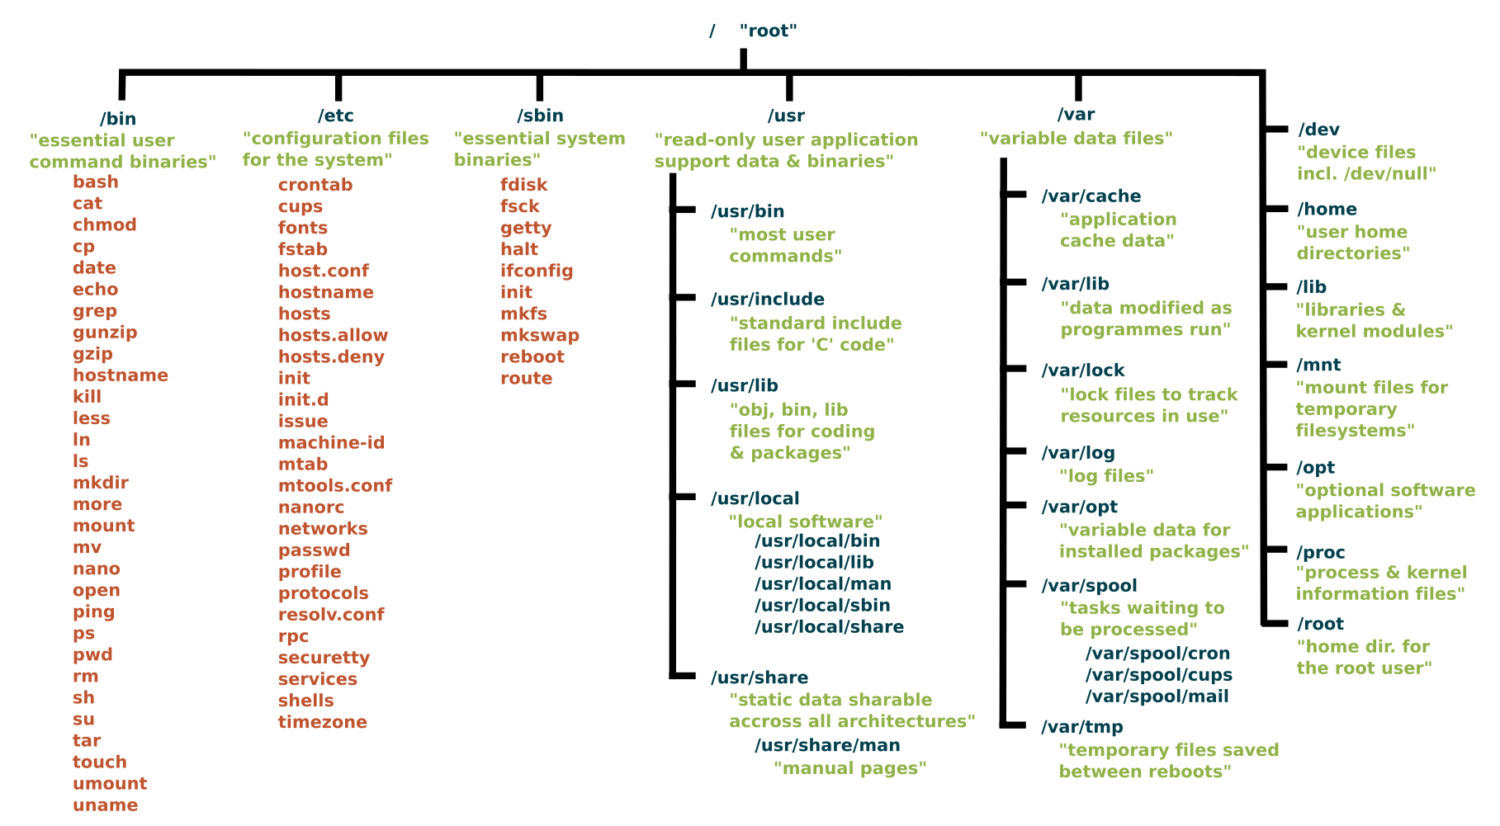
Key Directories You'll Use:
/                          # Root of entire system
├── home/                  # User home directories
│   └── username/          # Your personal space
├── usr/                   # User programs and libraries
│   ├── bin/               # User programs (like cargo, rustc)
│   └── local/             # Locally installed software
└── tmp/                   # Temporary files
Navigation Shortcuts:
~= Your home directory.= Current directory..= Parent directory/= Root directory
Let's take a look / basic navigation demo
Demo time! Let's look around... and see if we can find the desktop
Maybe half of your interactions with the shell will look like:
pwd                   # Print working directory
ls                    # List files in current directory
ls -a                 # List files including hidden files
ls -al                # List files with details and hidden files
cd directory_name     # Change to directory
cd ..                 # Go up one directory
cd ~                  # Go to home directory
Putting it together, can we get there?
Tips:
- Use
Tabfor auto-completion (great for paths!) - Use
Up Arrowto access command history - Try
control-cto abort something running or clear a line - You can't click into a line to edit it, use left/right arrows (or vim, or copy-paste)
Flags / Options
Special arguments called "options" or "flags" usually start with a dash - and can be separate or combined. These are equivalent:
ls -la
ls -al
ls -a -l
ls -l -a
BUT they typically need to come before other arguments:
ls -l -a ~   # works!
ls -l ~ -a   # does not work
Understanding ls -la Output
-rw-r--r-- 1 user group 1024 Jan 15 10:30 filename.txt
drwxr-xr-x 2 user group 4096 Jan 15 10:25 dirname
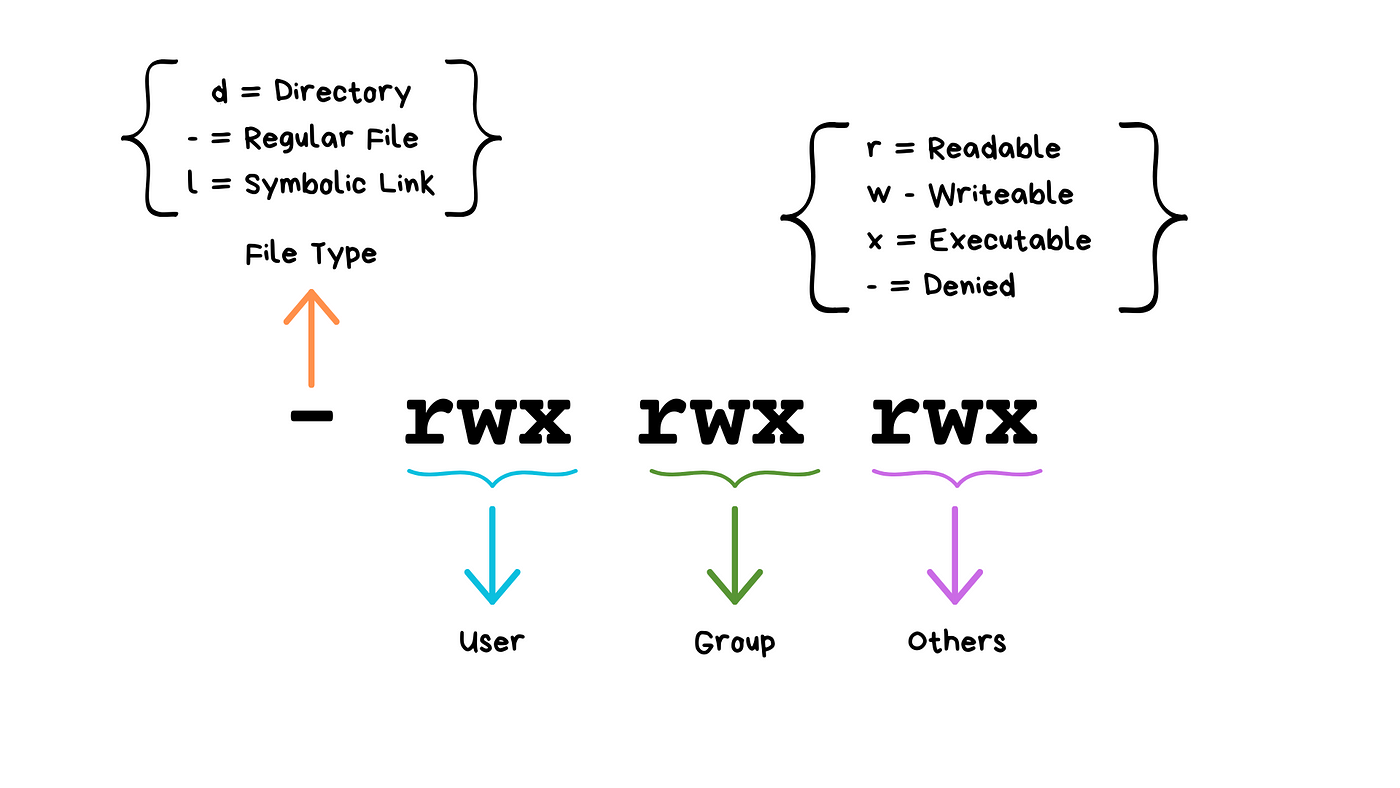
(Don't worry about "groups"!)
We will see these kinds of permissions again in Rust programming!
Don't have permission? Don't tell anyone I told you this but...
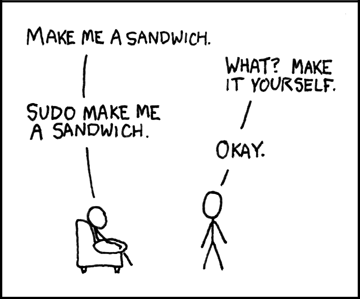
What do you think sudo stands for?
Sorry, Windows users
- macOS is built on Unix, so its terminal already speaks bash
- Windows ships its own shells (Command Prompt, PowerShell), which use different names
dirinstead oflscopyandmoveinstead ofcpandmv
- We strongly recommend Windows users install a terminal with
bash(we'll do it today!) so we can speak the same language.
With Git Bash, Windows gets Unix tools, so ls, cp, mv, cat, and pwd work the same as on a Mac or Linux.
BUT anything owned by the OS (rather than the shell) is still different:
- macOS opens a file with
open - Windows uses
startorexplorer .
One thing is unavoidable and painful: different paths
/vsC:\Users\- This incompatibility has caused more suffering than metric vs imperial units.
Quiz time!
What do these stand for and what do they do:
pwdcdls
And
- How can you "get home quickly"?
These slides make a great starting point for Anki!
Reverse, reverse!
- How can you see the name of the directory you're in?
- How can you look around to see what's in the folder?
- How can you go into one of those folders?
- How can you back out?
- How can you see hidden files?
The rest of the 80% of bash commands you will mostly ever use
mkdir project_name              # Create directory
mkdir -p path/to/dir            # Create nested directories
touch notes.txt                 # Create empty file
echo "Hello World" > notes.txt  # Overwrite file contents
echo "It is me" >> notes.txt    # Append to file content

cat filename.txt                # Display entire file
head filename.txt               # Show first 10 lines
tail filename.txt               # Show last 10 lines
less filename.txt               # View file page by page (press q to quit)
nano filename.txt               # Edit a file

cp file.txt backup.txt          # Copy file
mv old_name new_name            # Rename/move file
rm filename                     # Delete file
rm -r directory_name            # Delete directory and contents
rm -rf directory_name           # Delete dir and contents without confirmation
Three ways to go further
So far we've run one command at a time. We can build on that.
| a pipe sends one program's output straight into another program.
ls -la | sort -k5 -nr | head -10 # the ten biggest things here
> redirection sends it into a file instead. >> adds to the end rather than overwriting.
ls -la > results.txt
.sh a shell script is a saved copy-paste. Put your commands in a file, start it with #!/bin/bash, run it with source script.sh.
You do not need any of these today, but I'd bet you'll use all three eventually.
So what is all this good for?
Things you already know how to do, without the clicking
python3 analysis.py         # Run a script. No IDE, no notebook
pip install pandas          # You have done this one already
code .                      # Open this folder in VS Code
And things you probably did not know you could do from here:
open .                                          # this folder, in Finder
open -a Spotify                                 # launch an app
open "https://google.com/search?q=what+is+bash" # search the web
open is macOS. In Git Bash it is start, on Linux xdg-open.
For when your UI just won't cut it
# Rename 500 photos at once
for file in *.jpg; do mv "$file" "vacation_$file"; done

# Delete everything you have not touched in 30 days
find . -type f -mtime +30 -delete

# Why is my fan running like it is about to take off?
ps aux | grep app  # Find that app that's hogging memory
df -h              # See disk space usage immediately

# Find that file where you wrote something six months ago
grep -r searchterm .     # this folder and everything under it
grep -r searchterm ~     # your whole home directory. Go get a coffee
In-Class Activity: Shell Challenge
Navigate to the course website for activity instructions.
https://rust4ds.github.io/ds210-fa26-lectures/activities/activity_2.html
Upload your work, however far you get, on Gradescope by the end of class.
You may discuss side-by-side but please each complete and submit separately.
Wrap up
Questions from the activity or anything today?
Coming up
- No class Monday, Labor Day
- Your first discussion meets Tuesday / Wednesday and it's an important one where you'll get help getting all your tools set up. If you miss it, you won't be ready for class Friday.
- Pre-lecture task due Wednesday (shell exploration)
- We start Rust on Wednesday! Get excited. Wear crab-themed attire. Or not. (That would be weird?)
- Next Friday: git and GitHub, and Project 1 goes out
Appendix: for reference, not covered in lecture
How does Shell find your commands and programs
python --version  # checks what version of python we have
firefox           # opens firefox!
When you execute a command, the shell looks for an executable file with that exact name in specific locations (folders).
which python
which firefox
These specific locations are defined by the PATH environment variable.
echo $PATH
Common Permission Patterns
644orrw-r--r--: Files you can edit, others can read755orrwxr-xr-x: Programs you can run or edit, others can read/run600orrw-------: Private files only you can access
(Any guesses about the numeric codes?)
Terminals and shells come in proper nouns
Terminals:
- Terminal (macOS)
- iTerm2 (macOS)
- GNOME Terminal (Linux)
- Konsole (Linux)
- Command Prompt (Windows)
- PowerShell (Windows)
- Git Bash (Windows)
Shells:
- Bash (Bourne Again SHell) - most common on Linux and macOS
- Zsh (Z Shell) - default on modern macOS
- Fish (Friendly Interactive SHell) - user-friendly alternative
- Tcsh (TENEX C Shell) - popular on some Unix systems
- PowerShell - advanced shell for Windows
Your shell profile
Your shell reads a configuration file when it starts up. This is where you can add aliases, modify your PATH, and customize your environment.
- macOS (zsh):
~/.zshrc - macOS (bash):
~/.bash_profileor~/.bashrc - Linux (bash):
~/.bashrc - Windows Git Bash:
~/.bash_profile
It is in your home directory.
# Check which shell you're using (macOS/Linux)
echo $SHELL

echo $HOME/.zshrc          # macOS with zsh
echo $HOME/.bash_profile   # macOS/Linux with bash
Adding aliases to your shell profile
# Edit your shell configuration file (choose the right one for your system)
nano ~/.zshrc        # macOS zsh
nano ~/.bash_profile # macOS bash or Git Bash
nano ~/.bashrc       # Linux bash

# Add these helpful aliases:
alias ll='ls -la'
alias ..='cd ..'
alias ...='cd ../..'
alias projects='cd ~/development'
alias grep='grep --color=auto'

# Custom functions
# This will make a directory specified as the argument and change into it
mkcd() {
    mkdir -p "$1" && cd "$1"
}
Modifying your PATH
You may need to do this occasionally to make tools you install available on the command line.
# Add to your shell configuration file
export PATH="$HOME/bin:$PATH"
export PATH="$HOME/.cargo/bin:$PATH"    # For Rust tools (we'll add this later)
Applying changes:
source ~/.zshrc        # For zsh
source ~/.bash_profile # For bash

# Or start a new terminal session, or run: exec $SHELL
Lecture 3 - Hello Rust: your first program, and why it is fast

Announcements
Learning objectives
By the end of class today you should be able to:
- Explain what a compiler and a compiled language are
- Create a simple "hello world" Rust program with proper syntax (
fn, brackets) - Use
rustcandcargoto compile and run Rust programs - Explain what mutable and immutable variables are in Rust
Rust in three concepts
- Compiled
- Type-safe
- Memory-safe
What is a compiler?
Think for a moment, then turn to your neighbor: What is a compiler? What does it actually do?
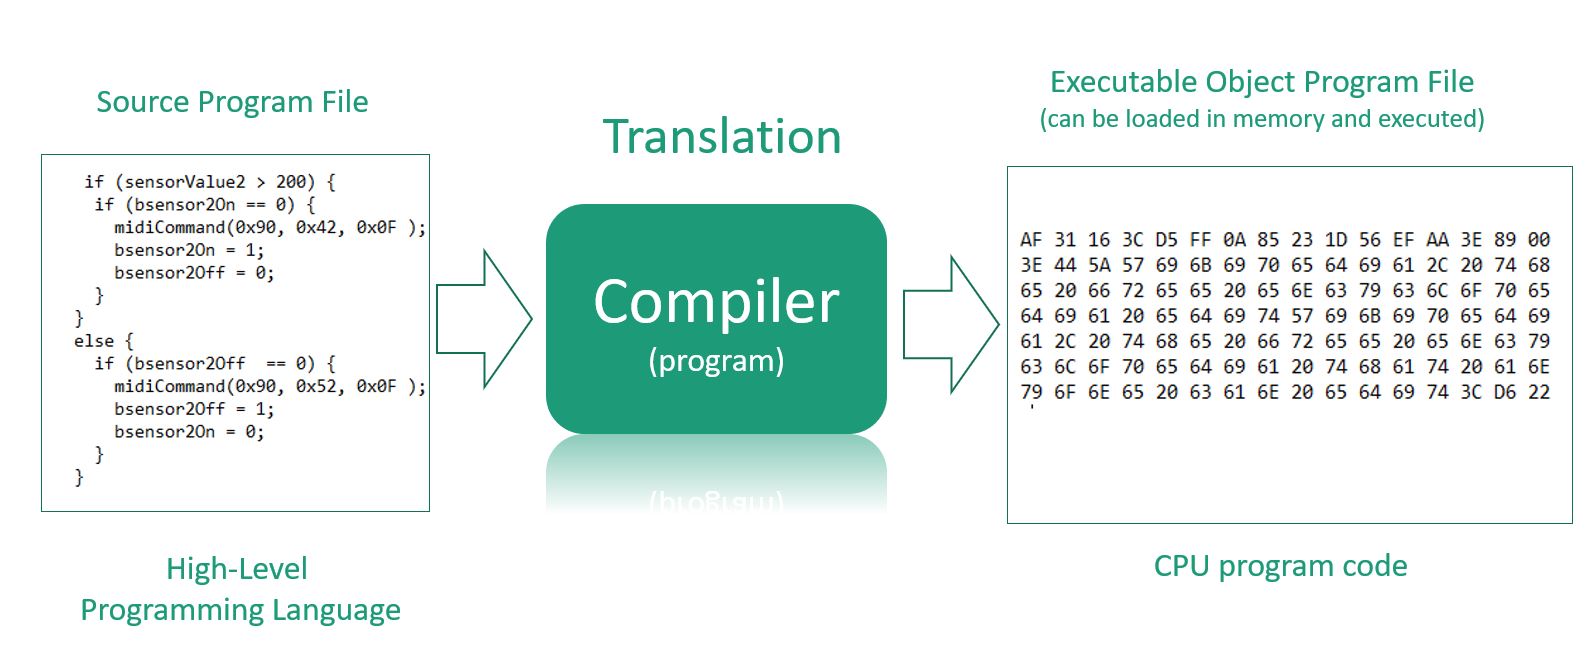
A compiler translates your whole program into machine code once, ahead of time.
Your computer then runs the resulting machine code.
Python is interpreted instead: the interpreter reads your code and executes it line by line, every time you run it.
Type-safe and memory-safe
Type-safe
- Every value has a type, and the compiler refuses to mix and match
Memory-safe
- The compiler restricts what variables you can change and when to prevent a large class of issues with older languages
The same benefit:
- Issues that crash Python or C/C++ at runtime will be caught by Rust before anything runs
We'll understand this a lot more clearly as we go!
Demo: your first Rust project
cargo new hello_rust --vcs none
cd hello_rust
ls -a
What did that give us?
cat Cargo.toml
cat src/main.rs

cargo run
ls
Rust v Python
Rust v Python - Basic function writing
Rust
fn main() {
    println!("Hello, world!");
}
Python
def main():
    print("Hello, world!")

main()
What differences do you notice?
fnkeyword for functions- Braces
{}for code blocks - Semicolons
;end statements println!is a macro (the!means macro) - more on this latermainruns on its own
Rust v Python - Variables, types, and mutability
RUN ME!
fn main() {
    let x = 5;          // immutable by default
    let mut y = 10;     // mut makes it mutable
    y = 15;             // this works
    // x = 6;           // this would error!
    // y = "today"     // this would also error!

    println!("x is {}, y is {}", x, y);
}
Key differences from Python:
- Python: everything mutable by default
- Rust: immutable by default with fixed types
Rust v Python: which one is the real thing?
If you haven't been bitten by python like this yet, you will.
a = [1, 2, 3, 4]
b = a[1:3]        # slice a list
b[0] = 99

print(a)          # [1, 2, 3, 4]   unchanged
import numpy as np
c = np.array([1, 2, 3, 4])
d = c[1:3]        # slice an array
d[0] = 99

print(c)          # [1, 99, 3, 4]  CHANGED
Same syntax. Opposite behavior.
Nothing in either line of code tells you which one to expect.
Show of hands for which you prefer?
In Rust you have to say which one you meant
let b = a;           // move:   a is gone, b owns it now
let b = a.clone();   // copy:   two separate values
let b = &a;          // borrow: b just looks at a
Three different behaviors. Three different notations.
It's always clear what's happening. You never have to wonder what b = a did.
Compiling and running
Rust works in two steps
Python: One Step (Interpreted)
python hello.py
- Python reads your code line by line and executes it immediately
- No separate compilation step needed
Rust: Two Steps (Compiled)
# Step 1: Compile (translate to machine code)
rustc hello.rs

# Step 2: Run the executable
./hello
rustcis your compiler that translates Rust program to machine code- Then you run the executable (why
./?)
Rust with Cargo (two-in-one)
# Set-up steps (one time)
cargo new my_project
cd my_project

# Build and run (compiles automatically)
cargo run
- Cargo uses
rustcunder the hood
Cargo has to be run from inside the project. If you see "could not find Cargo.toml", you are standing in the wrong folder. pwd to see where you are, cd to fix it.
Cargo can do it in two steps too
cargo build                  # compile only
./target/debug/my_project    # run what it built
cargo run is those two commands in one.
You already saw both halves in the demo. cargo run compiled and ran it, then we went into target/debug and ran the executable ourselves, and got the same output.
Two steps or one. Same program either way.
Where do rustc and cargo actually live?
You typed rustc. You never said where it is. So how did the shell find it?
which rustc     # /Users/you/.cargo/bin/rustc
which cargo     # /Users/you/.cargo/bin/cargo
which ls        # /bin/ls
They are files, sitting in a folder, exactly like everything you looked at on Friday.
When you type a command, the shell searches a list of folders for a file with that name. That list is an environment variable:
echo $PATH
# /Users/you/.cargo/bin:/opt/homebrew/bin:/usr/local/bin:/usr/bin:/bin
Folders separated by colons, searched left to right. First match wins.
Installing Rust is mostly this: put some files in ~/.cargo/bin, then add that folder to your PATH.
Putting a folder on the PATH yourself
You will often do this when you install a new tool.
For this terminal window only:
export PATH="$HOME/my_tools:$PATH"
To make it permanent, put that line in the file your shell reads on startup, then open a new terminal:
nano ~/.zshrc          # macOS
nano ~/.bash_profile   # Git Bash on Windows
"command not found" usually means "not on the PATH", not "not installed". Check with which, then check echo $PATH, before you reinstall anything.
And that is why you had to type ./hello
Your current directory is not on the PATH.
So plain hello means "search the PATH folders", and it is not in any of them.
./hello means "the file called hello, right here."
So what does that buy us?
Adding up ten million numbers
The same program, written twice. Build a list of ten million numbers, then add them all up.
sum = 0
for number in numbers:
    sum = sum + number
let mut sum = 0;
for number in numbers {
    sum = sum + number;
}
Same answer, every time. How long should each one take? (Write your guesses)
Write a guess now. Fill in the rest as we go.
| Your guess | What it was | Notes | |
|---|---|---|---|
| Python | |||
Rust, cargo run | |||
Rust, cargo run --release |
Adding up ten million numbers
| Time | |
|---|---|
| Python | ~500 ms |
Rust, cargo run | ~40 ms |
Rust, cargo run --release | ~1.4 ms |
Around 350x faster.
--release tells the compiler to spend longer optimizing. The default build skips that so it compiles faster while you are working. We come back to it on Monday.
If you're a large tech company (like every AI company) this cuts your compute bill by billions of dollars.
Always use --release when evaluating your program's performance to get the best times!
Why is Rust faster than Python?
Python's python3 command is an interpreter.
It's like watching a speech in a foreign language with a live interpreter: it works, you understand it, but every sentence costs you the interpreter's time.
Rust translates the whole thing once, ahead of time, into the computer's own language. Then it just runs. No interpreter in the room.
In-Class Activity: put the program together
- Get in groups of 2-3
- Send one person up to get a packet
- Write your names on the submission sheet
Place the lines in order in two parts on the page: your shell, and your code file src/main.rs, to make a reasonable sequence and a working program.
Full instructions: Activity 3
Coming up
- If you need more help getting set up after discussion follow up on Piazza
- Friday: git and GitHub. We put this project under version control, and Project 1 goes out
- Monday we build a whole program start to finish
Lecture 4 - Hello git: save points for your code
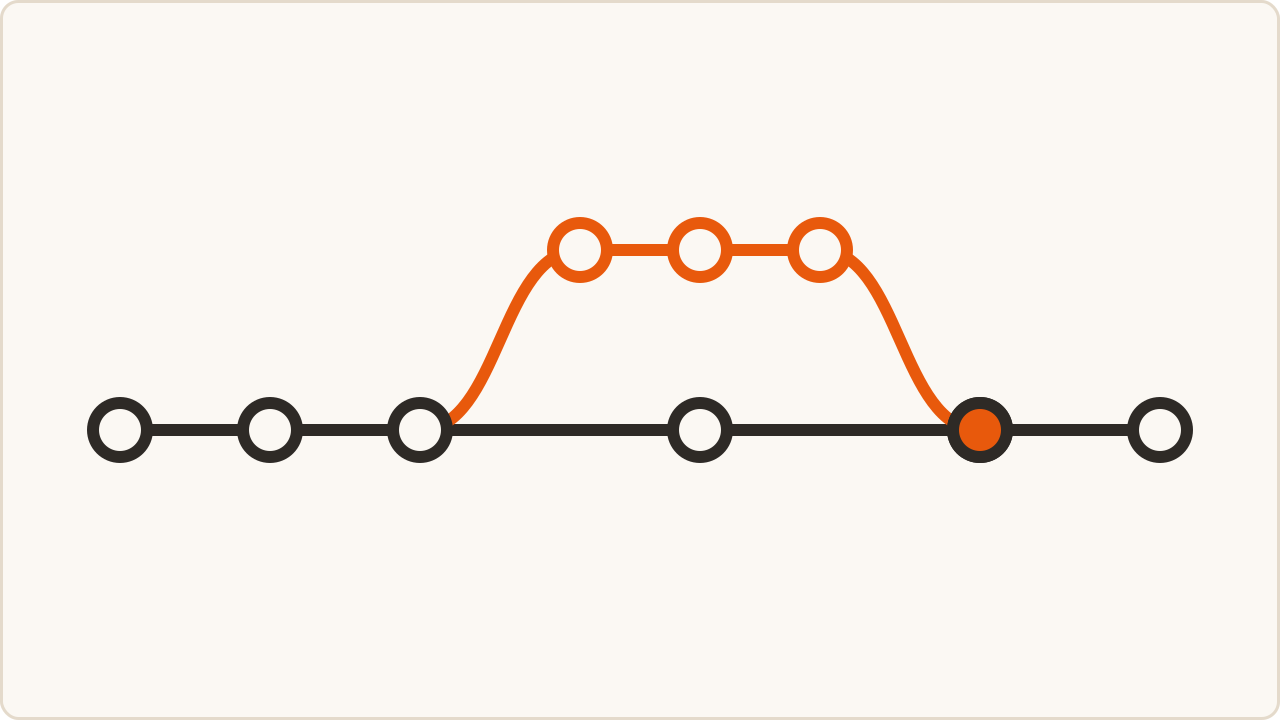
Announcements
Git Concepts
Is this familiar to anyone?
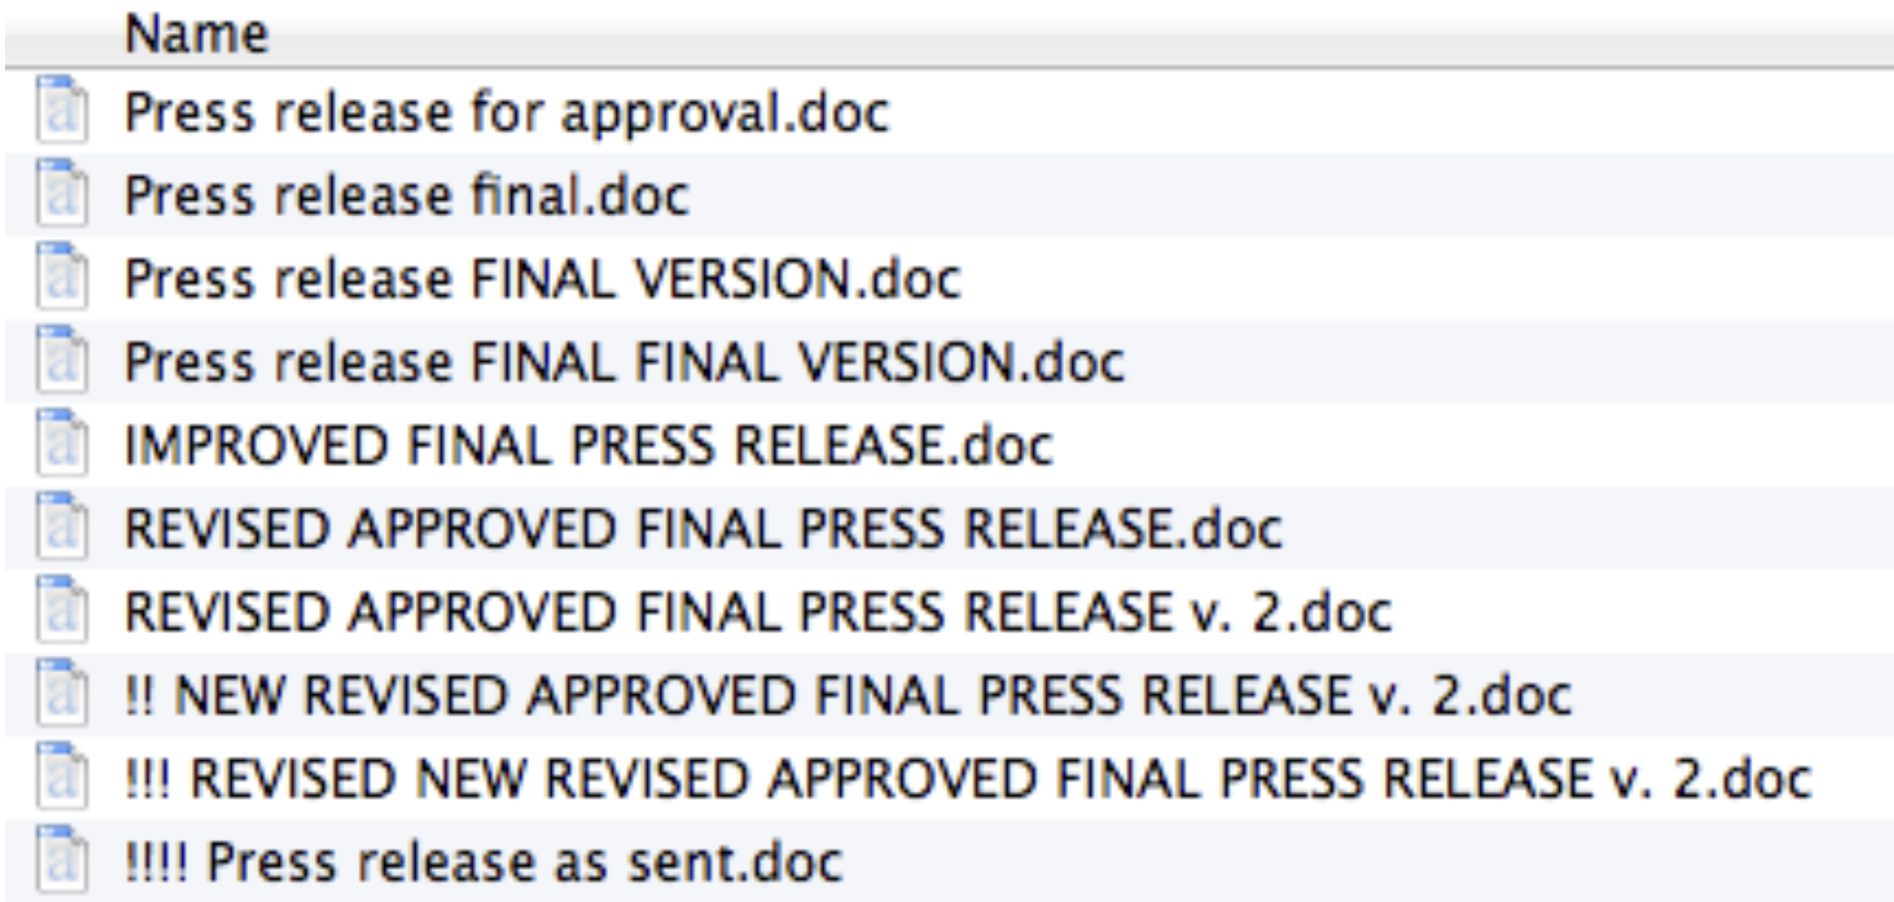
Have you ever saved final_v2_ACTUAL.docx? What problem were you solving?
The problem with "manual" version control
- Storage space (due to redundancy)
- Hard to see what changes were made when
- Hard to collaborate (merge, review)
The collaboration problem
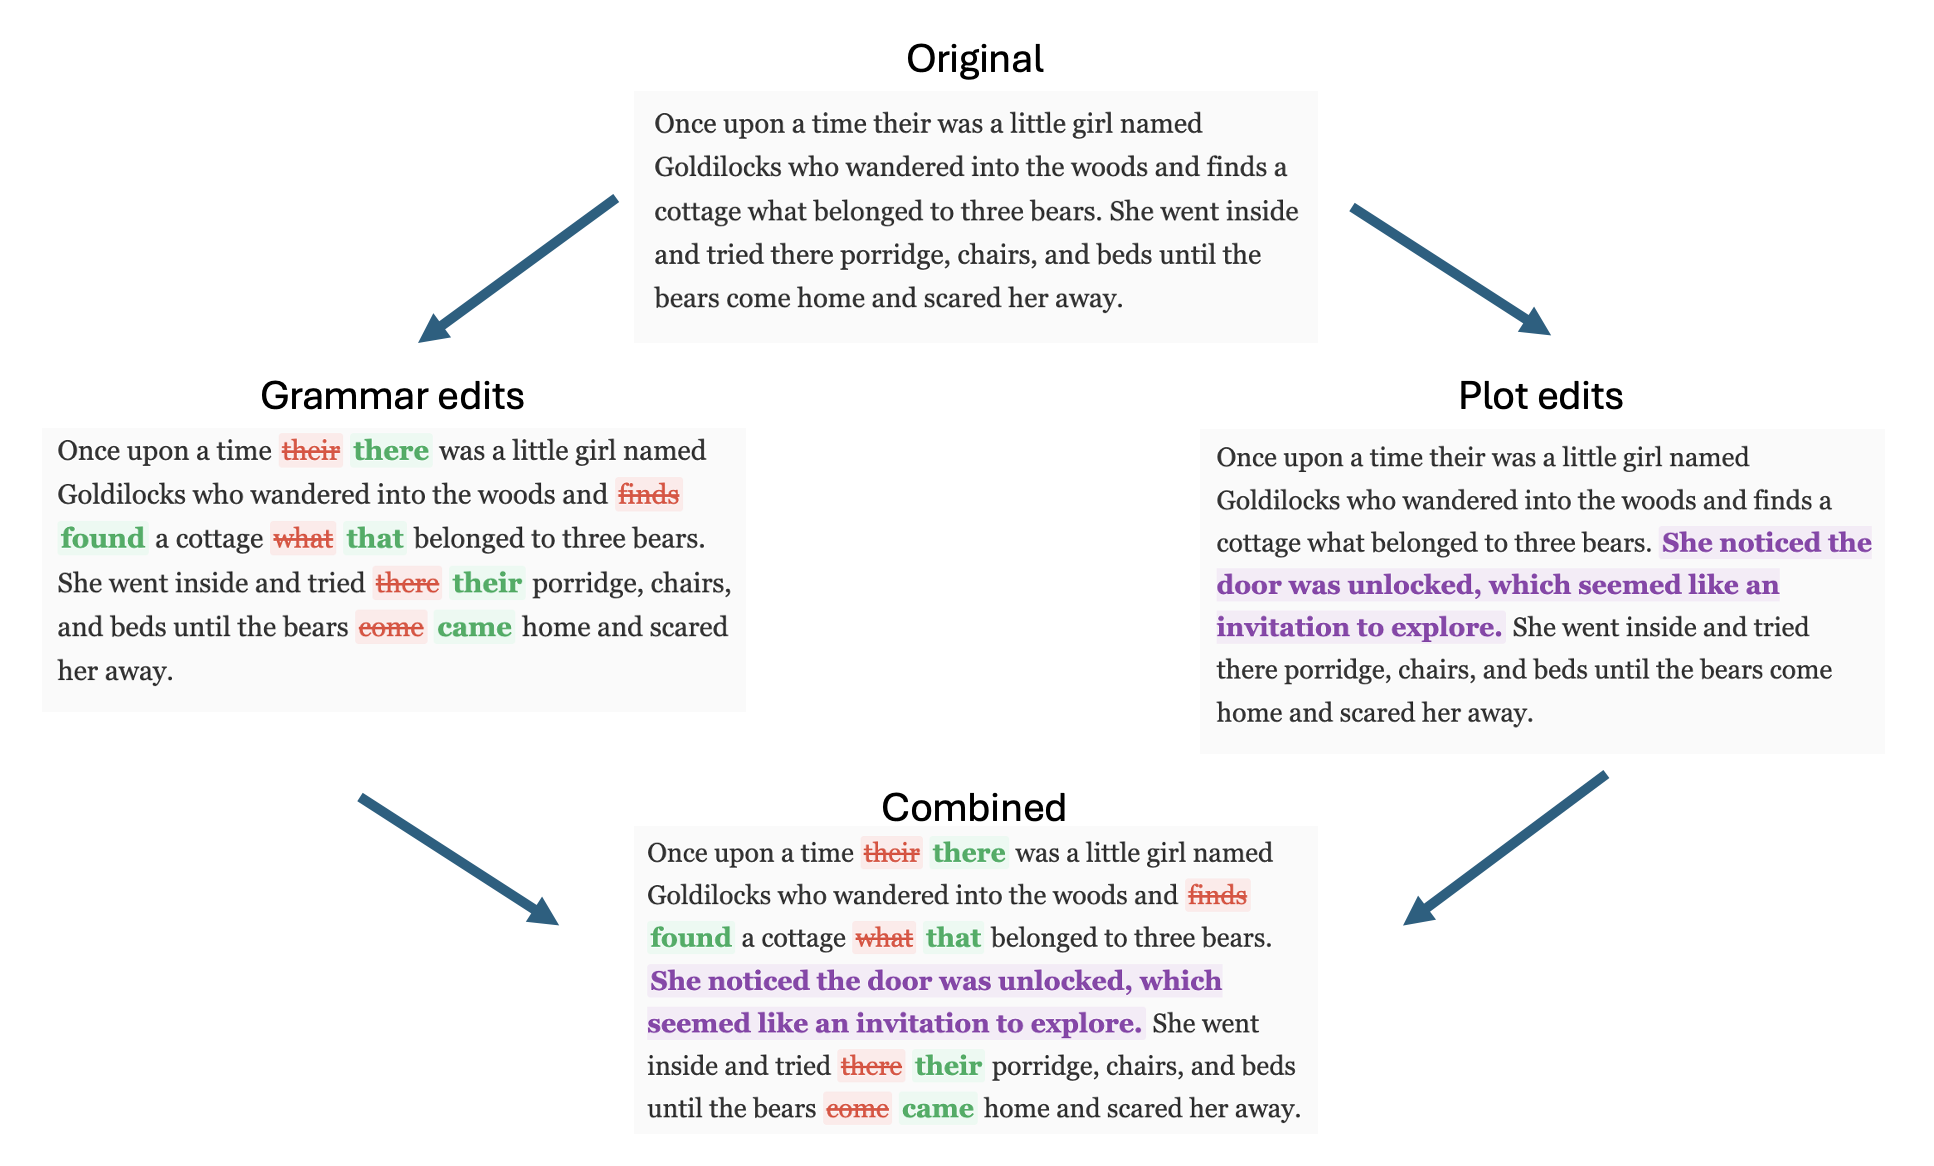
Learning Objectives
By the end of this lecture, you should be able to:
- Say why version control matters, and what it gives you that a folder of dated copies does not
- Configure git for first-time use
- Turn a project you already have into a repository, and clone one you don't
- See what you changed, and undo it
- Run the everyday loop:
status,add,commit,push - Connect a local repository to GitHub
This is a lot to take in at once, but we will be practicing and developing it ALL semester. Today we'll go over the loop you will run every day, and we'll talk about branches and merging on Monday.
One repo, two copies, and a staging area
Repository (repo). A project folder that git is tracking (your files plus their historical versions).
It can live in two places at once:
- Local is the copy on your laptop. This is the one you edit
- Remote is a copy hosted somewhere everyone can reach, usually on GitHub. Nobody edits this one directly
Most of your work happens locally. Only push and pull move work between the copies.
Staging: the batch you are about to save
Git does not save everything you changed. It saves what you chose.
Workspace. Your files as they are right now, mid-edit
Staging area. The batch you are assembling out of those edits
Commit. That batch, written into the project's history with a message on it
If you've ever looked at Google Doc histories, Google tries to detect periods of work automatically, but it never works quite right. This gives you control.
Staging is like attaching files to an email (kinda)
- Attaching the files is
git add. You pick what goes in. Attach the wrong file, take it off, attach a different one. Nothing is sent yet - The subject line is your commit message. It tells someone what is in here without making them open it
- Hitting send with your wifi off is
git commit. The batch is now a fixed record (an email in your outbox) but it hasn't actually left your machine yet - Connecting to wifi so your email goes out is like
git pushwhich sends your built-up commits up to GitHub for your collaborators to see
All analogies (like models) are wrong, but some are useful. With time and practice you'll get a feel for what these things really are and won't need the analogies anymore.
Git Workflows
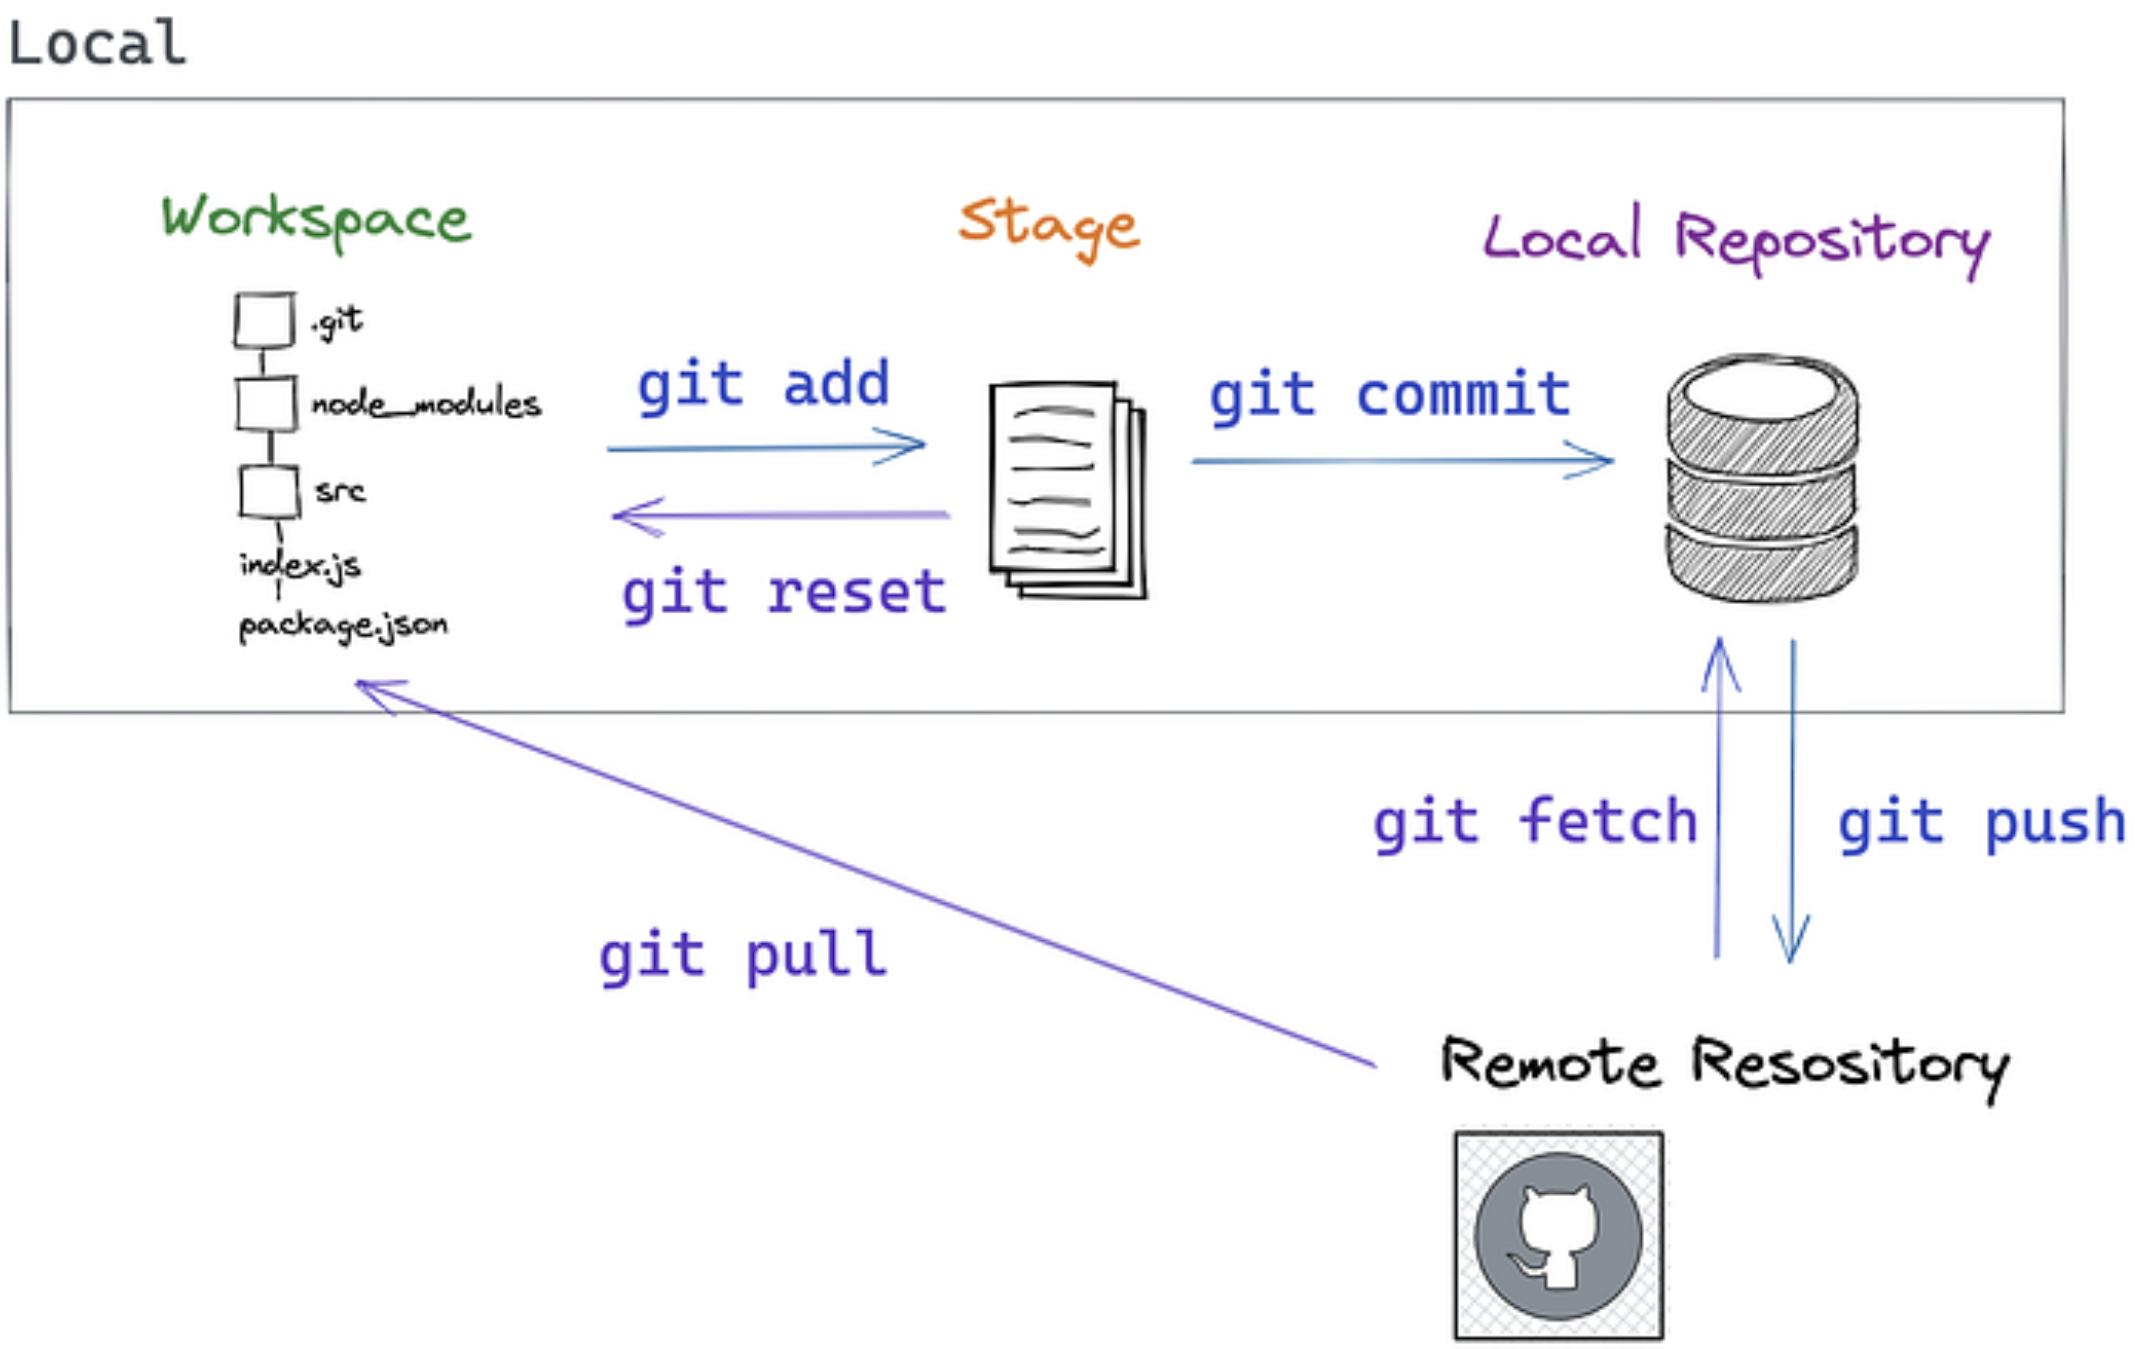
More git concepts
Commit: A snapshot of your project at a specific moment, with a message explaining what changed.
Diff: The collection of specific edits in a commit. (Or generally, the differences between any two versions of a file.)
Branch: One "timeline" of commits that may diverge from other timelines
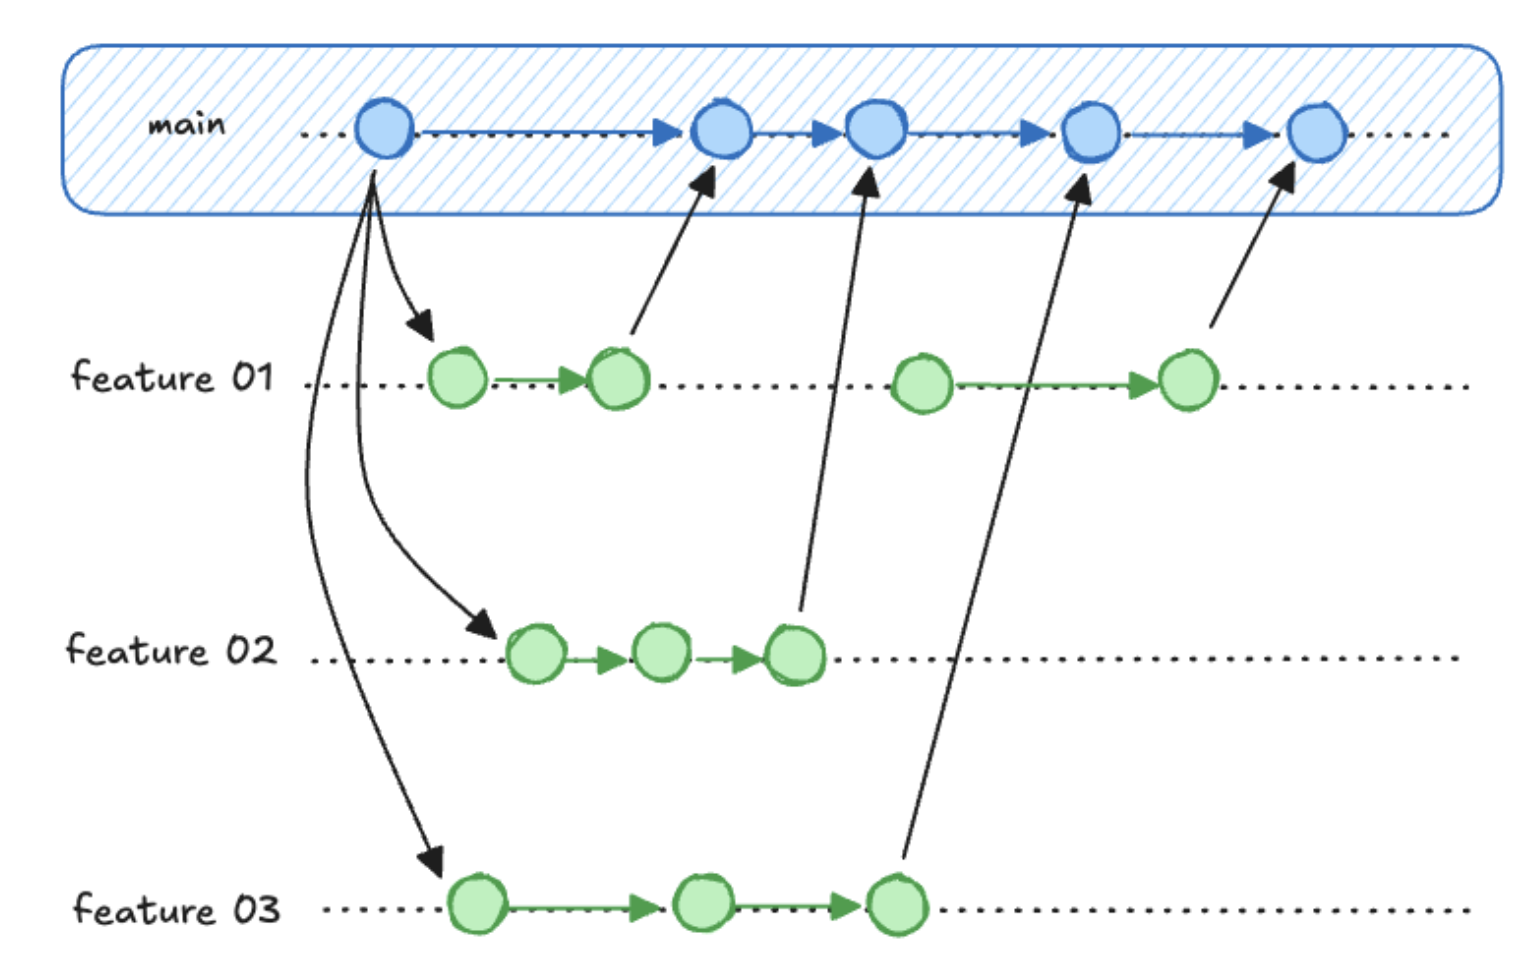
Not today. We come back to branching on Monday.
Essential Git Commands
One-Time Setup
You've done this already in discussion!
# Configure your identity (use your real name and email)
git config --global user.name "Your Full Name"
git config --global user.email "your.email@example.com"

# Set default branch name
git config --global init.defaultBranch main
Note: The community has moved away from
masteras the default branch name, but it may still be default in some installations.
Demo 1a: the project we made on Wednesday
Same command as Wednesday, so we start where you started:
cargo new hello_rust --vcs none
cd hello_rust
cargo run
ls -a          # your files, and no .git anywhere
Right now it is just a folder. Let's make it a repository.
git init       # now there's a .git folder. That IS the repository
git status     # everything is untracked, and look what showed up
Save a baseline, so there is something to compare against later.
git add src/main.rs Cargo.toml Cargo.lock   # notice what I am leaving out
git commit -m "Add the project cargo made in class"
git log
Demo 1b: change it, compare it, undo it
Now change one line in src/main.rs, and ask git what happened.
git status                 # now it says modified
git diff                   # here is exactly what I changed
That one is worth keeping, so it goes in the history the same way:
git add src/main.rs
git commit -m "Change the greeting to name the course"
git log                    # two commits now
Change it once more. This time we throw the change away.
git diff                   # the change is real
git restore src/main.rs    # and here is how I take it back
git status                 # main.rs is back, as if it never happened
Demo 2a: making a change stick
# make a real change, then
git status
git add src/main.rs        # move it to the staging area
git status                 # note that it says something different now
git commit -m "Pull the course name out into a variable"
git log                    # three commits now, yours on top

git push                   # ...and watch this fail
Demo 2b: there is nowhere to push to yet
git push cannot create a repository, so we will an empty one on GitHub first:
- Go to https://github.com/new
- Name your repo using your local folder's name (
hello_rust) keeps things simple - Choose public or private (I'll choose private)
- Leave README, .gitignore, and license off so that it starts truly empty
- Click Create repository. GitHub shows a page of commands with your URL already filled in
Then this should work
git remote add origin https://github.com/yourusername/repository-name.git
git push -u origin main
After that first push, plain git push is enough.
If you're missing a remote, git will throw an error and prompt the git remote add line line:
fatal: No configured push destination.
Either specify the URL from the command-line or configure a remote repository using

    git remote add <name> <url>
And if there's a renote but no tracked branch it will say:
fatal: The current branch main has no upstream branch.
To push the current branch and set the remote as upstream, use

    git push --set-upstream origin main
(git push -u origin main is just shorthand for git push --set-upstream origin main)
Where does everyone else's code come from?
What if you want to build upon someone else's code?
You can't edit it / push to it because you don't have write access
So you take a copy that is yours. That is a fork (or a template copy).
It's like when you get view-only access to a Google Doc and you can't edit it until you "make a copy".
A fork is your own copy of someone else's repository that you can edit. A template copy is like a fork but private and won't be used to push back to the upstream repo.
Projects are submitted by giving us the URL of your copy.
Fork copies sideways. Clone copies down.
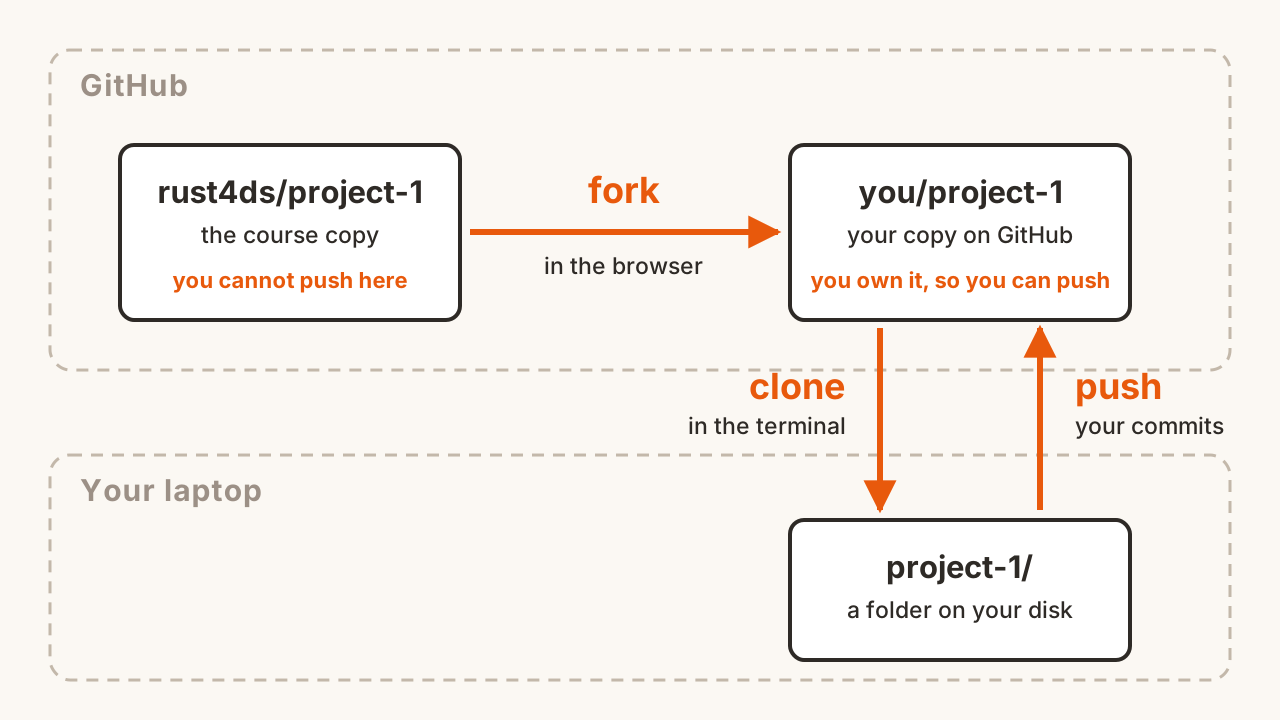
- Fork starts on GitHub, stays in GitHub
- Clone happens in the terminal. Your repo on GitHub becomes a folder on your laptop
Demo 1a went the other direction: a folder you already had became a repository. Cloning is how you start when the project already exists.
Cloning, which you do in the activity
git clone <the URL of your fork>
cd <the folder it just made>

ls -a            # .git is already here. You did not run git init
git remote -v    # and origin is already set. You did not add it
git log          # somebody else's history, now on your machine
Cloning does for you what we did by hand in Demos 1a and 2b. You never run git init, and you never add a remote.
git clone downloads to wherever you are, so run pwd before you clone and make sure that's where you want the project to live.
Writing Good Commit Messages
- Start with a present / imperative verb
- Be brief and specific
- If you find yourself using "and" a lot your commits are too big
The Golden Rule: Your commit message should complete this sentence: "If applied, this commit will [your message here]"
Good Examples:
git commit -m "Add input validation for calculator"
git commit -m "Fix division by zero error"
git commit -m "Refactor string parsing for clarity"
git commit -m "Add tests for edge cases"
Bad Examples:
git commit -m "fix a bug"        # What bug?
git commit -m "fix date range bug and added multi-user feature"  # Too much at once
git commit -m "trying again"    # What are you doing differently?
So about that target/ folder
You saw it in git status.
It holds thousands of files, up to hundreds of MB, and none of it is yours.
cargo build regenerates every bit of it from src/ and Cargo.toml.
So you don't want to keep track of it!
Anything in your repo you DON'T want tracked goes in a file called .gitignore:
target/
.DS_Store
.vscode/
.ipynb_checkpoints/
Then git status stops mentioning it and git add stops picking it up.
The rule: if a file can be regenerated, don't commit it. If you run git add and see a pile of files you don't recognize, it's time to update your .gitignore.
cargo new actually writes a .gitignore containing /target for you and runs git init unless you tell it not to. We told it not to (this time) so that you could see how it all works!
When a tool refuses, read what it says
Twice we saw git refuse to do something, but then it printed the exact command that fixed it.
This is why we love error messages!
Read the whole message before you change anything, and before you search. The answer is usually right in front of you.
Rust's compiler is the best example of this. Its errors are long because they are trying to help. We'll practice with this soon.
What we still owe you
Today was the loop you run every day, by yourself:
clone or init, change something, diff, add, commit, push
Still to come, starting Monday:
- Branches, so two people can work together without stepping on each other
- Merging, and what happens when git cannot figure it out for you
- Pull requests, which is how people review each other's code
You'll need merging for Project 1, and we recommend learning to use branches and PRs there too but won't require them until Project 2.
Getting unstuck
"What's going on??"
git status # use it until it's a reflex!
"I made a mistake in my last commit message"
git commit --amend -m "Corrected commit message"
"I want to undo a git add"
git restore --staged filename.rs
"I want to throw away changes I haven't committed yet"
git restore filename.rs        # one file
git reset --hard               # ALL uncommitted changes (CAREFUL!)
"I want to do something else"
git log    # shows commit history
git branch # shows available branches
Search and Stack Overflow are your friends here. So is git status, which is unusually good at telling you what to do next.
In-Class Activity: your first repository
Open your laptops and navigate to https://rust4ds.github.io/ds210-fa26-lectures/activities/activity_4.html for instructions.
Coming up
- Project 1 is out today. Checkpoint 1 is due Fri Sep 18, and today's activity is a head start
- Monday: reading, modifying, and breaking Rust. Also branches, merging, and what a merge conflict looks like
- Remember to complete the pre-lecture task for Monday!
Appendix: reference, not covered in lecture
We will go into git branching, merging, and pull requests more next lecture. Some notes here for your reference if you want a complete picture of git now.
Git Branching
-
Main branch: Usually called
main(ormasterin older repos) -
Feature branches: Created for new features or bug fixes
-
Isolates experimental work
-
Enables parallel development
-
Facilitates code review
Merging and Pull Requests
Merge: Combines changes from different branches. Takes commits from one branch and integrates them into another branch.
Merge Conflict: Merging may fail if both branches change the same lines. Git will point to the conflict and ask you to resolve it before finishing the merge.
Pull Request (PR): A request to merge your changes into another branch, typically used for code review. You "request" that someone "pull" your changes into the main codebase.
The branching workflow
# Create a descriptive branch name for the change you want to make
git checkout -b feature_branch

git status                   # See current state
git add filename.rs          # Add specific file to staging
git add .                    # Add all changes in current directory

git commit -m "Add calculator function"

git checkout main            # Switch back to main
git merge feature_branch     # Merge branch back into main
# merge merges the branch you NAME *into* the branch you're currently ON
Keeping in sync
cd repository

git pull    # get any changes from GitHub
git push    # send your commits to GitHub
git fetch is like git pull but stops short of merging what it downloaded. git rebase is an alternative to git merge with different history-rewriting behavior.
Resources for learning more and practicing
- Interactive online git tutorial that goes a bit deeper: https://learngitbranching.js.org/
- A downloadable app with tutorials and challenges: https://github.com/jlord/git-it-electron
- Another good tutorial (examples in Ruby): https://gitimmersion.com/
- Pro Git book (free online): https://git-scm.com/book/en/v2
Lecture 5 - Start to finish: build, break, fix

Announcements:
Three tools, one workflow
- The shell (Lecture 2), to move around and run things
- Rust and Cargo (Lecture 3), to build a program
- Git (Lecture 4), to keep its history
Today we walk through using all three together, start to finish, to see how they work together (and fit in a bit of review)
The loop
Everything you do for the rest of this course is some version of this:
- Write a little
cargo run- Notice it doesn't compile!
- Read what the compiler said
- Fix it
cargo runand it works!cargo testand it passes the tests!git add .,git commit -m "..."git pushso work is saved
Step 3 is not failure. It is the normal state (SNAFU), and today we'll learn to love those errors (at least a little)
Learning objectives
By the end of this lecture, you should be able to:
- Start from scratch and make a rust program with history: make it, run it, break it, fix it, commit it, push it
- Read a Rust compiler error: find the code, the line, and the suggested fix, and know that the fix does not always belong on the line the error names
- Know the shell, git, and cargo commands you are responsible for
- Make a branch, open a pull request, and merge it back
- Undo a bad commit with
git revert, and say why that is safer than deleting it from history
What you're accountable for
The shell commands you should know
Move around and look:
pwdls(plusls -aandls -l)cd(pluscd ..andcd ~)catwhich
Make and change things:
mkdir,touch,cp,mv,rm(andrm -rf)echo "some words" >> filename.txtas a way to append text to a filenano
The git commands you should know
Starting a repository:
git init- The concept of
git clone(you'll usually copy the command from github)
The everyday loop:
git status,git add,git commit -m,git push,git pull
Looking at what changed:
git log,git diff
Fixing things
git restore,git revert
Working with other people:
git branch,git checkout,git merge
Cargo and rustc
cargo newcargo build,cargo run,cargo checkcargo testcargo run --releaserustc
Let's practice!
The program from Wednesday (with a bug)
fn main() {
    let scores = vec![85, 92, 78, 96];
    scores.push(88);

    let total: i32 = scores.iter().sum();
    let average = total as f64 / scores.len() as f64;

    if average >= 90.0 {
        println!("Excellent! Average: {:.1}", average);
    } else if average >= 80.0 {
        println!("Good work! Average: {:.1}", average);
    } else {
        println!("Keep trying! Average: {:.1}", average);
    }
}
Notes:
Breaking down the compiler error
error[E0596]: cannot borrow `scores` as mutable, as it is not declared as mutable
 --> src/main.rs:3:5
  |
3 |     scores.push(88);
  |     ^^^^^^ cannot borrow as mutable
  |
help: consider changing this to be mutable
  |
2 |     let mut scores = vec![85, 92, 78, 96];
  |         +++
Every compiler error has the same five parts:
- An error code, like
E0596. You can look it up:rustc --explain E0596(or google it!) - A one-line summary of what is wrong
- Where it happened, as
file:line:column - Your code, with a caret pointing at the exact spot
- Usually, a suggested fix
Rust's error messages are unusually good. They are long because they are trying to help!
Demo: let's fix it (and break it again)
Notes:
Commit when something works, not when you take breaks. Let it feel like a little celebration, patting yourself on the back for building or fixing something.
Now the fun part: how to get ourselves out of trouble
But now if we...
cargo run
Oh no! We saved a bug in our last commit and we kept going! Let's find what went wrong
git log --oneline # find the commit that did it
How do we "undo a commit"? It's safer not to... instead we
git revert a1b2c3d
This makes a new commit that undoes what that old commit did. The bad commit stays in the history, and so does the fact that you undid it.
Why we do this:
- Your history stays honest
- It won't collide with someone else's work
(Yes there is a way to truly delete a commit, git reset --hard, but it's generally not best practice so you don't need to learn it)
A branch is somewhere to work without breaking main
main is the version that works. A branch is a second timeline where you can make a mess.
git branch                          # which branches exist, and where you are
git checkout -b add-letter-grades   # make one and switch to it
# edit, cargo check, commit as usual
git push -u origin add-letter-grades
Nothing you do on the branch touches main until you ask for it.
You'll get hands-on practice with branching this week in discussion!
A pull request is how you ask to bring it back
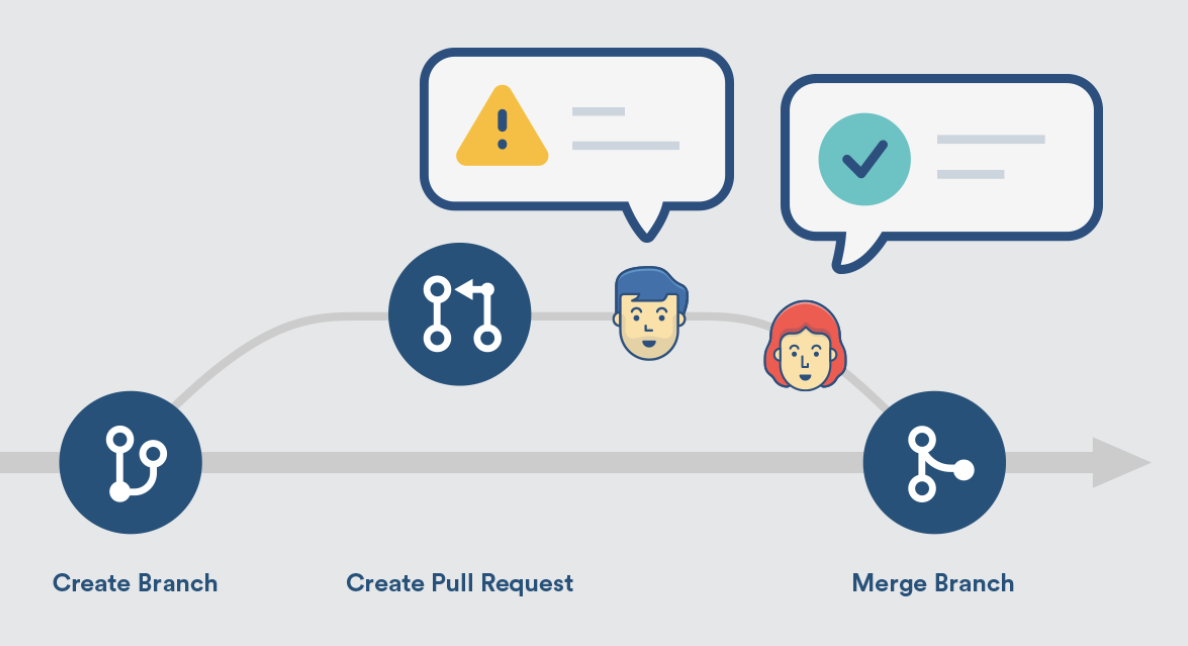
On GitHub, open a pull request from your branch into main:
- It shows the diff. Exactly what would change, nothing hidden
- Somebody reads it and comments (this is why we do it!)
- When everyone is happy, merge, and the branch's commits join
main - Back in the terminal:
git checkout main, thengit pull
Let's try it.
Working with AI without wasting the semester
Your guesses to the mystery question:
How to code with AI and still learn something
Imagine you're learning French and typing your first awkward essay. Every time you start typing a sentence, something completes it for you, perfectly, with flawless grammar.
What are you learning?
You've learned how to use autocomplete. You are not learning French.
How would you use AI or other tools to learn a language?
(A few volunteers?)
Where AI hurts you in this course
You are here to learn Rust, and systems, and data science, not autocomplete.
So my number one suggestion is... Turn off autocomplete.
It stops you from being uncomfortable. It stops you from struggling.
Discomfort is what learning feels like. So it stops you from learning.
(Like exercise!)
Actionably:
- Turn off copilot suggestions (VS Code ships with that on!) (click on the robot in the bottom right and hit "disable completions")
- Tell your AI (Cursor, Claude Code, Copilot) to answer your questions but not edit your file directly
Where AI helps you in this course
Good places to use it:
- "What does this compiler error mean?"
- What's the name of the function that does x?
- Do you have feedback on how I wrote this? once it already works
- "Explain this concept a different way" when lecture wasn't enough
In every case you did some thinking first and you can tell whether the answer is any good. You won't blindly accept a bad answer
A workflow that actually works
- Think on paper. What is this supposed to do? What are the steps?
- Write the steps out in plain English, in comments, before any Rust (this is called "pseudocode")
- Write what you can.
- Then ask for help with the specific thing you're stuck on
- Read the answer until you could have written it. If you can't, ask about what you don't understand
Remember, for code review, you need to be able to explain everything you wrote!
In-Class Activity: compiler error hunt
So we're going to hold back on some tools for this one.
Install still not working? You can still do the activity
The Rust Playground compiles and runs Rust in your browser. Nothing to install, nothing to configure.
It is not a substitute for a real setup, and you will need one for Project 1. But we'll often use this for activities because:
- It's faster to get started
- It doesn't have rust-analyzer
Instructions
Working in pairs, in the Rust Playground ^
Program and instructions: https://rust4ds.github.io/ds210-fa26-lectures/activities/activity_5.html
- Paste the program in and Run it, so you know it works to start with
- Make one change at a time that breaks it. Misspell, delete, reorder, change a type
- Run it and read what comes back
- Write it on your half sheet: what you changed, and what the compiler said
- Undo it, and break it a different way
Goal: at least 8 different errors. There is room for 12 on your sheet if you get on a roll.
Debrief
-
Which error was the most confusing?
-
Which error message was the most helpful?
-
Did any errors surprise you?
-
Anything you thought would produce an error that didn't?
-
Let's make a list together. How many did we find?
Coming up
- Discussion this week is git practice: branches, merging, and what to do when git cannot merge two changes by itself
- Wednesday: variables and types. We start writing our own Rust rather than editing someone else's
- Project 1 checkpoint 1 is due Friday
Lecture 6 - Variables: types and their properties
Announcements
Learning Objectives
By the end of this lecture, you should be able to:
- Use the
mutkeyword and shadowing withletto modify variables - Declare constants using
const - Understand Rust's basic types and their sizes (ints, floats,
bool,char,&str) - Use type annotation (with
let), type conversion (as), and type inference - Work with boolean values using comparisons (
==,!=,<,>=) and logical operators (&&,||,!)
Variables and Mutability
Variables are by default immutable!
Let's try this and then fix it.
fn main(){
    let x = 3;
    x = x + 1;
    println!("{x}")
}
Why can't we do this now?
fn main(){
    let mut x = 3;
    x = 9.5;
    println!("{x}")
}
One way to fix - Variable shadowing: new variable with the same name
fn main(){
    let solution = "4";
    let solution : i32 = solution.parse()
                        .expect("Not a number!");
    let solution = solution * (solution - 1) / 2;
    println!("solution = {}",solution);
    let solution = "This is a string";
    println!("solution = {}", solution);
}
Variables vs Constants
Sometimes you need values that never change and are known at compile time:
#![allow(unused)]
fn main() {
const MAX_PLAYERS: u32 = 100;
const PI: f64 = 3.14159;
const GREETING: &str = "Hello, world!";
}
Constants:
- Are always immutable (no
mutallowed) - Use
constinstead oflet - Must have explicit types
- Named in
ALL_UPPERCASEby convention - Can be declared in any scope (including global)
- Must be computable at compile-time (so typically hard-coded)
When to use constants vs variables:
- Constants: Mathematical constants, configuration values, limits
- Variables: Data that might change or is computed at runtime
Types
Integers and Binary representations
Representing 13:
- In decimal (base 10): 13 = 1×10¹ + 3×10⁰
- In binary (base 2): 1101 = 1×2³ + 1×2² + 0×2¹ + 1×2⁰ = 8 + 4 + 0 + 1 = 13
For example, the number 13 in binary is 1101:
Binary:   1 1 0 1
Position: 3 2 1 0
2x^n:     8 4 2 1
Value:    8 4 0 1  → 8+4+1 = 13
T/P/S - What's the largest integer we can represent with 4 binary digits?
Bits and bytes
- Bit: The smallest unit of data in computing - can store either 0 or 1
- Byte: A group of 8 bits, which can represent 2⁸ = 256 different values (0-255)
- Computers typically address memory in byte-sized chunks
- (In sizes like "16 GB of RAM" GB refers to "gigaBYTES" not gigaBITS)
So what are ints, under the hood
Unsigned integers are stored in binary format.
But (signed) integers are stored in two's complement format, where:
- if the number is positive, the first bit is 0
- if the number is negative, the first bit is 1
To calculate the two's complement of a negative number, we flip all the bits and add 1.
Let's try it:
// binary representation of 7 and -7
println!("{:032b}", 7);
println!("{:032b}", -7);
Why Two's Complement?
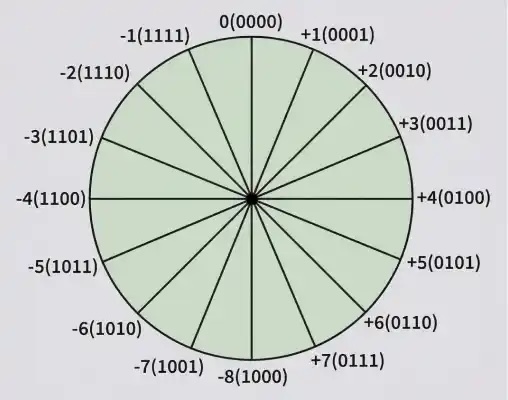
Integers come in all shapes and sizes
- unsigned integers:
u8,u16,u32,u64,u128,usize(architecture specific size, default for.len())- from to
- signed integers:
i8,i16,i32(default),i64,i128,isize(architecture specific size)- from to
These numbers (like u16) refer to bits, not bytes!
Different types don't play nice together
fn main(){
    let x : i16 = 13;
    let y : i32 = -17;
    println!("{}", x * y);   // will not work
    // println!("{}", (x as i32)* y);
}
if you need to convert, use the as operator
Be careful with math on ints
u8 is 8 bits and can store maximum value 2^8 - 1 = 255.
If we multiply: .
How many bits do we need to store this value? We can take the log base 2 of the value.
fn main(){
    let a: u8 = 255;
    let product = a as u32 * a as u32; // why u32? let's change it!

    println!("{} * {} = {}", a, a, product);
    println!("log base 2 is {}", (product as f64).log2());
}
So we need 16 bits to store the product of two u8 values.
In general when we multiply two numbers of size bits, we need bits to store the result.
Types - Floats
Why are they called floats?
- Two kinds:
f32andf64(default) - What do these mean?
Sizes of floats
#![allow(unused)]
fn main() {
println!("F32 min is {} max is {}", f32::MIN, f32::MAX);
println!("F32 min is {:e} max is {:e}", f32::MIN, f32::MAX);
println!("F64 min is {:e} max is {:e}", f64::MIN, f64::MAX);
}
Why these sizes?
f32: 1 sign bit + 8 exponent bits + 23 significance bitsf64: 1 sign bit + 11 exponent bits + 52 significance bits
You don't always have to write the type, but there is always a type
fn main(){
    let count = 42;
    let price = 19.99;
    let name = "DS210";

    println!("{count}, {price}, {name}");
}
Nothing here says i32, f64 or &str.
Each of those vars has exactly one though, decided at compile time.
Rust (often) works out types from the value and what you do with it later.
When it can't it will let you know (with an error).
Your editor will tell you what Rust worked out
rust-analyzer writes the type in next to each let, greyed out, as though you had typed it yourself.
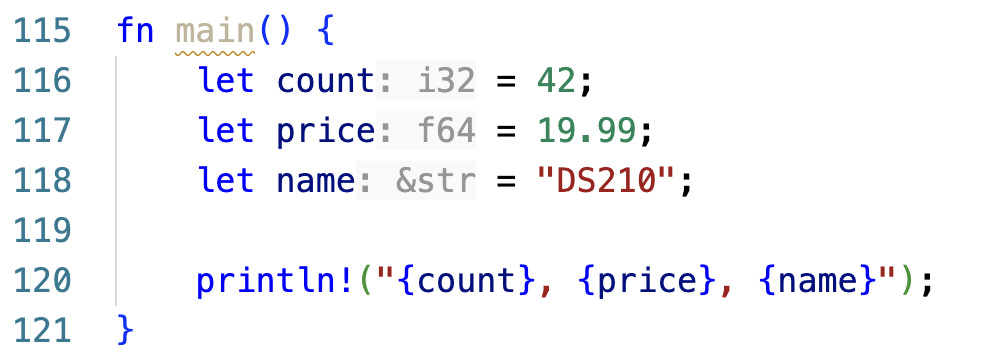
Floats and Rust's type inference system
fn main(){
    let x:f32 = 4.0;
    let y:f32 = 4; // Will not work.  It will not autoconvert for you.

    let z = 1.25; // won't get automatically assigned a type yet

    println!("{:.1}", x * z);

    //println!("{:.1}", (x as f64) * z);
}
Two ways to put a variable in println!
#![allow(unused)]
fn main() {
let name = "Ada";
let age = 20;

println!("{} is {}", name, age);  // separate arguments, filled in order
println!("{name} is {age}");      // the name goes inside the braces
}
Both print Ada is 20. You'll see both styles.
Only a plain variable name fits inside the braces. For anything else, use {} and pass it separately:
println!("{age + 1}");            // compiler error
println!("{}", age + 1);          // fine
Formatting in println!
You can control how numbers are displayed using format specifiers:
#![allow(unused)]
fn main() {
let total = 21.613749999999997;
let price = 19.99;
let big_number = 1_234_567.89;
let small_number = 0.000123;
let count = 42;

// Float formatting
println!("Default: {}", total);         // Default: 21.613749999999996
println!("2 decimals: {:.2}", total);   // 2 decimals: 21.61
println!("Currency: ${:.2}", price);    // Currency: $19.99

// Scientific notation
println!("Scientific: {:e}", big_number);    // Scientific: 1.23456789e6
println!("Scientific: {:.2e}", small_number); // Scientific: 1.23e-4

// Integer formatting
println!("Default: {}", count);         // Default: 42
println!("Width 5: {:5}", count);       // Width 5:    42
println!("Zero-pad: {:05}", count);     // Zero-pad: 00042
println!("Binary: {:b}", count);        // Binary: 101010
println!("Hex: {:x}", count);           // Hex: 2a
}
We won't expect you to memorize those - if you need them on an exam we'll give them to you in an appendix!
Mini-Quiz
Take a minute to talk to a partner about what these do, then I'll call on you
cargo new my_projectcargo checkgit add .rustc hello.rsgit pullcargo run --releasegit commit -m "fix bug"
Types - Booleans (and logical operators)
booluses one byte of memory (why not one bit?)
#![allow(unused)]
fn main() {
let x = true;
let y: bool = false;

println!("{}", x && y); // logical and
println!("{}", x || y); // logical or
println!("{}", !y);    // logical not

}
FYI there are "bitwise" operators that use single symbols (& and |) and also do binary arithmetic... but you won't need them. Just remember to use double && and || by default!
Comparisons give you a bool
#![allow(unused)]
fn main() {
let age = 20;

println!("{}", age == 20);             // equal
println!("{}", age != 21);             // not equal
println!("{}", age >= 18 && age < 21); // combine them with && and ||
}
Also <, >, <=, >=, same as Python.
= sets a value, == asks a question. if age = 20 gives a compiler error.
One more shortcut, also the same as Python:
#![allow(unused)]
fn main() {
let mut count = 0;
count += 1;   // same as count = count + 1
count -= 1;   // same as count = count - 1
}
(but Rust doesn't have count++)
Types - Characters
chardefined via single quotes, uses four bytes of memory (that's how many bits?)- For a complete list of UTF-8 characters check https://www.fileformat.info/info/charset/UTF-8/list.htm
#![allow(unused)]
fn main() {
let x: char = 'a';
let y = '🚦';
let z = '🦕';

println!("{} {} {}", x, y, z);
}
Try Control-Command-Space (Mac) or Windows-Key + . (Windows) to add emojis anywhere!
Types - Strings
- A string slice (
&str) is defined via double quotes - A
String(with a capital S!) is something different - We'll talk a lot more about the difference later. Until then, you'll primarily use
&strand we'll try to steer you away from trouble.
fn main() {
    let s1 = "Hello! How are you, 🦕?";  // type is `&str`
    let s2 : &str = "Καλημέρα από την Βοστώνη και την DS210";  // here we make the type explicit

    println!("{}", s1);
    println!("{}\n", s2);

    // This doesn't work.  You can't do String = &str
    //let s3: String = "Does this work?";

    let s3: String = "Does this work?".to_string();
    println!("{}", s3);
    let s4: String = String::from("How about this?");
    println!("{}\n", s4);
    let s5: &str = &s3;
    println!("str reference to a String reference: {}\n", s5);

    // This won't work.
    // println!("{}", s1[3]);
    // println!("{}", s4[3]);

    // But you can index this way.
    println!("4th character of s1: {}", s1.chars().nth(3).unwrap());
    println!("3rd character of s3: {}", s4.chars().nth(2).unwrap());
}
Activity time!
Tear off the last sheet in your packet. Instructions are there.
You can work in small groups but EACH person needs to fill in a sheet.
Make hypotheses for everything before breaking out laptops to test!
Lecture 7 - Functions: parameters, returns, and expressions
Announcements
Learning Objectives
By the end of this lecture, you should be able to:
- Write function signatures including parameter names, types, and return types
- Return more than one value from a function by returning a tuple
- Create functions that return the unit type
()for side-effect-only operations - Explain the difference between an expression and a statement in Rust
- Pass parameters into functions via copying, borrowing, and passing ownership
Function Syntax
We've seen a few examples like this:
#![allow(unused)]
fn main() {
fn my_age_in_5_years(age: i16) -> i16 {
    let new_age = age + 5;
    return new_age;
}
}
General function template:
#![allow(unused)]
fn main() {
fn function_name(arg_name_1:arg_type_1,arg_name_2:arg_type_2) -> type_returned
  // ^ This part is the "function signature"

{
    // Do stuff
    // return something
}
 // ^ This part is the "function body" and can be a statement or expression inside
}
Where you put it does not matter. Rust sees every fn in the file wherever it sits, so main can call a function written below it (couldn't in Python!)
The signature is the function's "promise"
#![allow(unused)]
fn main() {
/// Returns the distance between two points on a line.
fn distance(a: f64, b: f64) -> f64 {
    (a - b).abs()
}
}
The signature tells you what goes in and what comes out.
The /// above it is called a "doc comment" or "docstring" and it tells you what the function is for. (Your editor keeps the /// going when you press Enter)
Naming a function is naming its contract. If you can't keep it brief, the function is probably doing more than one job!
You will run into other comment-looking things in Rust code: /* */, /** */, //!. You don't need any of them in this course, and you can look them up if you see them.
Statements and expressions
Just as in math when we have:
- expressions like ()
- and equations like ()
In rust we have expressions and statements
- Expressions simplify to a value (like a math expression)
- Statements do things but don't simplify to a value (kind of like an equation?)
So -
y + 2is an expressionlet x = y + 2;is a statement
Statements and expressions can be nested
let x = y + 2; is a statement BUT it INCLUDES y + 2 which is an expression
The reverse is also true - we can build complex expressions that include statements
#![allow(unused)]
fn main() {
let y = {
    let x = 2 * 3;
    x
};
}
A statement or expression - shout it out
let x = 5;                  // Statement or expression?
x + 2                       // Statement or expression?
println!("hello");          // Statement or expression?
my_function(5)              // Statement or expression?

let y = x + 2;              // Statement or expression?
{
    let z = 10;             // Statement or expression?
    z * 2                   // Statement or expression?
}                           // Statement or expression?

return x + 5;               // Statement or expression?

let x = {
    println!("doing work"); // Statement or expression?
    42                      // Statement or expression?
};                          // Statement or expression?
Maybe it was too easy to cheat because...
- Statements always end with semicolons
- Expressions never end with semicolons
So {} blocks are expressions too. They evaluate to their final line, as long as it has no semicolon.
Adding a semicolon turns an expression into a statement
fn main(){
    let a = {
        let x = 10;
        x + 5       // Expression
    };
    println!("{}",a);

    let b = {
        let x = 10;
        x + 5;      // Statement
    };
    println!("{:?}",b);
}
That little {:?} makes things that don't normally print, print anyway! It's called "debug printing" and we'll see it more later.
Let's look at return again now
We have two ways of returning from a function:
#![allow(unused)]
fn main() {
fn my_age_in_5_years(age: i16) -> i16 {
    let new_age = age + 5;
    return new_age;
}
}
We can also:
#![allow(unused)]
fn main() {
fn my_age_in_5_years(age: i16) -> i16 {
    let new_age = age + 5;
    new_age
}
}
T/P/S - Why are these effectively the same thing? (Hint: think about expressions and statements)
Returning more than one thing
A function returns one value. But that one value can be a tuple, which groups several values together:
/// Returns the smallest and largest of three numbers.
fn min_max(a: i32, b: i32, c: i32) -> (i32, i32) {
    let smallest = a.min(b).min(c);
    let largest = a.max(b).max(c);
    (smallest, largest)
}

fn main() {
    let (lo, hi) = min_max(14, 3, 27);
    println!("range: {} to {}", lo, hi);
    let t = min_max(14, 3, 27);
    println!("range: {} to {}", t.0, t.1);
    println!("{:?}", t);
}
(i32, i32) is the return type: two integers, in that order.
Then we can unpack with let (lo, hi) = ... to split it back into two names.
You can reach into a tuple by position with .0 and .1, and {:?} prints the whole tuple at once.
But what happens if you don't return anything?
fn say_hello(who:&str) { // no -> return_type here
                         // vs fn say_hello(who:&str) -> () {
    println!("Hello, {}!",who);
}

fn main() {
    say_hello("world");
    say_hello("Boston");
    say_hello("DS210");

    // let z = say_hello("DS210");
    // println!("The function returned {:?}", z)
}
Functions that return no value
Functions that don't return or end in an expression return "the unit type" ()
() is an empty tuple that takes no memory (think of an empty set!)
This lets us have "side-effects only" functions that perform actions (printing, file I/O, etc.)
Pure, or side effects?
#![allow(unused)]
fn main() {
// Pure: same inputs, same answer, and nothing else happens
fn add(x: i32, y: i32) -> i32 {
    x + y
}

// Side effect: it also prints, and the signature does not tell you that
fn add_and_print(x: i32, y: i32) -> i32 {
    let result = x + y;
    println!("{} + {} = {}", x, y, result);
    result
}
}
A pure function is easier to test and easier to trust, because nothing outside it changes.
Both are fine. Just know which one you are writing.
Passing parameters
Here's where we get a preview of the memory stuff we'll really digest later.
3 ways to pass parameters
- Copying a parameter (default for
i32,bool,f64, other basic types) - Take ownership of a parameter (so it can change) (default for
String, other complex types) - Borrowing a parameter (to "peek" at it) (
&str,&i32)
Examples:
#![allow(unused)]
fn main() {
fn greet_person(first_name: String, last_name: &str, age: u32) {
    // first_name now OWNS what was passed to it
    // last_name is BORROWING what was passed to it
    // age COPIED what was passed to it
    println!("Hello, {} {}! You are {} years old.",
             first_name, last_name, age);
}
}
We'll talk a lot more about owning vs borrowing later. For now, some simple rules to get started:
Quick Rules for Beginners:
- Use
&strfor string parameters - Basic types like
i32,f64,boolare automatically copied - no worries there - Use
&before the parameter type when you don't need to modify it - If Rust complains about ownership, try following its suggestion or adding
& - You typically can't use a reference (
&) in a return value - that's why you'll seeStringas a return type more often than&str
Examples:
fn print_name(name: &str) { /* name is borrowed - original still usable */ }
fn calculate_area(width: f64, height: f64) -> f64 { /* both copied */ }
Just enough if to get through the activity
We've glossed over this so far. Here is the shape of it, and we do branching properly next lecture.
Syntax:
if condition {
    //
} else if other_condition {
    //
} else {
    //
}
else ifandelseparts optional
Bringing it together with expressions
You can even use conditional expressions as values!
Python:
z = 100 if x == 7 else 200
Rust:
#![allow(unused)]
fn main() {
let x = 4;
let z = if x == 7 {100} else {200};
println!("{}",z);
}
// won't work
fn main(){
    let x = 4;
    println!("{}",if x == 7 {100} else {1.2});
}
Activity time!
We'll have our first hand-coding practice session!
You can work next to someone but write out your own sheet.
If you worked with someone, swap with someone else for feedback.
We'll go over answers at the end or start of next class.
Lecture 8 - Control flow: branching and looping
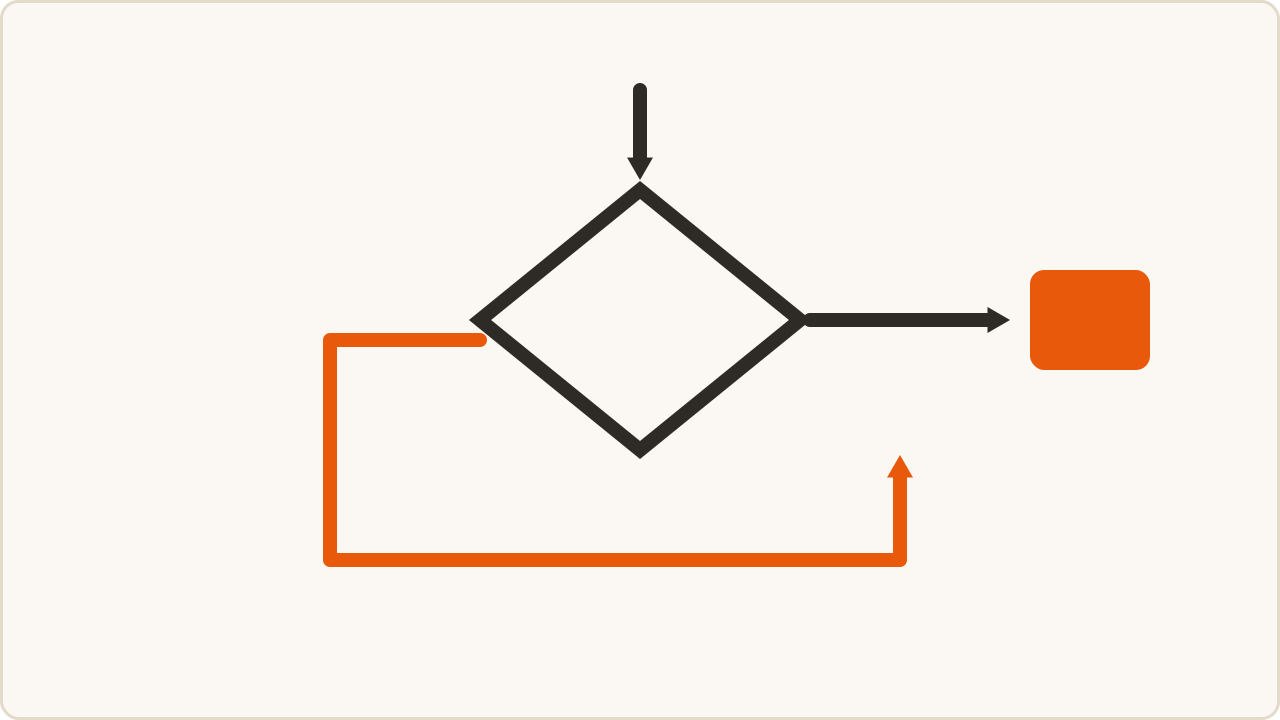
Announcements
Learning Objectives
- Write
if/else if/elsebranches and early returns - Use
while,for,loop,break, andcontinue - Use
forloops with ranges (..and..=) - Use
.iter()and.iter().enumerate()to loop over an array - Create and work with fixed-size arrays
- Choose appropriate loop types based on use case requirements
Three rules for branching with if
You probably already do these two:
- Indent each block. Rust doesn't need the whitespace to run, but people need it to read. Your editor will mostly take care of it. (Unless you're doing the all-on-one-line trick)
- Use
else ifrather than anifnested inside anelse
if x == 7 {
    let z = 100;
} else {
    let z = 200;
}
or
let z = if x == 7 {100} else {200};This one takes some explaining:
- Keep nesting shallow. When it makes sense, return early, or move a branch into its own function
Checking inputs with nested if
#![allow(unused)]
fn main() {
/// Returns the score as a percentage, or -1.0 if the inputs don't make sense.
fn percent(points: f64, max_points: f64) -> f64 {
    if max_points > 0.0 {
        if points >= 0.0 {
            if points <= max_points {
                points / max_points * 100.0
            } else {
                println!("Invaid");
                -1.0
            }
        } else {
            println!("Invalid");
            -1.0
        }
    } else {
        println!("Invalid");
        -1.0
    }
}
}
Same checks, returning early
/// Returns the score as a percentage, or -1.0 if the inputs don't make sense.
fn percent(points: f64, max_points: f64) -> f64 {
    if max_points <= 0.0 {
        println!("Max points must be positive");
        return -1.0;
    }
    if points < 0.0 {
        println!("Points can't be negative");
        return -1.0;
    }
    if points > max_points {
        println!("More points than the max");
        return -1.0;
    }
    points / max_points * 100.0
}

fn main() {
    println!("{}", percent(45.0, 50.0));
    println!("{}", percent(55.0, 50.0));
}
Each check gets its own if, with its message right under it. Once you're past all of them, the inputs are good.
Your turn: clean this up
#![allow(unused)]
fn main() {
// This is technically valid but TERRIBLE code please DO NOT DO THIS
let x = 4;
let result = if x > 0 {
    if x < 10 {
        let temp = x * x;
        let bonus = if temp > 10 { 5 } else { 2 };
        temp + bonus
    } else {
        let factor = x / 2;
        if factor > 3 {
            factor * 3
        } else {
            factor + 1
        }
    }
} else {
    0
};
println!("Result: {}", result);
}
T/P/S - How would you rewrite this so it's easier to read?
One way: return early, like the percent example.
#![allow(unused)] fn main() { fn result_for(x: i32) -> i32 { if x <= 0 { return 0; } if x < 10 { let temp = x * x; let bonus = if temp > 10 { 5 } else { 2 }; return temp + bonus; } let factor = x / 2; if factor > 3 { factor * 3 } else { factor + 1 } } }
Another way: give each branch its own function, so the top-level function is just a short else if chain.
#![allow(unused)] fn main() { fn small_result(x: i32) -> i32 { let temp = x * x; let bonus = if temp > 10 { 5 } else { 2 }; temp + bonus } fn large_result(x: i32) -> i32 { let factor = x / 2; if factor > 3 { factor * 3 } else { factor + 1 } } fn result_for(x: i32) -> i32 { if x <= 0 { 0 } else if x < 10 { small_result(x) } else { large_result(x) } } }
Looping
In P1CP2 week you'll write programs that keep asking until they know something
In CP2, one person picks a secret number, and the other asks questions until they have it.
Every strategy you write for checkpoint 2 is a loop. Here's one that comes with the project:
/// Guess at random until the guess happens to be right.
pub fn random(keeper: &mut SecretKeeper, min: u32, max: u32) -> u32 {
loop {
let guess = random_range(min..max);
if keeper.ask_if_equal(guess) {
return guess;
}
}
}loopruns forever, likewhile True:in Python- The only way out is to leave: here
returnends the whole function - Don't worry about
&mutyet.keeperis the one who knows the number and answers yes or no
The same loop, written another way
A loop is an expression, so it can hand back a value. break with a value leaves the loop and gives that value to whatever is waiting for it:
pub fn random(keeper: &mut SecretKeeper, min: u32, max: u32) -> u32 {
let answer = loop {
let guess = random_range(min..max);
if keeper.ask_if_equal(guess) {
break guess;
}
};
answer
}returnleaves the whole functionbreakleaves just the loop, so it's handy when there's more to do after it
You can break out of for and while loops too, but without a value. Can you guess why?
for loops and ranges
A range is start..end, e.g. 1..5 or we can write (1..5)
The index will vary as:
Unless you use the notation (start..=end), in which case the index will vary as
Let's watch it in a for loop:
#![allow(unused)] fn main() { for i in (1..5) { println!("{}",i); }; }
Or inclusive:
#![allow(unused)] fn main() { // inclusive range for i in (1..=5) { println!("{}",i); }; }
Or you can get fancy:
#![allow(unused)] fn main() { // every other element for i in (1..5).step_by(2) { println!("{}",i); }; println!("And now for the reverse"); for i in (1..5).step_by(2).rev() { println!("{}",i) }; }
Try printing over your loop indices early on to make sure it's doing what you want it to do!
Arrays in Rust
- Arrays in Rust are of fixed length (we'll learn about more flexible
Veclater) - All elements of the same type (unlike tuples)
- You cannot add or remove elements from an array (but you can change their values)
- Arrays are 0-indexed and elements are
arr[i]
What will this return?
#![allow(unused)] fn main() { let mut arr = [1,7,2,5,2]; arr[1] = 13; println!("{} {}",arr[0],arr[1]); println!("{}",arr.len()); }
Three ways to loop over an array
#![allow(unused)] fn main() { let fruits = ["apple", "banana", "orange"]; // 1. Count through the positions for i in 0..fruits.len() { println!("fruits[{}] = {}", i, fruits[i]); } // 2. Take the values one at a time (`for fruit in fruits` works too) for fruit in fruits.iter() { println!("{}", fruit); } // 3. Get the position and the value together for (i, fruit) in fruits.iter().enumerate() { println!("fruits[{}] = {}", i, fruit); } }
| You need | Use |
|---|---|
| The position | for i in 0..fruits.len() |
| The value | for fruit in fruits.iter() or for fruit in fruits |
| Both | for (i, fruit) in fruits.iter().enumerate() |
| To change the elements | for i in 0..fruits.len(), then fruits[i] = ... |
Don't worry yet about what .iter() and .enumerate() are doing under the hood. For now, .iter() hands you the items one at a time, and .enumerate() pairs each one with its position as a tuple.
for fruit in fruits and for fruit in fruits.iter() do the same job for now. There is a difference, and we'll get to it when we learn about ownership.
You'll sometimes see &fruit written in that last loop. We'll get to what & means later.
Common array operations
#![allow(unused)] fn main() { // create array of given length and fill it with a specific value // note the semicolon vs the comma! let arr2 = [15;3]; for x in arr2 { print!("{} ",x); } println!(); }
#![allow(unused)] fn main() { // you can still infer or annotate types let arr2 : [u8;3] = [15;3]; }
Arrays come with useful built-in methods:
#![allow(unused)] fn main() { let mut scores = [85, 92, 78, 96, 88]; // Get the length println!("Number of scores: {}", scores.len()); // How to print an array println!("{:?}", scores); // There's also sort, min, clamp, truncate... you can look them up! }
Remember: {:?} is "debug" formatting
Let's pause here for some review (skip for time)
Take a minute with a partner to review functions from last lecture:
-
What's wrong with this function signature?
#![allow(unused)] fn main() { fn calculate_area(width, height) -> f64 { } -
What's wrong with this function?
#![allow(unused)] fn main() { fn mystery(x: i32) -> i32 { let result = x * 2; result + 1; } } -
What are two different ways you can fix this so it compiles?
fn main() { let x = 4; let y = 4.5; let z = x + y; println!("{}",z); }
while loops
While loops continue as long as a condition remains true (very similar to Python)
#![allow(unused)] fn main() { let mut number = 3; while number != 0 { println!("{number}!"); number -= 1; } println!("LIFTOFF!!!"); }
Using continue to jump to the next iteration
Think/pair/share - what is this going to print?
#![allow(unused)] fn main() { let mut x = 1; let result = loop { if x == 3 { x = x+1; continue; } println!("X is {}", x); x = x + 1; if x==6 { break x*2; } }; println!("Result is {}", result); }
FYI: you can label loops
break and continue apply to the innermost loop. A label like 'outer: lets you target an outer one instead:
#![allow(unused)] fn main() { 'outer: for x in 1..=4 { for y in 1..=3 { if x * y == 6 { break 'outer; // leaves both loops } } } }
You won't need this in this course. If you find yourself reaching for it, there is usually a clearer way to write the loop.
Which loop would you use?
T/P/S - Pick for, while, or loop for each of these games:
- Deal 5 cards to each of 4 players
- Roll a die until you get a 6
- Blackjack: keep drawing cards until your hand is 17 or over
- Hangman: keep taking guesses if you have lives left and the word isn't solved
for, twice: you know up front it's 4 players and 5 cardsloop, with abreakwhen you roll a 6. You can't know how many rolls it will takewhile hand < 17: one condition decides when to stopwhile lives > 0 && !solved: still one condition, built from two with&&
Aren't these all kind of the same?
#![allow(unused)] fn main() { for i in 0..3 { println!("{i}"); } }
How could you write this as a while loop? And that while as a loop?
#![allow(unused)] fn main() { let mut i = 0; while i < 3 { println!("{i}"); i += 1; } }
#![allow(unused)] fn main() { let mut i = 0; loop { if i >= 3 { break; } println!("{i}"); i += 1; } }
All three print 0 1 2.
Pick the one that's most concise and expresses what you mean:
for: "go through each of these"while: "keep going as long as this is true"loop: "keep going until something inside tells me to stop"
When for fits, it's the safest (there's no i += 1 to forget)
Activity time
Activity 8: loops, functions, and variables review
- Work alone or with one partner, and put both names on one sheet
- Paper only, no laptops
- Start with whatever part you feel least sure about
- We'll go over answers at the start of Wednesday's class
To think about til Wednesday: which one is faster?
Two ways to find the nth prime (the 4th prime is 7):
A. Check each number. Count up from 2. For each number, try dividing it by every smaller number. Stop once you've found n primes.
B. Cross out multiples. Write down every number up to 100,000. Cross out every multiple of 2, then every multiple of 3, then of the next number that isn't crossed out, and so on. Then count through what's left.
- How would you write each of these as loops?
- Which would you bet is faster?
- How could you find out for sure? How would you count the steps?
- Does the answer depend on
n?
That's where we start on Wednesday.
Lecture 9 - Complexity: how to compare two programs
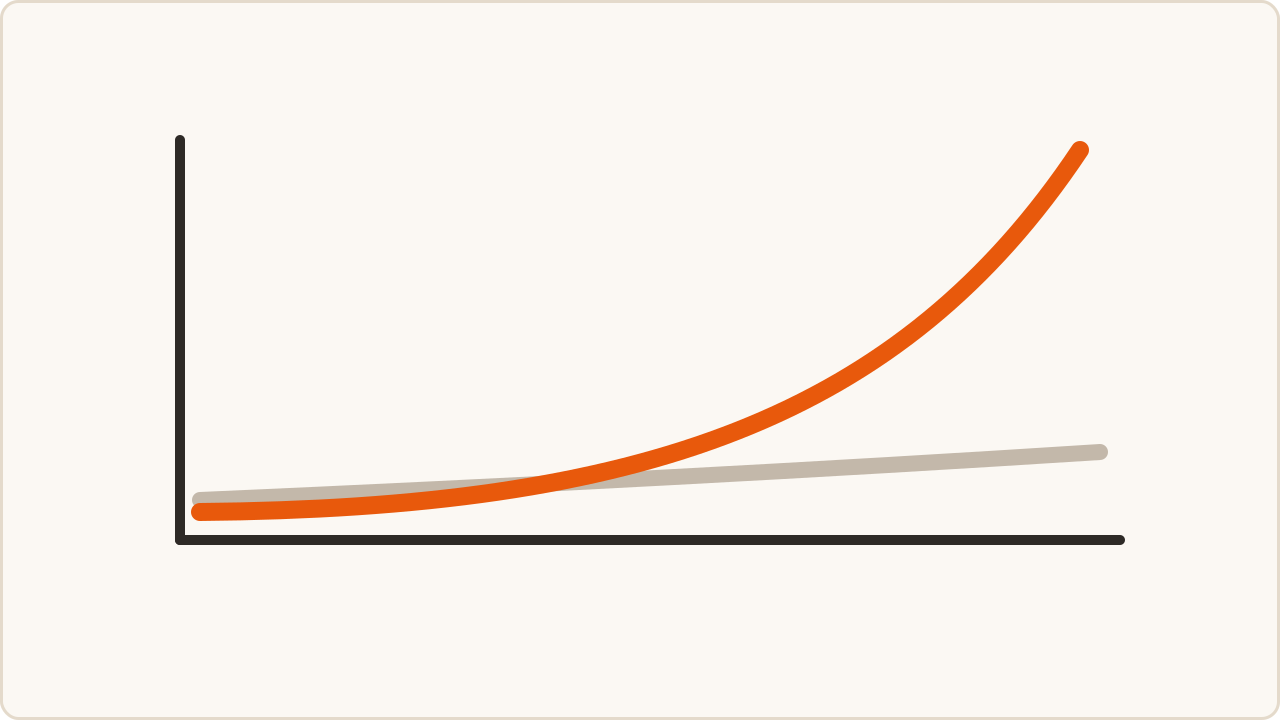
Announcements
Learning objectives
By the end of today, you should be able to:
- Time two programs that do the same thing, and explain why debug and release give different numbers
- Count the steps in each part of a program, and say how that count grows with the input
- Use Big O notation to describe time and space complexity
- Recognize common complexity classes: O(1), O(log n), O(n), O(n^2), O(2^n)
- Apply key rules: drop constants, keep dominant terms
Part 1: Which one is faster?
Monday's question
Two ways to find the nth prime (the 4th prime is 7):
A. Check each number. Count up from 2. For each number, try dividing it by every smaller number. Stop once you've found n primes.
B. Cross out multiples. Write down every number up to 100,000. Cross out every multiple of 2, then every multiple of 3, then of the next number that isn't crossed out, and so on. Then count through what's left.
Which would you bet is faster? Does it depend on n?
The two programs in Rust
/// Count up from 2, checking each number, until we've found n primes.
fn nth_prime_a(n: u32) -> u32 {
let mut count = 0;
let mut candidate = 1;
while count < n {
candidate += 1;
let mut is_prime = true;
for d in 2..candidate {
if candidate % d == 0 {
is_prime = false;
break;
}
}
if is_prime {
count += 1;
}
}
candidate
}
/// Cross out every multiple of every number up to a limit,
/// then count through whatever is left.
fn nth_prime_b(n: u32) -> u32 {
let mut maybe_prime = [true; 100_000];
maybe_prime[0] = false;
maybe_prime[1] = false;
for i in 2..maybe_prime.len() {
if maybe_prime[i] {
let mut multiple = i * 2;
while multiple < maybe_prime.len() {
maybe_prime[multiple] = false;
multiple += i;
}
}
}
let mut count = 0;
for i in 0..maybe_prime.len() {
if maybe_prime[i] {
count += 1;
if count == n {
return i as u32;
}
}
}
0 // n was too big for this limit
}Let's time them
cargo run
On my machine, in debug mode:
| n | nth prime | A | B |
|---|---|---|---|
| 4 | 7 | 709 ns | 2.4 ms |
| 100 | 541 | 0.2 ms | 2.8 ms |
| 1,000 | 7,919 | 25 ms | 2.3 ms |
| 2,000 | 17,389 | 87 ms | 1.4 ms |
| 4,000 | 37,813 | 343 ms | 1.7 ms |
| 8,000 | 81,799 | 1.5 s | 1.7 ms |
Now in release mode
cargo run --release
| n | A | B |
|---|---|---|
| 4 | 42 ns | 0.33 ms |
| 100 | 0.03 ms | 0.34 ms |
| 1,000 | 4.2 ms | 0.31 ms |
| 2,000 | 16 ms | 0.26 ms |
| 4,000 | 50 ms | 0.21 ms |
| 8,000 | 225 ms | 0.27 ms |
Time things in release mode. Debug is for building and fixing: it compiles fast and runs slow. Release takes longer to compile and runs about 6-7x faster here.
What just happened?
- A wins for small
n. B wins, by a lot, for bign - B takes about the same time no matter which prime you ask for
- Each time
ndoubles, A gets about 4x slower, not 2x
Our intuition says a job twice as big should take twice as long. It's often not that simple. It depends on the algorithm.
T/P/S - Why? Look at each loop in the code. What decides how many times it runs?
It's about more than getting the right answer
- A and B are both correct. Which one is better depends on how it gets used
- Ask an AI for "the nth prime" and you might get A
- Better asks:
- "Show me a few different approaches"
- "How does this scale as
ngrows?" - "I'll need lots of primes. Can we find them once and look them up after?"
- You can only ask those if you know they're the right questions
Counting the steps in each part
A has a loop inside a loop, and both grow with n:
- The
whileruns once per number checked, all the way up to thenth prime (81,799 forn= 8,000) - For each prime, the
fortries every smaller number
Double n and you check about twice as many numbers, each with about twice as many divisors to try: about 4x the work.
B never looks at n until the very end:
- Crossing out always covers all 100,000 numbers
- Counting through what's left is at most 100,000 more steps
So B does about the same work every time.
That's why it loses for the 4th prime and wins for the 8,000th.
Part 2: Big O notation - The math of "about how fast?"
Think-pair-share: Counting operations
Part 1: Given this code:
#![allow(unused)] fn main() { fn sum_to(n: u64) -> u64 { let mut total = 0; for i in 1..=n { total += i; } total } }
Question: How many addition operations happen?
Part 2: Now consider this code:
#![allow(unused)] fn main() { fn count_pairs(n: usize) -> usize { let mut count = 0; for i in 1..n { for _j in i..n { count += 1; } } count } }
Question: If we call count_pairs(n), how many times does the inner loop execute in total?
Can't figure out a formula? Try tracing it by hand with n = 3 or 4.
Part 1: n additions, one per time through the loop.
Part 2: For n = 4 the inner loop runs 3 + 2 + 1 = 6 times. In general (n-1) + (n-2) + ... + 1 = n(n-1)/2, which grows like n^2.
What is Big O?
Big O notation describes how runtime/memory grows as input size grows.
Key idea: We ignore:
- Exact number of operations
- Constants and performance on small inputs
- Hardware / OS dependent values
We focus on: The growth rate as n goes to infinity
So in Big O terms, B is the "constant" one, even though it lost for small n. Big O is about what happens as n gets big.
Example: Linear growth
#![allow(unused)] fn main() { fn print_up_to(n: u32) { for i in 0..n { // n iterations println!("{}", i); } } }
- n = 10: ~10 operations
- n = 100: ~100 operations
- Any n: ~n operations
This is O(n) - "linear time"
Example: Quadratic growth
#![allow(unused)] fn main() { fn print_all_pairs(n: u32) { for i in 0..n { // n iterations for j in 0..n { // n iterations for EACH i println!("{}, {}", i, j); } } } }
- n = 10: ~100 operations (10 × 10)
- n = 100: ~10,000 operations (100 × 100)
- Any n: ~n^2 operations
This is O(n^2) - "quadratic time"
Example: Exponential growth
A door opens for exactly one on/off setting of n light switches. Try them all:
#![allow(unused)] fn main() { fn try_every_setting(n: u32) -> u64 { let mut tried = 0; for _setting in 0..2u64.pow(n) { // the _ means we never use the variable tried += 1; } tried } }
- 10 switches: 1,024 settings (2^10)
- 20 switches: 1,048,576 settings (2^20)
- 40 switches: 1,099,511,627,776 settings (2^40)
Each extra switch doubles the work, like a population of bunnies doubling every generation.
This is O(2^n) - "exponential time" (explodes quickly!)
Example: Logarithmic growth
Now run the bunnies backwards. Start with 2, double every generation. How many generations until there are at least n?
#![allow(unused)] fn main() { fn generations_until(n: u64) -> u32 { let mut bunnies = 2; let mut generations = 0; while bunnies < n { bunnies *= 2; generations += 1; } generations } }
- 1,000 bunnies: 9 generations
- 1,000,000 bunnies: 19 generations
- 1,000,000,000 bunnies: 29 generations
Ask for 1,000x more bunnies and it only takes 10 more generations.
This is O(log n) - "logarithmic time" (very fast!)
Example: Constant time
#![allow(unused)] fn main() { fn last_digit(n: u64) -> u64 { n % 10 } }
- n = 10: 1 operation
- n = 1,000,000,000: 1 operation
- Any n: still 1 operation!
This is O(1) - "constant time" (doesn't depend on n)
Think about: What's the complexity?
#![allow(unused)] fn main() { fn evens_times_odds(n: u64) -> u64 { let mut evens = 0; for i in 0..n { if i % 2 == 0 { evens += 1; } } let mut odds = 0; for i in 0..n { if i % 2 == 1 { odds += 1; } } evens * odds } }
T/P/S - How does the work grow with n?
O(n). Two loops of n one after the other is 2n steps, and Big O drops the 2. A loop after a loop adds; a loop inside a loop multiplies.
Common complexity classes (from best to worst)
| Notation | Name | Example |
|---|---|---|
| O(1) | Constant | Array access by index |
| O(log n) | Logarithmic | Doubling until you reach n (the bunnies) |
| O(n) | Linear | Loop from 0 to n once |
| O(n log n) | Linearithmic | Good sorting algorithms |
| O(n^2) | Quadratic | Nested loops |
| O(2^n) | Exponential | Trying every on/off setting |
| O(n!) | Factorial | Trying all permutations |
Each step down this list is MUCH slower!
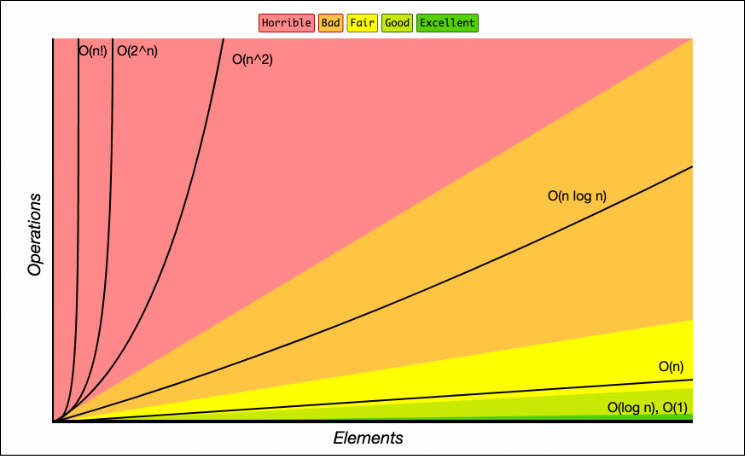
Rules for analyzing code
-
Loops: Multiply complexity by number of iterations
- Loop n times doing O(1) work = O(n)
- Loop n times doing O(n) work = O(n^2)
- Outer loop n times, inner loop m times = O(n m)
-
Drop constants and lower-order terms:
- O(3n) -> O(n)
- O(n^2 + n) -> O(n^2)
- O(5) -> O(1)
Let's do this one together
#![allow(unused)] fn main() { fn mystery_function(n: u64) -> u64 { let mut count = 0; for i in 0..n { count += i; } for _ in 0..10 { count += 1; } for i in 0..n { for j in 0..n { if i == j { count += 1; } } } count } }
n + 10 + n^2 steps. Drop the constant and the smaller term: O(n^2).
Space complexity exists too!
Big O also applies to memory usage. Back to the two prime finders:
- A keeps a few variables (
count,candidate,d) no matter how bigngets: O(1) space - B makes an array of 100,000
true/falsevalues before it does anything else. The memory it needs grows with its limit: O(limit) space
B buys its speed with memory. You make that trade all the time:
- Your browser caches websites. It keeps copies on disk, so a page you've visited loads without downloading it all again
- Looking for one thing in a box? Dump the whole box out on the floor. It takes up the whole floor, but now you can see everything at once
Best case vs. worst case vs. average case
Example: checking whether a single number is prime
#![allow(unused)] fn main() { fn is_prime(n: u64) -> bool { if n < 2 { return false; } for d in 2..n { if n % d == 0 { return false; } } true } }
- Best case: O(1) -
nis even, so it stops atd = 2 - Worst case: O(n) -
nis prime, so it tries everydfrom 2 to n - 1 - Average case: somewhere in between, and harder to work out
Usually we care most about worst case!
Sometimes the algorithm isn't even the whole story
Two ways to add up every number in a 10,000 by 10,000 grid:
// Across each row, then down to the next row
for r in 0..rows {
for c in 0..cols {
sum = sum + matrix[r][c];
}
}
// Down each column, then over to the next column
for c in 0..cols {
for r in 0..rows {
sum = sum + matrix[r][c];
}
}Same 100 million additions. Same Big O. On my machine, going down the columns is about 6x slower (in release mode).
Why? We'll come back to that when we get to memory.
Activity Time
Complexity cheat sheet
Fast to Slow:
- O(1) - Instant, no matter the size
- O(log n) - Doubling the input adds one step
- O(n) - Proportional to size
- O(n log n) - The best we can do for sorting
- O(n^2) - Nested loops, gets bad quickly
- O(2^n) - Explodes! Avoid if possible
Lecture 10 - Sorting: complexity and recursion

Announcements
Learning objectives
By the end of today, you should be able to:
- Sort by hand with selection sort, insertion sort, and merge sort
- Find the Big O of selection and insertion sort from their loops
- Read and write a recursive function: a base case plus a smaller version of the same problem
- Explain why merge sort is O(n log n) from its call tree
- Explain why the fastest sort for a person is not always the fastest for a computer
Part 1: Sorting the way people do
How do you sort a hand of cards?
You're dealt 8 cards. Put them in order, smallest to largest.
What do you actually do?
Selection sort: find the smallest, move it to the front
/// Sort 8 cards smallest to largest. /// Find the smallest card left, swap it to the front, repeat. fn selection_sort(mut cards: [i32; 8]) -> [i32; 8] { for front in 0..cards.len() { // Find where the smallest card is, from `front` to the end let mut smallest = front; for check in (front + 1)..cards.len() { if cards[check] < cards[smallest] { smallest = check; } } // Swap the smallest card into the front spot let temp = cards[front]; cards[front] = cards[smallest]; cards[smallest] = temp; } cards } fn main() { println!("{:?}", selection_sort([60, 30, 80, 10, 50, 20, 70, 40])); }
A loop inside a loop: 7 + 6 + ... + 1 comparisons. O(n^2), like count_pairs on Wednesday.
Insertion sort: slide each card into place
/// Sort 8 cards smallest to largest. /// Keep the left side sorted. Slide each new card left until it fits. fn insertion_sort(mut cards: [i32; 8]) -> [i32; 8] { for next in 1..cards.len() { // Slide the card at `next` left while the card before it is bigger let mut spot = next; while spot > 0 && cards[spot - 1] > cards[spot] { let temp = cards[spot - 1]; cards[spot - 1] = cards[spot]; cards[spot] = temp; spot -= 1; } } cards } fn main() { println!("{:?}", insertion_sort([60, 30, 80, 10, 50, 20, 70, 40])); }
Also a loop inside a loop: O(n^2) in the worst case.
Think-pair-share: does the starting order matter?
- What if the cards are already sorted? How many comparisons does each sort make?
- What if they're in reverse order?
Selection sort doesn't care. Selection always scans everything that's left: 28 comparisons for 8 cards, regardless. O(n^2) best and worst.
Insertion sort does. Already sorted, each card checks its neighbor once and stops, so 7 comparisons, O(n) best case. Reversed, every card slides all the way left: 28 comparisons, O(n^2) worst case.
Part 2: Recursion
What if you split the pile?
Sorting 16 cards alone is a lot of comparisons.
- Split the pile in half and hand each half to a friend
- Each friend splits their half and hands it off too
- ...until everyone holds one card, which is already sorted
Every friend is doing the same job on a smaller pile.
A function that calls itself on a smaller version of the problem is recursive.
A recursive function you already know
Wednesday's sum_to, with a loop:
#![allow(unused)] fn main() { fn sum_to(n: u64) -> u64 { let mut total = 0; for i in 1..=n { total += i; } total } }
The same thing, with no loop:
fn sum_to(n: u64) -> u64 { if n == 0 { return 0; // base case: nothing left to add } n + sum_to(n - 1) // a smaller version of the same problem } fn main() { println!("{}", sum_to(3)); }
Tracing sum_to(3)
#![allow(unused)] fn main() { fn sum_to(n: u64) -> u64 { if n == 0 { return 0; } n + sum_to(n - 1) } }
What happens when we call sum_to(3)?
sum_to(3) = 3 + sum_to(2)
= 2 + sum_to(1)
= 1 + sum_to(0)
= 0 base case, start returning
= 1 + 0 = 1
= 2 + 1 = 3
= 3 + 3 = 6
Each call waits for the one below it to answer. Nothing adds up until the base case returns.
Every recursive function has two parts
- A base case: a problem small enough to answer right away
- A recursive step: call yourself on a problem that is smaller, closer to the base case
Write the base case first. Then ask: does every call get closer to it?
Think-pair-share: fill in the blanks
Wednesday's mystery function counted the digits in a number with a loop. Write it recursively:
/// Count the digits in n. count_digits(4096) is 4.
fn count_digits(n: u64) -> u64 {
if n < 10 {
return ___;
}
___ + count_digits(___)
}/// Count the digits in n. count_digits(4096) is 4. fn count_digits(n: u64) -> u64 { if n < 10 { return 1; // one digit left } 1 + count_digits(n / 10) // this digit, plus the digits after chopping it off } fn main() { println!("{}", count_digits(4096)); }
What if there's no base case?
#![allow(unused)] fn main() { fn count_digits(n: u64) -> u64 { 1 + count_digits(n / 10) } count_digits(115); }
Part 3: Merge sort
Merging two sorted piles
Two piles, each already sorted, smallest on top:
Left: 20 50 80 Right: 10 30 90
Look at only the two top cards. Take the smaller one. Repeat.
20 vs 10 take 10 10
20 vs 30 take 20 10 20
50 vs 30 take 30 10 20 30
50 vs 90 take 50 10 20 30 50
80 vs 90 take 80 10 20 30 50 80
right pile left: 10 20 30 50 80 90
At most one comparison per card placed: merging is O(n).
Merge sort
To sort a pile:
- Base case: one card? It's sorted. Done
- Split the pile in half
- Merge sort each half (recursion!)
- Merge the two sorted halves
[60, 30, 80, 10, 50, 20, 70, 40] split
[60, 30, 80, 10] [50, 20, 70, 40] split
[60, 30] [80, 10] [50, 20] [70, 40] split
[60] [30] [80] [10] [50] [20] [70] [40] base case: one card each
[30, 60] [10, 80] [20, 50] [40, 70] merge
[10, 30, 60, 80] [20, 40, 50, 70] merge
[10, 20, 30, 40, 50, 60, 70, 80] merge
Why O(n log n)?
[10, 20, 30, 40, 50, 60, 70, 80] merging this level touches 8 cards
[10, 30, 60, 80] [20, 40, 50, 70] 8 cards
[30, 60] [10, 80] [20, 50] [40, 70] 8 cards
- Work per level: every card gets merged once, so about
n - Number of levels: halve 8 until you reach 1 card: 8, 4, 2, 1, so 3 levels so log n
n work on each of log n levels: O(n log n)
The picture of calls splitting into two smaller calls is a tree. You'll see a lot more of these.
Don't just memorize "merge sort is n log n." Draw the tree and count: how much work per level, times how many levels.
How much faster is that?
Comparisons for our 8 and 16 card starting orders (activity!):
| Cards | Selection | Insertion | Merge |
|---|---|---|---|
| 8 | 28 | 20 | 17 |
| 16 | 120 | 75 | 49 |
| 1,000,000 | about 500 billion | about 250 billion | about 20 million |
Double the cards: selection does about 4x the comparisons. Merge does about 3x, and the gap keeps growing.
Quicksort and .sort()
Quicksort is another split-the-pile recursive sort. Pick one card, put smaller cards on its left and bigger on its right, then quicksort each side.
.sort(): in Rust you almost never write your own sort, you just:
fn main() { let mut cards = [60, 30, 80, 10, 50, 20, 70, 40]; cards.sort(); println!("{:?}", cards); }
.sort()is built on merge sort, and switches to insertion sort for 20 items or fewer.sort_unstable()is built on quicksort
Watch them sort
15 Sorting Algorithms in 6 Minutes
Watch for selection, insertion, merge, and quick. What shape does each one make as it works? For the ones we haven't talked about - can you guess what they do? (Heap sort, Radix sort, etc.)
Just for fun: in the order the video shows them, what do you think each one does?
| Sort | Your guess |
|---|---|
| Selection sort | We did this one |
| Insertion sort | We did this one |
| Quick sort | We did this one |
| Merge sort | We did this one |
| Heap sort | |
| Radix sort (LSD) | |
| Radix sort (MSD) | |
| std::sort | |
| std::stable_sort | |
| Shell sort | |
| Bubble sort | |
| Cocktail shaker sort | |
| Gnome sort | |
| Bitonic sort | |
| Bogo sort |
Activity 10: Sorting race
- Groups of 5-6 (6 groups) - each get 4 packets
- Four people race at once, one each: insertion, selection, merge, and freestyle (your own strategy)
- Person 5 is the timer and fills in the Google Form. Person 6, if you have one, checks
- Same starting order for everyone. Round 1 with 8 cards, round 2 with 16
- Swap roles between rounds
Before each round: which sort will win?
Results
- Did the winner match the comparison counts?
- Which sort was easier for people than for a computer? Why?
- Did anything change between 8 and 16 cards? What about 1,000?
- Why would Rust's
.sort()use insertion sort for small lists?
Appendix: merge sort in Rust
Just FYI if you're curious. Vec is a list that can grow, and &cards[..mid] means "a glance at the first half of cards". Both are coming later. Can you find the base case and the two recursive calls?
/// Merge two sorted piles into one sorted pile. fn merge(left: &[i32], right: &[i32]) -> Vec<i32> { let mut result = Vec::new(); let mut l = 0; // position in the left pile let mut r = 0; // position in the right pile while l < left.len() && r < right.len() { if left[l] <= right[r] { result.push(left[l]); l += 1; } else { result.push(right[r]); r += 1; } } // Once one pile is empty while l < left.len() { result.push(left[l]); l += 1; } while r < right.len() { result.push(right[r]); r += 1; } result } fn merge_sort(cards: &[i32]) -> Vec<i32> { if cards.len() <= 1 { return cards.to_vec(); } let mid = cards.len() / 2; let left = merge_sort(&cards[..mid]); let right = merge_sort(&cards[mid..]); merge(&left, &right) } fn main() { println!("{:?}", merge_sort(&[60, 30, 80, 10, 50, 20, 70, 40])); }
Lecture 11 - Structs: bundling data and giving it methods

Announcements
Learning objectives
By the end of today, you should be able to:
- Define a struct to group related data under one name
- Use a tuple struct when the fields don't need names
- Write methods in an
implblock, and call them with a dot - Choose between
&selfand&mut self, and say whatselfalone would do - Write a constructor and explain why it uses
::instead of. - Say what
pubdoes to a field, and why you would leave it off - Use a
Vecas a list that can grow
Part 1: You've already been using one
Three weeks of keeper.something()
From Project 1:
let mut keeper = dealer.deal();
if keeper.ask_if_greater(50) {
// the secret is bigger than 50
}
println!("Questions asked: {}", keeper.questions_asked());keeper is not an i32, a bool, or an array. It is a custom type we wrote.
What secret_keeper.rs actually says
Abridged a little, but this is the shape of it:
struct SecretKeeper { secret: u32, questions: u32, } impl SecretKeeper { fn questions_asked(&self) -> u32 { self.questions } fn ask_if_greater(&mut self, guess: u32) -> bool { self.questions += 1; guess < self.secret } } fn main() { let mut keeper = SecretKeeper { secret: 42, questions: 0 }; println!("{}", keeper.ask_if_greater(50)); println!("Questions asked: {}", keeper.questions_asked()); }
Two halves:
struct: the data it holdsimpl: what you can ask it to do
The problem structs solve
Say you're tracking a customer. You could use loose variables:
let customer_name = "Alice Smith";
let customer_age = 25;
let customer_state = "NY";
let customer_member = true;This works, but it's not ideal.
What sucks about this?
Three things wrong with loose variables
let customer_name = "Alice Smith";
let customer_age = 25;
let customer_state = "NY";
let customer_member = true;Nothing holds them together. You'd need to pass them as four arguments into a function, and the compiler might not notice if you mix them up.
A second customer is a mess. 4 more vars, nothing linking Alice's name to Alice's age.
The logic lives somewhere else. (We'll see more of that in a minute)
Group them into one type
#![allow(dead_code)] struct Customer { name: String, age: u32, state: String, member: bool, } fn main() { let alice = Customer { name: "Alice Smith".to_string(), age: 25, state: "NY".to_string(), member: true, }; println!("{} is {}", alice.name, alice.age); }
struct Customer { ... }defines a new type, once- The block with the values makes one of them
- Access a field with a dot:
alice.age(like tuple notation!)
The loose version said "NY" (&str) but the field needs "NY".to_string()(String) because the compiler wants to know where the text lives and for how long. Like before... more info later in the term.
Changing fields and printing
#![allow(dead_code)] #[derive(Debug)] struct Customer { name: String, age: u32, state: String, member: bool, } fn main() { let mut alice = Customer { name: "Alice Smith".to_string(), age: 25, state: "NY".to_string(), member: true, }; alice.age = 26; // needs `mut` on alice println!("{:?}", alice); }
mutis on the whole struct, not on one field. Either all of it can change or none of it can#[derive(Debug)]gives you{:?}, the same one you used for arrays
Tuple structs: when we don't need field names
#![allow(dead_code)] #[derive(Debug)] struct Point3D(f64, f64, f64); #[derive(Debug)] struct BoxOfDonuts(u32); fn main() { let corner = Point3D(3.0, 4.0, 5.0); let dozen = BoxOfDonuts(12); println!("x is {}, y is {}", corner.0, corner.1); println!("{:?}", dozen); }
Fields by position, not by name.
BoxOfDonuts(12) is not a u32, so you can't hand it to a function expecting a count of something else. That's the point of it.
Part 2: Methods
Functions that belong to a type
Without methods, every function takes the struct as an argument:
fn area(rect: &Rectangle) -> f64 { ... }
fn perimeter(rect: &Rectangle) -> f64 { ... }
let a = area(&rect);With an impl block, they hang off the type itself:
impl Rectangle {
fn area(&self) -> f64 { ... }
fn perimeter(&self) -> f64 { ... }
}
let a = rect.area();The difference is that now they travel with the type, and you find them by typing rect.
What that buys you: adding a shape
Say a circle turns up. With one function for everything, you need a way to tell the shapes apart, and every shape's fields end up on one struct:
struct Shape {
kind: String,
width: f64,
height: f64,
radius: f64, // meaningless unless kind is "circle"
}
fn area(shape: &Shape) -> f64 {
if shape.kind == "rectangle" {
shape.width * shape.height
} else if shape.kind == "circle" {
3.14159 * shape.radius * shape.radius
} else {
0.0 // and now what?
}
}A triangle adds a field nobody else uses, and it edits area, and perimeter, and everything else that branches on kind. Nothing stops you writing Shape { kind: "circle", width: 10.0, radius: 0.0 } either.
The way out of that is one function per shape:
fn area_rectangle(r: &Rectangle) -> f64 { ... }
fn area_circle(c: &Circle) -> f64 { ... }
fn perimeter_rectangle(r: &Rectangle) -> f64 { ... }
fn perimeter_circle(c: &Circle) -> f64 { ... }Now the compiler checks the types for you, but you are the one keeping the names straight, and the triangle is two more functions.
With methods, they can all just be called area:
struct Rectangle { width: f64, height: f64 } struct Circle { radius: f64 } impl Rectangle { fn area(&self) -> f64 { self.width * self.height } } impl Circle { fn area(&self) -> f64 { 3.14159 * self.radius * self.radius } } fn main() { let rect = Rectangle { width: 10.0, height: 5.0 }; let circle = Circle { radius: 3.0 }; println!("{:.2} {:.2}", rect.area(), circle.area()); }
Two types, same method name, and no clash: rect. can only reach Rectangle's. The triangle is one new struct and one new impl, and no other code needs to change.
&self: the method just reads
struct Rectangle { width: f64, height: f64, } impl Rectangle { fn area(&self) -> f64 { self.width * self.height } } fn main() { let rect = Rectangle { width: 10.0, height: 5.0 }; println!("{}", rect.area()); // like calling area(&rect) println!("{}", rect.width); // rect is still fine }
selfis the value you called the method on. Here,rect- The
&means the method borrows it: a look, not a handover - Most methods are
&self
&mut self: the method changes something
struct Rectangle { width: f64, height: f64, } impl Rectangle { fn scale(&mut self, factor: f64) { self.width *= factor; self.height *= factor; } } fn main() { let mut rect = Rectangle { width: 10.0, height: 5.0 }; rect.scale(2.0); println!("{} by {}", rect.width, rect.height); // 20 by 10 }
&mut selfmeans the method may change the fields- The variable has to be
mut, or the call won't compile - That's why
keeperhad to bemutin Project 1:ask_if_greatercounts the question
There is a third one, but you don't want it yet
impl Rectangle {
fn into_area(self) -> f64 { // no &
self.width * self.height
}
}Plain self takes the whole struct with it. After you call the method, the variable is gone, and using it again is a compile error.
Useful for turning one thing into another. Rare. For now, write &self or &mut self.
Which one do I write?
| Parameter | The method... | After the call |
|---|---|---|
&self | reads the fields | the value is still yours |
&mut self | changes the fields | the value is still yours, and changed |
Plain self is the third option: the value is consumed, and you'll rarely write it this term.
Start with &self. Reach for &mut self only when the method actually changes a field. If the compiler wants more, it will say so.
Think-pair-share: &self or &mut self?
You're writing a Playlist. Which does each method take?
total_minutes, adds up the length of every songadd_song, puts one more song on the endis_empty, says whether there are any songsrename, gives the playlist a new title
&self, reading&mut self, changing&self, reading&mut self, changing
The question is always the same one: does this change a field?
Constructors: building one without spelling it out
#![allow(dead_code)] #[derive(Debug)] struct Rectangle { width: f64, height: f64, } impl Rectangle { fn new(width: f64, height: f64) -> Rectangle { Rectangle { width, height } // short for width: width, height: height } fn square(side: f64) -> Rectangle { Rectangle { width: side, height: side } } } fn main() { let rect = Rectangle::new(10.0, 5.0); let unit = Rectangle::square(1.0); println!("{:?} {:?}", rect, unit); }
No self parameter, because there's nothing to call it on yet. You're making the thing.
So it's Rectangle::new(...) with two colons, not rect.new(...) with a dot.
A dot means "I already have one of these." Two colons means "make me one" or "this belongs to the type, not to a value."
new is not a keyword. It's a convention, and a strong one, but nothing special happens when you use the name. Rectangle::square is a constructor too.
Vec: an array that can grow
An array is a fixed size forever. A Vec is a list that grows:
fn main() { let mut grades = Vec::new(); // the same :: you just saw grades.push(85.0); grades.push(92.0); println!("{} grades", grades.len()); println!("first is {}", grades[0]); // index it like an array println!("{:?}", grades); }
Vec is a struct with methods, exactly like the ones you're writing today.
How it manages memory is a later lecture, and in Project 2 you'll build your own.
let grades = Vec::new(); on its own gives you "type annotations needed". Rust works out what the Vec holds from the first thing you push, so it needs to see one.
You've been calling methods for weeks
cards.sort(); // Friday
scores.iter(); // Activity 8
name.len();
text.to_string();Every one of those is a method on a type someone else wrote:
| What you wrote | What it really is | Which self |
|---|---|---|
cards.sort() | sort(&mut cards) | &mut self, it reorders the cards |
name.len() | len(&name) | &self, just reading |
Vec::new() | nothing to call it on | no self at all |
Method or plain function?
A method goes on the type when it needs the data inside it.
impl Customer {
fn is_adult(&self) -> bool { self.age >= 18 } // needs the customer
}
fn tax_rate(state: &str) -> f64 { ... } // doesn't
fn average_age(customers: &Vec<Customer>) -> f64 { ... } // needs multipleWhen writing a struct, ask yourself "what would someone expect this type to have and do?"
Naming for structs and methods
- Types are
CamelCase, fields and methods aresnake_case - Don't repeat the type inside it.
Customer { name, age }, notCustomer { customer_name, customer_age } is_andhas_for methods that answer yes or no- A field called
datatells the next reader nothing - Rust style avoids "get_" for access (
customer.age()notcustomer.get_age())
The other reason: there is only one place to get it wrong
Say a BankAccount must never go negative, and other functions want to withdraw from it.
If you let them reach in, this has to be written every time:
if amount > account.balance {
println!("not enough funds");
}
account.balance -= amount;Put it in a method, and there is exactly one:
impl BankAccount {
fn withdraw(&mut self, amount: i32) {
if amount > self.balance {
println!("not enough funds");
}
self.balance -= amount;
}
}Same code, but the difference is how many places you need to keep in sync.
So what stops you reaching in anyway?
You have written this:
println!("Questions asked: {}", keeper.questions_asked());SecretKeeper has a field called questions. Why did you call a method instead of just writing keeper.questions?
Because you are not allowed to
println!("{}", keeper.questions);error[E0616]: field `questions` of struct `SecretKeeper` is private
--> src/main.rs:7:22
|
7 | println!("{}", keeper.questions);
| ^^^^^^^^^ private field
In secret_keeper.rs:
pub struct SecretKeeper {
source: Source,
questions: u32,
already_used: Vec<u32>,
}
impl SecretKeeper {
pub fn questions_asked(&self) -> u32 {
self.questions
}
}pub means other files can see this. The struct is pub, and so is the method. The fields are not.
So from your code you can ask how many questions you have asked. You cannot set the counter to zero.
Let's build one together: a grade tracker
struct Student { name: String, grades: Vec<f64>, } impl Student { fn new(name: String) -> Student { Student { name, grades: Vec::new(), } } fn add_grade(&mut self, grade: f64) { self.grades.push(grade); } fn average(&self) -> f64 { if self.grades.len() == 0 { return 0.0; } let mut total = 0.0; for grade in &self.grades { total += grade; } total / self.grades.len() as f64 } } fn main() { let mut alice = Student::new("Alice".to_string()); alice.add_grade(85.0); alice.add_grade(92.0); println!("{}'s average: {:.1}", alice.name, alice.average()); }
Activity Time
See Activity 11
Lecture 12 - Enums: variants, match, and exhaustiveness
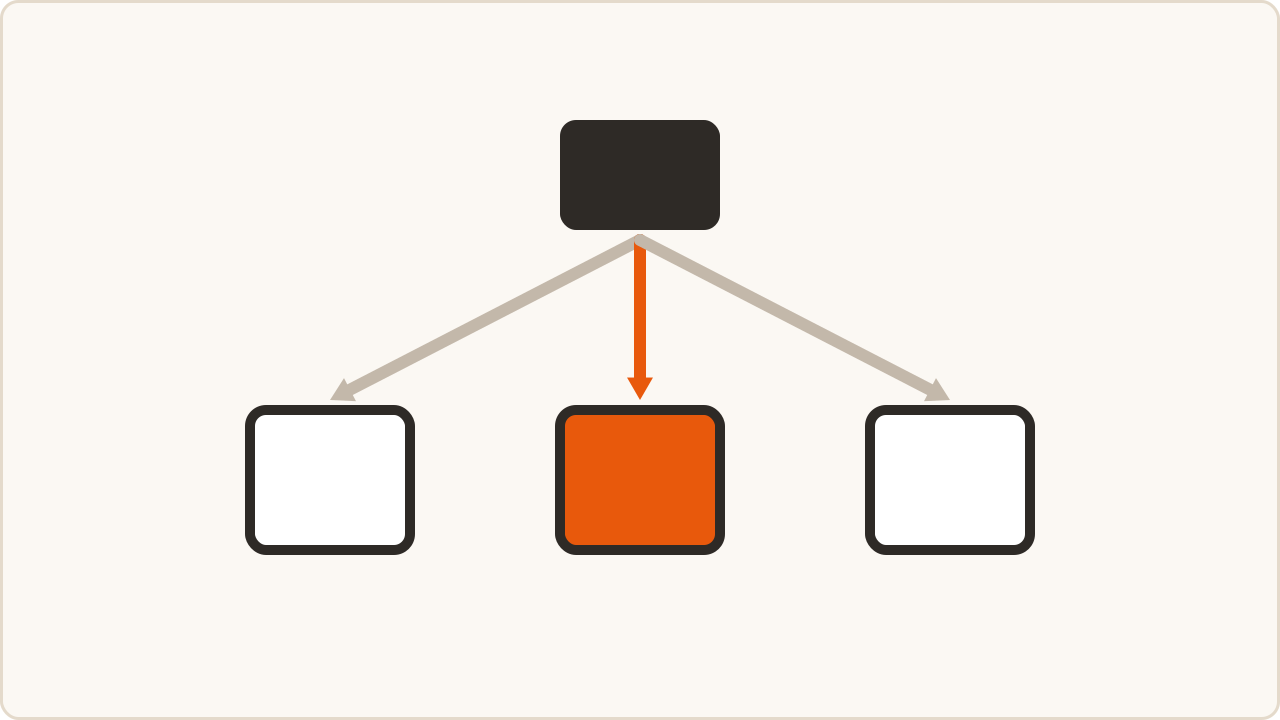
Announcements
Learning objectives
By the end of today, you should be able to:
- Define an enum, including variants that carry data
- Use
#[derive(Debug)]and#[derive(PartialEq)]to print and compare them - Write a
matchthat covers every variant, and say what the compiler does when you miss one - Choose between an enum and a struct for a piece of data
- Read a pattern guard, an
ifon amatcharm - Use
Option<T>when you want to return a value or nothing
Monday's Customer wasn't perfect
struct Customer {
name: String,
age: u32,
state: String,
member: bool,
}name is free text. Whatever a person types is a legal name, and no rule we could write would say otherwise.
state is not free text. There are fifty of them, more or less.
But String lets us write both fields the same way.
What does Alice pay?
#[derive(Debug)] struct Customer { name: String, age: u32, state: String, member: bool, } fn shipping_cost(c: &Customer) -> f64 { if c.state == "NY" { 5.00 } else { 12.00 } } fn main() { let alice = Customer { name: "Alice Smith".to_string(), age: 25, state: "ny".to_string(), member: true, }; println!("{} pays ${:.2}", alice.name, shipping_cost(&alice)); }
Spellings the compiler is happy with
state: "ny".to_string()
state: "New York".to_string()
state: "NY ".to_string()
state: "Nueva York".to_string()They all compile, but only one matches the shipping_cost function.
Our mistake was that state isn't a free string, it's more like a dropdown menu.
A text box, or a dropdown
A text box accepts the typo. A dropdown does not offer it.
Rust lets you build the dropdown, as a type:
enum State {
NY,
MA,
CA,
// ... 47(ish) more
}
struct Customer {
name: String,
age: u32,
state: State, // not String
member: bool,
}The field no longer accepts text. It accepts one of the variants of State, and nothing else.
The typo is now a compile error
let alice = Customer {
name: "Alice Smith".to_string(),
age: 25,
state: State::ny, // won't compile
member: true,
};error[E0599]: no variant, associated function, or constant named `ny`
found for enum `State` in the current scope
help: there is a variant with a similar name
|
18 - state: State::ny,
18 + state: State::NY,
This is a good thing! We catch the issue early and don't accidentally charge the wrong thing.
So what is an Enum anyway?
enum is short for "enumeration" and allows you to define a type by enumerating its possible variants.
Let's make another one:
#![allow(unused)] fn main() { // define the enum and its variants enum Direction { North, East, South, West, SouthWest, } // create instances of the enum variants let dir_1 = Direction::North; // dir is inferred to be of type Direction let dir_2: Direction = Direction::South; // dir_2 is explicitly of type Direction }
The enum declaration is defining our new type, so now a type called Direction exists, alongside i32, f64, bool, etc.
The let declarations are creating instances of the Direction type.
Using "use" as a shortcut
enum Direction {
North,
East,
South,
West,
SouthWest,
}
// Bring the variant `East` into scope
use Direction::East;
// Bring two of them into scope
use Direction::{South, West};
// Bring all of them into scope
use Direction::*;
// we didn't have to specify "Direction::"
let dir_3 = East;
let dir_4 = North;Teaching Rust two things about your enum
Out of the box, Rust will not print your enum and will not compare two of them. But you can insist.
// #[derive(Debug, PartialEq)] enum Direction { North, East, South, West, } use Direction::*; fn main(){ let here = North; let there = South; println!("{:?}", here); println!("{}", here == there); }
Debugis what{:?}needsPartialEqis what==and!=need
Control Flow with match
The match statement is used to control flow based on the value of an enum.
enum Direction { North, East, South, West, } use Direction::*; fn report(dir: Direction) { match dir { North => println!("N"), South => println!("S"), West => { // can do more than one thing println!("Go west!"); println!("W") } East => println!("E"), }; } fn main() { report(North); report(East); report(South); report(West); }
dir is a parameter typed Direction, so the only things it can be are the four variants.
If we tried doing this with if/else statements it would have to look like:
// The ugly if/else version (and it needs the PartialEq derive):
if dir == North {
println!("N");
} else if dir == East {
println!("E");
} else if dir == South {
println!("S");
} else if dir == West {
println!("Go west!");
println!("W");
} else {
// Nothing here should ever run, but the compiler can't tell us that,
// and it can't tell us if we forget one either
unreachable!();
}Covering all variants with match
match is exhaustive, so we must cover all the variants!
If we didn't...
enum Direction { North, East, South, West, } use Direction::*; fn main() { let dir_2: Direction = South; match dir_2 { North => println!("N"), South => println!("S"), // East and West not covered }; }
But there is a way to match anything left.
enum Direction { North, East, South, West, } use Direction::*; fn main() { let dir_2: Direction = Direction::North; match dir_2 { North => println!("N"), South => println!("S"), // match anything left _ => (), // covers all the other variants and doesn't do anything } }
WARNING - your catch-all has to go last or it'll gobble everything up!
Just like if-elseif-else... or a series of filters.
enum Direction { North, East, South, West, } use Direction::*; fn report(dir: Direction) { match dir { _ => println!("anything else"), // will never get here!! North => println!("N"), South => println!("S"), } } fn main() { report(North); report(East); report(South); report(West); }
Every call prints anything else, not what you want. The warning helps here!
warning: unreachable pattern
|
10 | _ => println!("anything else"),
| - matches any value
13 | North => println!("N"),
| ^^^^^ no value can reach this
Another quick example
enum Coin { Penny, Nickel, Dime } fn value(c: Coin) -> u32 { match c { Coin::Penny => 1, Coin::Nickel => 5, Coin::Dime => 10, } } fn main() { println!("{}", value(Coin::Penny)); println!("{}", value(Coin::Dime)); }
Putting Data in an Enum Variant
Each variant can come with additional information
#[derive(Debug)] enum DivisionResult { Answer(u32), DivisionByZero, } fn divide(x:u32, y:u32) -> DivisionResult { if y == 0 { return DivisionResult::DivisionByZero; } else { return DivisionResult::Answer(x / y); } } fn main() { // each pass through the loop destructures one pair into a and b for (a,b) in [(9,3), (7,0)] { match divide(a,b) { DivisionResult::Answer(result) // assigns the variant value to result => println!("This result is {}",result), DivisionResult::DivisionByZero => println!("noooooo!!!!"), }; } }
This result is 3
noooooo!!!!
So which one?
A struct has several parts, all at once.
An enum is one of a few alternatives.
| Reach for an enum when | Reach for a struct when |
|---|---|
| The value is one of a few alternatives | The value has several parts, all at once |
| The cases carry different data, or none | Every one of them carries the same fields |
| You want the compiler to make you handle each case | You want to add a field later without touching every match |
Real code usually has both: a struct to group the fields, and an enum for the field that is one of a few choices.
Sometimes either one will work and you pick the one that fits better, sometimes you're forced into one.
The same type, written both ways
| As a struct | As an enum | |
|---|---|---|
| Temperature prefer struct |
|
|
Beyond enums: match works on other types
Matching on a condition, which you will see again in a minute:
fn main() { let number = 42; match number { x if x % 2 == 0 => println!("{} is even", x), x => println!("{} is odd", x), } }
The if on an arm is a guard. That arm matches only when the pattern fits and the condition holds.
Other shapes, one line each. Full versions are on the website:
(0, y) => ... // a tuple, keeping y
13..=19 => ... // a range
[1, _, _] => ... // an array starting with 1
Book { rating, .. } => ... // a struct, keeping one fieldThe Option Enum
Find someone's last name
We've all written something like this in Python:
def find_index(target, names):
for i in range(len(names)):
if target == names[i]:
return i
return -1
index = find_index("Kesar", names)
print(last_names[index])
Now let's look up somebody who is not in the list
index = find_index("Totoro", names) # Totoro is not in names
print(last_names[index]) # last_names[-1]
No error. No crash. It prints... what?
How Rust solves it elegantly
There is a built-in enum Option<T> with two variants:
Some(T)- The variantSomecontains a value of typeTNone
Useful for when there may be no output
- Like
Noneornullin other languages - Rust makes you explicitly handle them, preventing bugs that are extremely common in other languages
- This might look a little like "optional" parameters in python (
def myfn(arg: Optional[int] = None):but functions differently)
You write Direction::North with the enum's name in front, but plain Some and None with nothing in front. They are in the prelude, the short list of names Rust hands you for free in every file. Option::Some(3) works too, and nobody writes it.
An Option<T> example
Here is prime-finding code whose return type is Option<u32>.
If it finds a prime, it returns Some(u32) holding that prime.
If it does not, it returns None.
fn is_prime(x:u32) -> bool { if x <= 1 { return false;} for i in 2..=((x as f64).sqrt() as u32) { if x % i == 0 { return false; } } true } fn prime_in_range(a:u32,b:u32) -> Option<u32> { // returns an Option<u32> for i in a..=b { if is_prime(i) {return Some(i);} } None } fn main(){ let tmp : Option<u32> = prime_in_range(90,906); // let tmp : Option<u32> = prime_in_range(20,22); println!("{:?}",tmp); }
Extracting the contents of an Option<T> with match
fn main() { let tmp : Option<u32> = Some(3); // let tmp: Option<u32> = None; match tmp { Some(____) => println!("Got: {}",____), None => println!("None"), }; }
How we do find_index, in Rust
fn find_index(target: &str, names: [&str; 3]) -> Option<usize> { for i in 0..names.len() { if target == names[i] { return Some(i); } } None } fn main() { let names = ["Kesar", "Mei", "Satsuki"]; let last_names = ["Patel", "Kusakabe", "Kusakabe"]; for target in ["Kesar", "Totoro"] { match find_index(target, names) { Some(i) => println!("{} {}", target, last_names[i]), None => println!("{} is not in the list", target), } } }
Kesar Patel
Totoro is not in the list
There is no -1 to index with by accident. To get the number out you have to go through the match, and the match makes you say what happens when it is None.
The name on the left is one you make up
Same function, different names, same output:
fn main() { let number = 42; match number { tuesday if tuesday % 2 == 0 => println!("{} is even", tuesday), y => println!("{} is odd", y), } }
x, y, tuesday. Rust knows none of these names before you write them. A pattern on the left of => creates a new variable, and it exists only inside that one arm. (You can even call it number again but that's confusing)
Same thing in Some(x). The x catches whatever was inside the Some.
let tmp: Option<u32> = Some(3);
match tmp {
Some(x) => println!("{}", x), // 3
None => println!("nothing"),
}Activity Time
Paper instructions, Playground for solving, Gradescope for submitting.
Lean on the compiler! (And lecture notes.)
Feel free to change the problems so they ask you to PRINT strings instead of return them.
These problems are harder than what we'd expect you to hand-code!
More match, on the website
Everything past this point is on the lecture page rather than on your paper. Six short appendices, if you want to go further:
- Matching on a struct, and guarding an arm with
if if let, a shorthand for when you only care about one arm of amatchmatchas an expression, so an arm's value goes straight into alet- The other pattern shapes: tuples, ranges, and arrays
- More destructuring: partial with
.., and a pattern in a function parameter - Two more enums: the temperature types with their methods, and Project 1's
SecretKeeper
Matching on a struct, and guarding an arm
match works on structs too. Name the fields you want, .. for the rest.
#![allow(unused)] fn main() { #[derive(Debug)] struct Book { title: String, rating: f64, pages: u32, } fn get_rating(book: &Book) -> f64 { match book { &Book { rating, .. } => rating, } } fn classify(book: &Book) -> &str { match book { &Book { rating, pages, .. } if rating >= 4.5 && pages >= 400 => "Epic Bestseller", &Book { rating, .. } if rating >= 4.5 => "Highly Rated", _ => "Standard", } } }
Arms are tried top to bottom, so the fussiest guard goes first.
The & in &Book { rating, .. } is there because book is a &Book. The pattern is shaped like the type it matches. (And we'll understand exactly how it works... you guessed it, after the midterm.)
Bonus - Simplified matching with if let (FYI)
When you care about one case only, match makes you write a _ arm you have no use for:
enum Direction { North, East, South, West, } use Direction::*; fn main() { for dir in [North, East, South, West] { match dir { North => println!("this one is North"), _ => (), }; } }
That happens often enough to have a shorthand:
enum Direction { North, East, South, West, } use Direction::*; fn main() { for dir in [North, East, South, West] { if let North = dir { // YES THIS LOOKS BACKWARDS! It's more like match than if println!("this one is North"); } } }
You can add an else, the same as on a regular if.
You will meet it most often on Option, where the pattern carries a value. These two do the same thing:
fn main() { let tmp: Option<u32> = Some(3); // with match match tmp { Some(x) => println!("match: {}", x), None => println!("nothing"), } // with if let, when you only care about one of the two cases if let Some(x) = tmp { println!("if let: {}", x); } }
if let reads backwards the first few times. Some(x) is the pattern and tmp is the
value being tested against it, which is the same order a match arm uses. And unlike ==,
it can reach inside a variant and pull the value out.
Appendix: match as an expression (FYI)
The result of a match can be used as an expression.
Each branch (arm) returns a value.
#[derive(Debug)] enum Direction { North, East, South, West, } use Direction::*; fn main() { // turn left let dir_facing = North; println!("{:?}", dir_facing); let after_turning_left = match dir_facing { North => West, West => South, South => East, East => North }; println!("{:?}", after_turning_left); }
Appendix: the other pattern shapes (FYI)
Matching tuples:
fn main() { let point = (3, 5); match point { (0, 0) => println!("Origin"), (0, y) => println!("On Y-axis at {}", y), (x, 0) => println!("On X-axis at {}", x), (x, y) => println!("Point at ({}, {})", x, y), } }
Matching ranges:
fn main() { let age: u32 = 25; match age { 0..=12 => println!("Child"), 13..=19 => println!("Teenager"), 20..=64 => println!("Adult"), 65.. => println!("Senior"), } }
Destructuring arrays:
fn main() { let arr = [1, 2, 3]; match arr { [1, 2, 3] => println!("Exact match"), [1, _, _] => println!("Starts with 1"), [_, _, 3] => println!("Ends with 3"), _ => println!("Something else"), } }
Appendix: more destructuring (FYI)
You have done this with tuples: let (x, y) = (3, 5);. A struct works the same way, naming every
field: let Book { title, rating, pages } = dune;.
Partial destructuring with .., when you only want some of the fields:
struct Book { title: String, rating: f64, pages: u32 } fn main() { let dune = Book { title: String::from("Dune"), rating: 4.6, pages: 412 }; println!("rating: {}", dune.rating); // ignore rating this time let Book { title, pages, .. } = dune; println!("{} is {} pages", title, pages); }
In a function parameter, so the body never mentions the struct at all:
fn print_pages(Book { title, pages, .. }: &Book) {
println!("{} is {} pages", title, pages);
}Appendix: the temperature types, and Project 1's SecretKeeper (FYI)
The two temperature types from the slide, with a sensor id added and the methods that use them. Both versions print identical output.
Temperature as a struct. Converting needs the scale; reading the sensor id does not.
enum Scale { Fahrenheit, Celsius } struct Temperature { degrees: f64, scale: Scale, sensor_id: u32, } impl Temperature { // converting needs the scale fn in_celsius(&self) -> f64 { match self.scale { Scale::Celsius => self.degrees, Scale::Fahrenheit => (self.degrees - 32.0) * 5.0 / 9.0, } } } fn main() { let body = Temperature { degrees: 98.6, scale: Scale::Fahrenheit, sensor_id: 7 }; let boiling = Temperature { degrees: 100.0, scale: Scale::Celsius, sensor_id: 4 }; for t in [&body, &boiling] { // the sensor id has nothing to do with the scale, so just read the field println!("sensor {}: {:.1} C", t.sensor_id, t.in_celsius()); } }
Temperature as an enum. Same output, but reading the sensor id takes a match whose two arms do the same thing.
enum Temperature { Fahrenheit(f64, u32), // degrees, sensor id Celsius(f64, u32), // degrees, sensor id } impl Temperature { // converting needs the scale fn in_celsius(&self) -> f64 { match self { &Temperature::Celsius(degrees, _) => degrees, &Temperature::Fahrenheit(degrees, _) => (degrees - 32.0) * 5.0 / 9.0, } } // the sensor id has nothing to do with the scale, and we still have to ask fn sensor_id(&self) -> u32 { match self { &Temperature::Fahrenheit(_, id) => id, &Temperature::Celsius(_, id) => id, } } } fn main() { let body = Temperature::Fahrenheit(98.6, 7); let boiling = Temperature::Celsius(100.0, 4); for t in [&body, &boiling] { println!("sensor {}: {:.1} C", t.sensor_id(), t.in_celsius()); } }
Project 1's SecretKeeper. The one you saw on Monday was trimmed. Here is the field the real one has:
enum Source {
Human,
Known(u32),
}
pub struct SecretKeeper {
source: Source,
questions: u32,
already_used: Vec<u32>,
}There is no secret field. A keeper either asks the person at the keyboard, or it is already holding a number. Only one of those two carries a u32, so the number lives inside the variant.
Why not a secret field with a human flag next to it? Because then a Human keeper would still have a secret number sitting inside it, and nothing would stop you reading it. The enum makes the impossible combination impossible to write down: if it is Human, there is no number to read.
Lecture 15 - Review: everything before Midterm 1

Welcome to Review Day!
You've learned a lot in just a few weeks! Today we'll:
- Review key concepts you need to master for the midterm
- Practice with interactive questions
- Clarify what you need to know vs. what's just context
- Build confidence for the exam
Reminders about the exam
- Friday during your usual class time
- No reference sheets or calculators
- Two exam versions and set (but not assigned) seating
And two things to keep in mind when this feels hard
- Corrections. About two weeks after the exam, in discussion, you can redo specific questions and earn back up to half your lost points.
- A strong final counts for more. If your final beats your midterm average, we reweight automatically and use whichever calculation is better for you.
Shell/Terminal Commands (Lecture 2)
For the midterm, you should recognize and recall:
pwd- where am I?ls- what's here?ls -la- more info and hidden filesmkdir folder_name- make a foldercd folder_name- move into a foldercd ..- move up to a parent foldercd ~- return to the home directoryrm filename- delete a filerm -rf folder_name- delete a folder and everything in it, no questions askedtouch filename- make an empty filecat filename- print a whole file to the screennano filename- edit a file without leaving the terminalcp file.txt backup.txt- copy a filemv old_name new_name- rename or move a fileecho "text" > file.txt- write text to a file, replacing what was thereecho "text" >> file.txt- add text to the end of a file
You DON'T need to: Memorize complex command flags, pipes, file permissions, or shell scripting
Git Commands (Lecture 4)
For the midterm, you should recognize and recall:
git clone- get a repository, pasting in the HTTPS or SSH linkgit init- start tracking the folder you are standing ingit status- see what's changedgit diff- see exactly what changed since the last commitgit add .- stage all recent changesgit commit -m "my commit message"- create a commit with staged changesgit push- send what's on my machine to GitHubgit pull- get changes from GitHub to my machine
You DON'T need to: type merge, revert, reset, checkout, or pull request commands from memory
You DO need the ideas: what a branch is, what merging does, and what a merge conflict is, including roughly how you sorted out the one in Project 1
Cargo Commands (Lecture 5)
For the midterm, you should recognize and recall:
cargo new project_name- create projectcargo run- compile and runcargo run --release- compile and run with optimizations (slower to compile, faster to run)cargo build- just compile without runningcargo check- just check for errors without compilingcargo test- run tests
You DON'T need to know: Cargo.toml syntax, how Cargo.lock works, or advanced cargo features
You DO need to read a compiler error: find the file and line it names, read what it says it expected and what it found, and use the suggestion. Remember that the fix does not always belong on the line the error points at.
Quick Questions: Tools
Question 1
Name the command that:
- a) shows your current location on your machine
- b) compiles your code without running it
Answer. a) pwd. b) cargo build. (cargo check looks for errors but never produces a program you could run.)
Question 2
What's the correct order for the basic Git workflow?
- A) add -> commit -> push
- B) commit -> add -> push
- C) push -> add -> commit
- D) add -> push -> commit
Answer. A. add, then commit, then push. Staging comes first, the commit packages what is staged, and the push sends it to GitHub.
Compilers vs Interpreters (Lecture 3)
Key Concepts
- Compiled languages (like Rust): Code is transformed into machine code before running
- Interpreted languages (like Python): Code is executed line-by-line at runtime
- The compiler checks your code for errors and translates it into machine code
- The machine code is directly executed by your computer - it isn't Rust anymore!
- A compiler error means your code failed to translate into machine code
- A runtime error means your machine code crashed while running
Rust prevents many runtime errors by being strict at compile time!
Variables and Types (Lecture 6)
Key Concepts
- Defining variables:
let x = 5; - Mutability: Variables are immutable by default, use
let mutto allow them to change - Shadowing:
let x = x + 1;creates a newxvalue withoutmutand lets you change types. A variable that's shadowed inside a scope ({}) is visible again after the scope ends. - Basic types:
i32,f64,bool,char,&str,String - Rough variable sizes: Eg.
i32takes up 32-bits of space and its largest positive value is about half ofu32's largest value - Type annotations: Rust infers types (
let x = 5) or you can specify them (let x: i32 = 5) - Tuples: Creating (
let x = (2,"hi")), accessing (let y = x.0 + 1), destructuring (let (a,b) = x) - Constants: Eg.
const MY_CONST: i32 = 5, always immutable, must have explicit types, written into machine code at compile-time - Two's complement: how a signed integer holds a negative number. Flip every bit, add one. A leading
1means negative, so as ani8,1111 1111is-1and not255
What's Not Important
- Calculating exact variable sizes and max values
- Complex string manipulation details
String vs &str - You're not responsible for it, but let's refresh
Quick explanation
String= a string = owned text data (like a text file you own)&str= a string slice = borrowed text data (like looking at someone else's text)- A string literal like
"hello"is a&str(you don't own it, it's baked into your program) - To convert from an &str to a String, use
"hello".to_string()orString::from("hello") - To convert from a String to an &str, use
&my_string(to create a "reference")
Don't stress! You can do most things with either one, and I will not make you do anything crazy with these / penalize you for misusing these on the midterm.
Quick Questions: Rust basics
Question 3
What happens with this code?
#![allow(unused)] fn main() { let x = 5; x = 10; println!("{}", x); }
- A) Prints 5
- B) Prints 10
- C) Compiler error
- D) Runtime error
Answer. C, compiler error. x is immutable. let mut x = 5; fixes it.
Question 4
What's the type of x after this code?
#![allow(unused)] fn main() { let x = 5; let x = x as f64; let x = x > 3.0; }
- A)
i32 - B)
f64 - C)
bool - D) Compiler error
Answer. C, bool. Each let x shadows the one before it and is allowed to change the type: i32, then f64, then the result of a comparison.
Question 5
How do you access the second element of tuple t = (1, 2, 3)?
- A)
t[1] - B)
t.1 - C)
t.2 - D)
t(2)
Answer. B, t.1. Tuples use a dot and a number. Square brackets are for arrays and vectors.
Functions (Lecture 7)
Key Concepts
- Function signature:
fn name(param1: type1, param2: type2) -> return_type, returned value must matchreturn_type - Expressions and statements: Expressions reduce to values (no semicolon), statements take actions (end with semicolon)
- Returning with return or an expression: Ending a function with
return x;andxare equivalent - {} blocks are scopes and expressions: They reduce to the value of the last expression inside them
- Unit type: Functions without a return type return
() - Best practices: Keep functions small and single-purpose, name them with verbs
What's Not Important
- Ownership/borrowing mechanics (we'll cover this after the midterm)
- Advanced function patterns
Quick Questions: Functions
Question 6
What is the value of mystery(x)?
#![allow(unused)] fn main() { fn mystery(x: i32) -> i32 { x + 5; } let x = 1; mystery(x) }
- A) 6
- B)
i32 - C)
() - D) Compiler error
And if the return type were dropped, fn mystery(x: i32), what would change?
Answer. D, compiler error. The semicolon after x + 5 turns the body into a statement, so the function hands back () while its signature promises i32. Drop the semicolon, or write return x + 5;.
If -> i32 were dropped, it would compile, because () is then exactly what the signature says. mystery(x) would be ().
Question 7
Which is a correct function signature for a function that takes two integers and returns their sum?
Answer. fn add(a: i32, b: i32) -> i32. The names are up to you, and so is which integer type. Every parameter needs a type, and the return type comes after ->.
Control Flow and Arrays (Lecture 8)
Key Concepts
- Ranges:
1..5vs1..=5 - Arrays: Creating (
[5,6]vs[5;6]), accessing (x[i]), 0-indexing - If/else: how to write
if / elseblocks with correct syntax - Loop types:
for,while,loop- how and when to use each breakandcontinue: For controlling loop flow- Basic enumerating
for (i, val) in x.iter().enumerate()
What's Not Important
- Compact notation (
let x = if y ...orlet y = loop {...) - Enumerating over a string array with
for (i, &item) in x.iter().enumerate() - Labeled loops, breaking out of an outer loop
Quick Questions: Control Flow & Arrays
Question 8
- a) What's the difference between
1..5and1..=5? - b) How do you get both the index and the value when looping over an array?
Answer. a) 1..5 is 1, 2, 3, 4. 1..=5 also includes 5. b) for (i, val) in x.iter().enumerate().
Question 9
What does this print?
#![allow(unused)] fn main() { for i in 0..3 { if i == 1 { continue; } println!("{}", i); } }
Answer. 0, then 2. When i is 1, continue skips the println! and starts the next pass.
Comparing Programs (Lecture 9)
Key Concepts
- Timing two programs that do the same thing, and why debug and release give different numbers
- Counting steps: how many operations a piece of code does, and how that count grows as the input grows
- Big O notation: describing that growth for time and for space
- The common classes: O(1), O(log n), O(n), O(n^2), O(2^n), and what each one feels like as n gets big
- The two rules: drop constants, keep the dominant term.
O(3n + 7)isO(n) - Reading a loop: one loop over n is O(n), a loop inside a loop is usually O(n^2)
What's Not Important
- Formal proofs, or the difference between big O, big theta, and big omega
- Amortized analysis
- Memorizing complexity numbers you have not derived
Sorting and Recursion (Lecture 10)
Key Concepts
- Sorting by hand: selection sort and insertion sort, step by step on a small list
- Finding their Big O from the loops: both are O(n^2), and you should be able to say why
- Recursion: a base case plus a smaller version of the same problem, and what happens without a base case
- Merge sort is O(n log n), from the shape of its call tree: log n levels, n work per level
What's Not Important
- Writing merge sort from scratch
- Quicksort, heapsort, or sort stability
- The exact number of swaps or comparisons for a given list
Quick Questions: Complexity & Sorting
Question 10
What is the Big O of this, in terms of n?
#![allow(unused)] fn main() { for i in 0..n { for j in 0..n { println!("{}", i * j); } } }
- A) O(1)
- B) O(n)
- C) O(n^2)
- D) O(2^n)
Answer. C, O(n^2). A loop over n, inside a loop over n.
Question 11
A program is O(n^2). You double the size of the input. Roughly how much longer does it take?
Answer. About four times as long. Double the input and n^2 becomes (2n)^2, which is 4n^2.
Question 12
What is missing here, and what happens when you run it?
#![allow(unused)] fn main() { fn countdown(n: u32) { println!("{}", n); countdown(n - 1); } }
Answer. There is no base case, so it never stops calling itself. It crashes before it gets far, though: once n reaches 0, n - 1 goes below zero, which a u32 cannot hold, and the program panics with attempt to subtract with overflow. Add if n == 0 { return; } at the top to fix.
Question 13
Merge sort is O(n log n). Where does the log n come from?
Answer. From halving. The list splits in half each time, so it takes about log(n) splits to get down to single elements. That is the number of levels in the call tree, and every level does n work merging back together.
Structs (Lecture 11)
Key Concepts
- Defining a struct:
struct Customer { name: String, age: u32 }, and making one - Reading and writing fields with a dot, and that
mutapplies to the whole struct - Tuple structs for when the fields don't need names
implblocks: writing a method and calling it with a dot&selfvs&mut self: read the struct, or change it. Plainselftakes it with you- Constructors:
Customer::new(...), and why it is::and not. Vec: a list that can grow,push,len, and indexing
What's Not Important
- Deriving anything beyond
Debug - Generic structs, or lifetimes on a struct
Box, trait objects, and anything else that comes after the midtermpub: not on Friday. It comes back properly when we do modules and crates
Quick Questions: Structs
Question 14
What happens with this code?
#![allow(unused)] fn main() { struct Point { x: f64, y: f64 } let p = Point { x: 1.0, y: 2.0 }; p.x = 5.0; }
- A) Prints nothing, runs fine
- B) Compiler error
- C) Runtime error
- D)
p.xis 1.0 afterwards
Answer. B, compiler error. p is not mut, so none of its fields can be written. let mut p = ... fixes it.
Question 15
What goes in the blank?
#![allow(unused)] fn main() { impl Rectangle { fn area(____) -> f64 { self.width * self.height } } }
Answer. &self. The method reads self.width and self.height and changes nothing, so it only needs to borrow.
Question 16
Why is it Customer::new("Alice") and not customer.new("Alice")?
Answer. new is an associated function, not a method: notice it takes no self. There is no Customer yet to put on the left of a dot, so you reach through the type itself with ::.
Enums and Pattern Matching (Lecture 12)
Key Concepts
- Enum definition: Creating custom types with variants
- Data in variants: Enums can hold data
matchexpressions: syntax by hand, needs to be exhaustive, how to use a catch-all (_)Option<T>: HasSome(value)andNone, for when there might be nothing#[derive(Debug)]: For making enums printable#[derive(PartialEq)]: For allowing enums to be compared with==and!=- Data extraction: Getting values out of enum variants with
match. ForOptionspecifically, alsounwrapandexpect - Pattern guards: an arm with a condition on it,
Some(x) if x > 40 => ...
What you should be able to write
- A
matchon an enum, covering every variant - A guard, which is just a condition on the arm. That is the flexible one
What's Not Important
if letnotation- Writing the other pattern shapes from memory (ranges, tuples, arrays, struct patterns). You should be able to read a variety of them
Quick Questions: Enums & Match
Question 17
What's wrong with this code?
#![allow(unused)] fn main() { enum Status { Loading, Complete, Error, } match Status::Loading { Status::Loading => println!("Loading..."), Status::Complete => println!("Done!"), } }
Answer. The match is not exhaustive. Status::Error has no arm, so this does not compile. Add an arm for it, or a _ catch-all.
Question 18
If a function's return type is Option<i32> what values can it return (can be more than one)?
- A)
Some(i32) - B)
Ok - C)
Ok(i32) - D)
None - E)
Err
Answer. A and D. Some(i32) or None. Ok and Err belong to Result, not Option.
Question 19
Which of these can go in the ???? to print Got: 42? More than one works.
#![allow(unused)] fn main() { let x = Some(42); match x { Some(????) => println!("Got: {}", ????), None => println!("Nothing"), } }
- A)
_and_ - B)
42and42 - C)
xandx - D)
yandy
Answer. C and D both work.
y is the best answer, but x works too, because inside the arm, x is a new variable holding 42, shadowing the outer x. But it's confusing to read.
A fails because _ cannot be used as a value. B fails for a different reason: Some(42) matches only the number 42, so the match stops being exhaustive.
Question 20
What does #[derive(Debug)] do?
Answer. It lets you print it with {:?}.
Error Handling and File I/O (Lecture 13)
Key Concepts
Result<T, E>: HasOk(value)andErr(error), for when something failed and you can say why- Choosing between
Option,Result, andpanic!: nothing is a normal answer, it failed and here is why, or carrying on makes no sense panic!vsResult: Panic when unrecoverable, Result when recoverable- Error propagation: Passing errors up with
matchor? unwrap()andexpect(): Quick ways to extract values (but they can panic!)- The
?operator: Shortcut for "if error, return it; if ok, give me the value". The error type has to match the one your function returns, or be convertible into it
What's Not Important
- Custom error types, or implementing
std::error::Error Box<dyn Error>, and anything else that comes after the midterm- Writing file I/O from memory. You do not need to recall
fs::read_to_stringorfs::writeexactly, and you can look them up. You should be able to read them and say what you have to do with theResulteach one hands back
Quick Questions: Error Handling
Question 21
Option, Result, or panic!? One for each:
- a) looking up a name that is not in the list
- b) reading a file that is not there
- c) a situation your own code should have made impossible
And when is writing .unwrap() a reasonable thing to do?
Answer. a) Option, since "not in the list" is a normal answer. b) Result, since it failed and you can say why. c) panic!, since carrying on makes no sense.
.unwrap() is reasonable in a test, in a quick script, or when you can show the failure cannot happen.
Question 22
Why won't this code compile?
#![allow(unused)] fn main() { fn parse_number(s: &str) -> Result<i32, String> { let num = s.parse::<i32>()?; // parse() returns Result<i32, ParseIntError> Ok(num * 2) } }
- A) The
?operator can't be used inletstatements - B) You can't multiply by 2 inside
Ok() - C) The error types don't match:
ParseIntErrorvsString - D)
Okdoesn't match theResulttype
Answer. C. ? tries to turn the ParseIntError into a String, and no such conversion exists.
Putting It All Together
What You've Accomplished
In just a few weeks, you've learned:
- Professional development tools (shell, git, github, cargo)
- The foundations of a systems programming language
- Sophisticated pattern matching and error handling techniques
That's a lot.
And if it doesn't feel fluent yet, give it some time. It's like you memorized your first 500 words in a new spoken language but haven't had much practice actually speaking it yet. It feels awkward, and that's normal.
Midterm Strategy
- Focus on concepts: Understand the "why" behind the syntax and it will be easier to remember
- Practice with your hands: Literally and figuratively - practice solving problems, and practice on paper
- Take big problems step-by-step: Understand each line of code before reading the next. And make a plan before you start to hand-code
Questions and Discussion
What is still unclear? This is the last time we are all in a room together before Friday.
Activity time
See Activity 15. Two hand-coding problems, in groups of three.
(You said more hand-coding and more group work!)
One sheet per group, and a different person holds the pen for each problem. The other two say what to write and catch the mistakes.