Rust and VSCode Setup
Lecture 2: Wednesday, May 20, 2026.
Code examples
This module will run you through the steps required to installed the tools we need for this course:
- The Rust compiler and package manager (called
cargo) - The VSCode IDE and its Rust analyzer plugin for developing Rust!
- Git.
It will also show you the basics of creating and running a Rust project using VSCode and the command line.
Rust Compiler, IDE, and git Setup
To get setup, follow these instructions and do not hesitate to ask us for help.
You should also install Git using these instructions.
How do you know if you have succeeded in setting up Rust
Use these steps to test that your setup is successfully.
To test your Rust (cargo) installation:
- Run the following command in your command line (Mac/Linux) or power shell (Windows):
cargo --version
The output should show cargo version 1.92.0 or later.
- Create a hello world Rust project by navigating to a folder of your choosing (e.g., your desktop) and running the following command via your command line (Mac/Linux) or power shell (Windows):
# make sure you are in the desktop directory/folder
cargo new hello_world --bin
- Run the hello world Rust project using:
# make sure you are in the desktop directory/folder
cd hello_world   # change directory to inside of the hello_world project
cargo run        # run the project
If successful, you should see the following output:
Hello, world!
Common issues
Windows
C++ Redistributable Package: You may not have Microsoft’s visual c++ redistributable package installed. If you do not, the Rust compiler
may appear to be installed successfully but fail to work when run. You can fix this error by installing this package from here.
Path Environment Variable: If you get an error saying that cargo cannot be found or is unrecognizable when you attempt to run cargo --version,
you must manually add %USERPROFILE%\.cargo\bin to your path environment variable. You can do that by following this video, but make sure
to add %USERPROFILE%\.cargo\bin instead of what the video uses (python directory).
Missing link.ex: You may not have the C++ build tools (including the linker) installed. If so, when you try to compile/run a Rust project, you will get an error about missing link.exe.
In this case, you will need to install the windows SDK and the MSVC C++ Build tools from https://visualstudio.microsoft.com/downloads/. Choose the latest version of both that is compatible with your machine.
Mac
Mac VSCode Command Line: The default command line in VSCode on Mac is Zsh which may give you some headache or not work. If so, you can change it to bash
which is friendlier for Rust using these instructions.
In-class Exercise: Rust and VSCode Basics
This module gives you some practice creating, editing, and running Rust projects.
Step 1: Create the Project
We will create a project from the terminal / command line. Use Git Bash if you are on windows.
-
Open a terminal, and navigate to the folder where you would like your project to appear using
cd. -
Run
cargo new exampleto create a new project. In this case, we named this projectexample, but you can change the name to whatever you feel like. -
Confirm the project was created correctly by navigating to its folder using
cd exampleand running it usingcargo run. -
Use
pwdto the exact location where you created the folder.
You should see a similar output to the screenshot below, but the location of your project may be different.

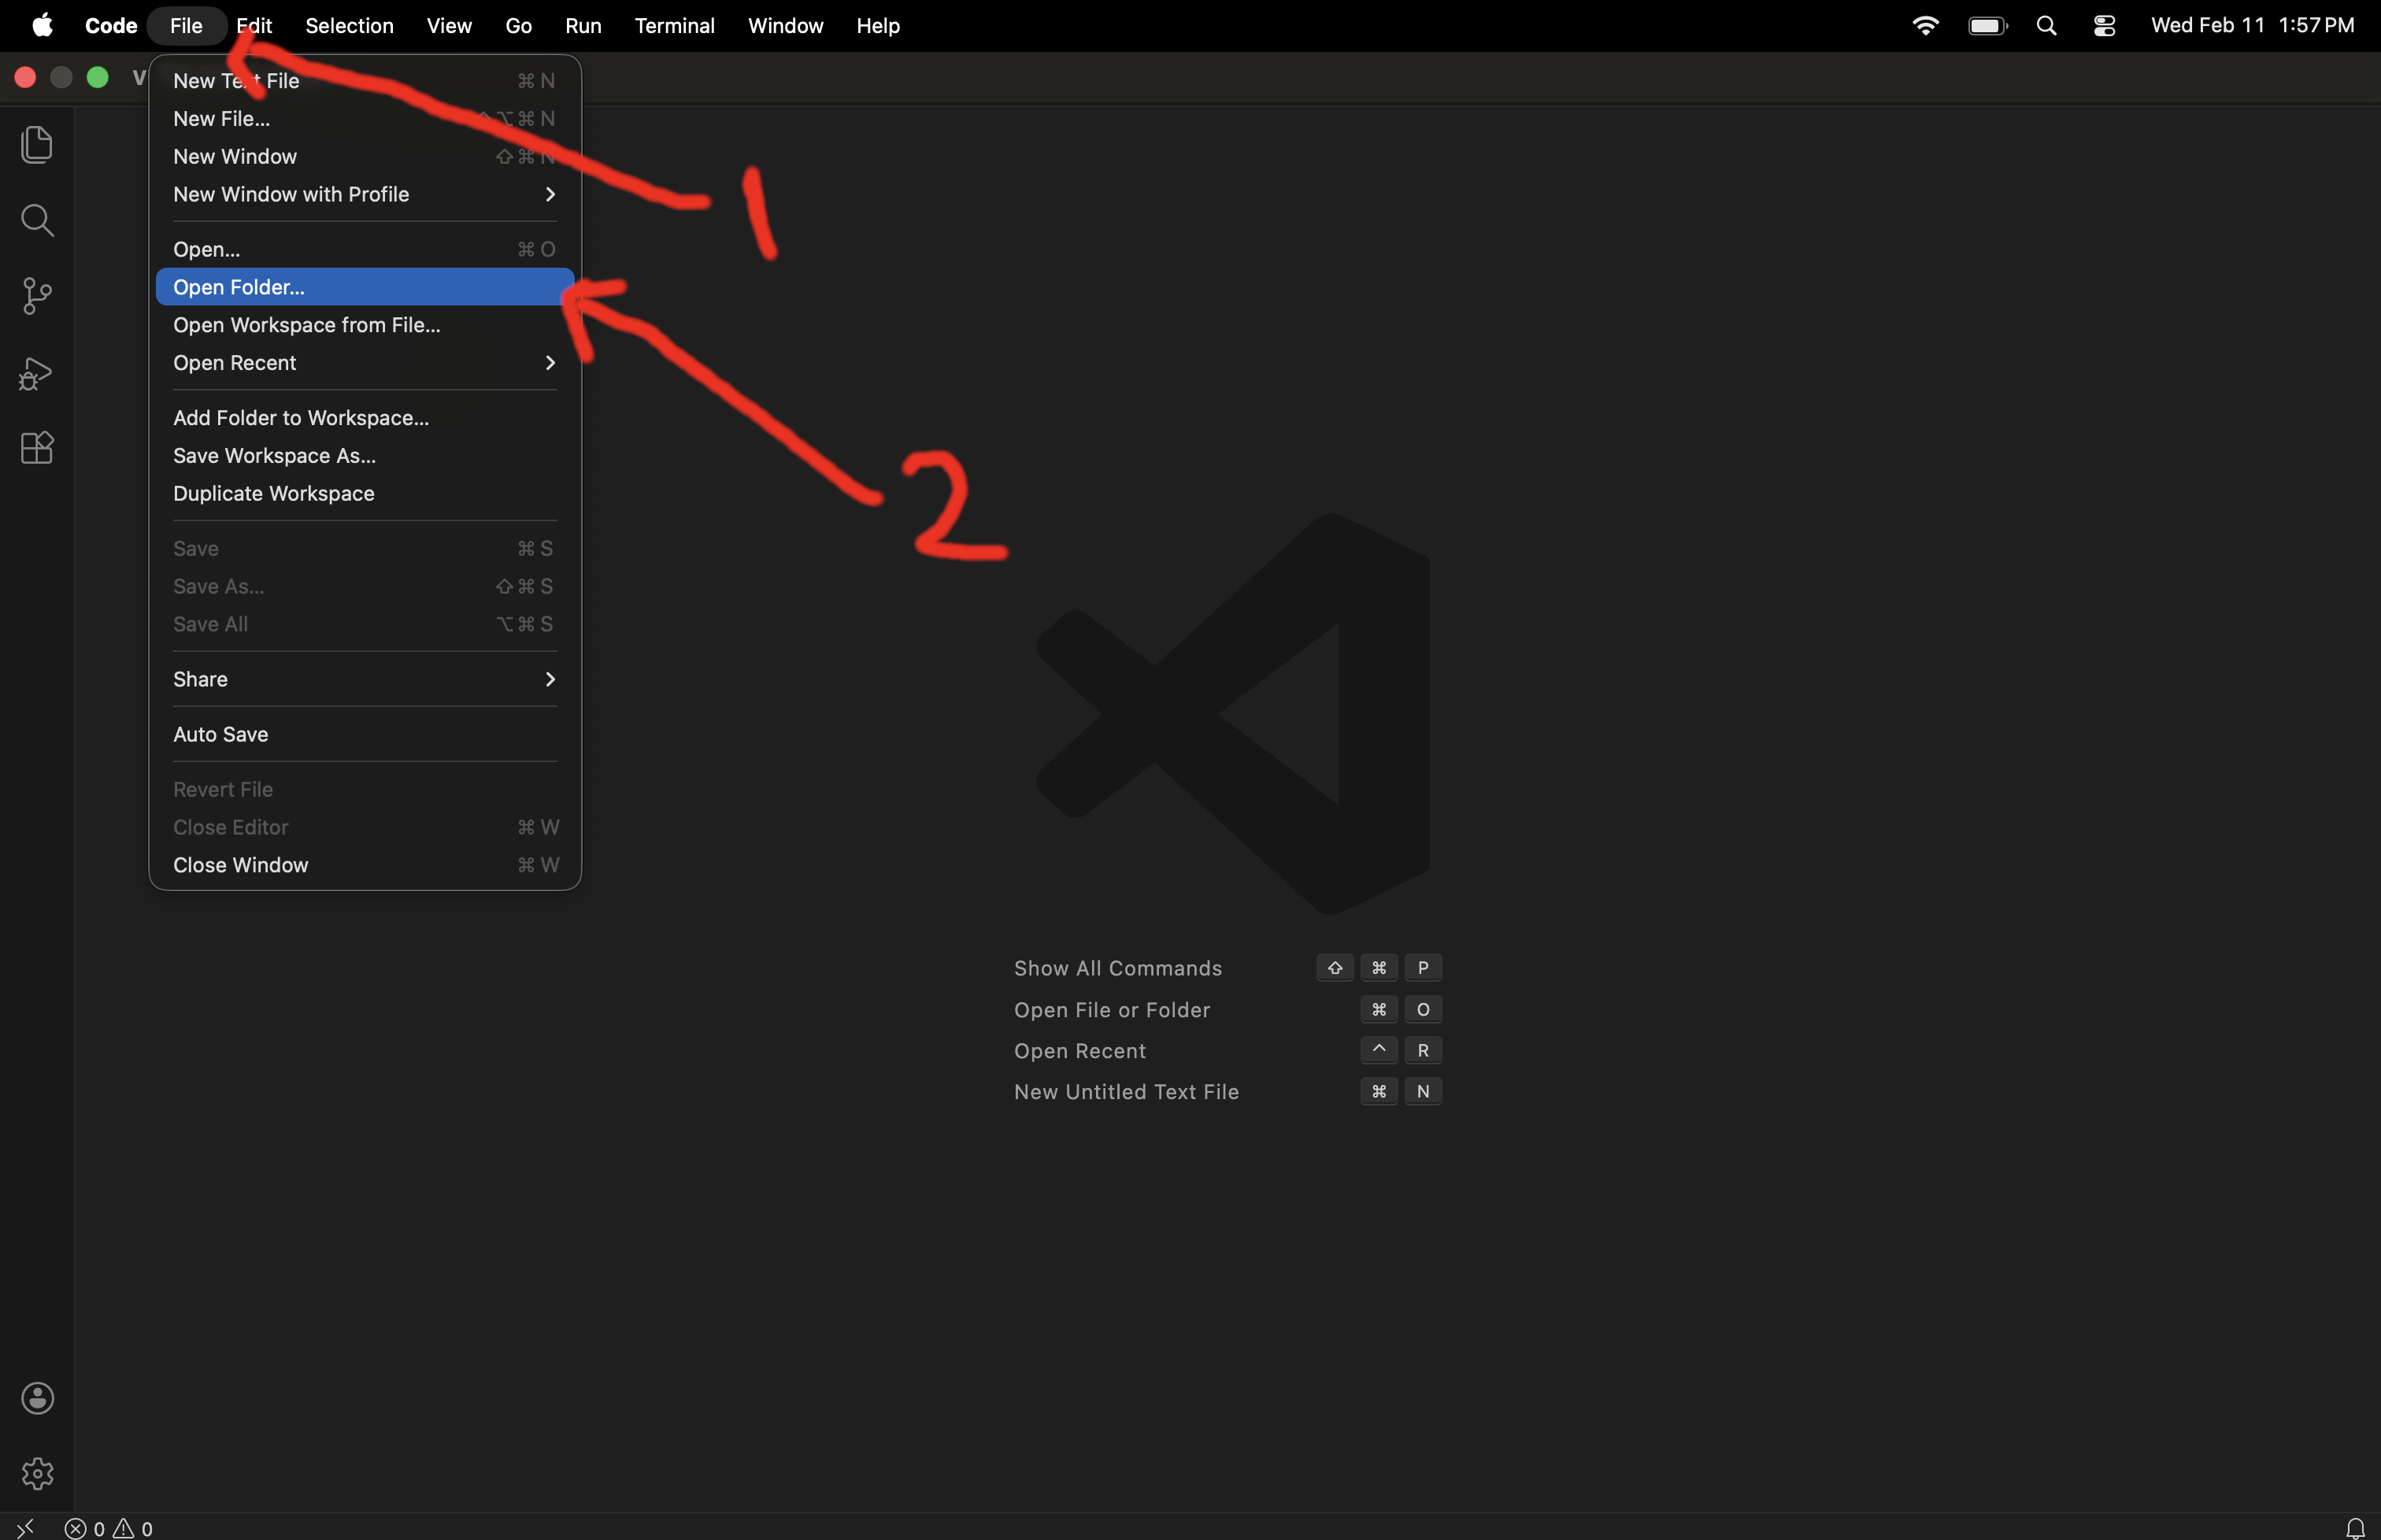
Step 2: Open the project with VSCode
Open your VSCode, then use the file menu to click on open folder. You need to use open folder and not open.
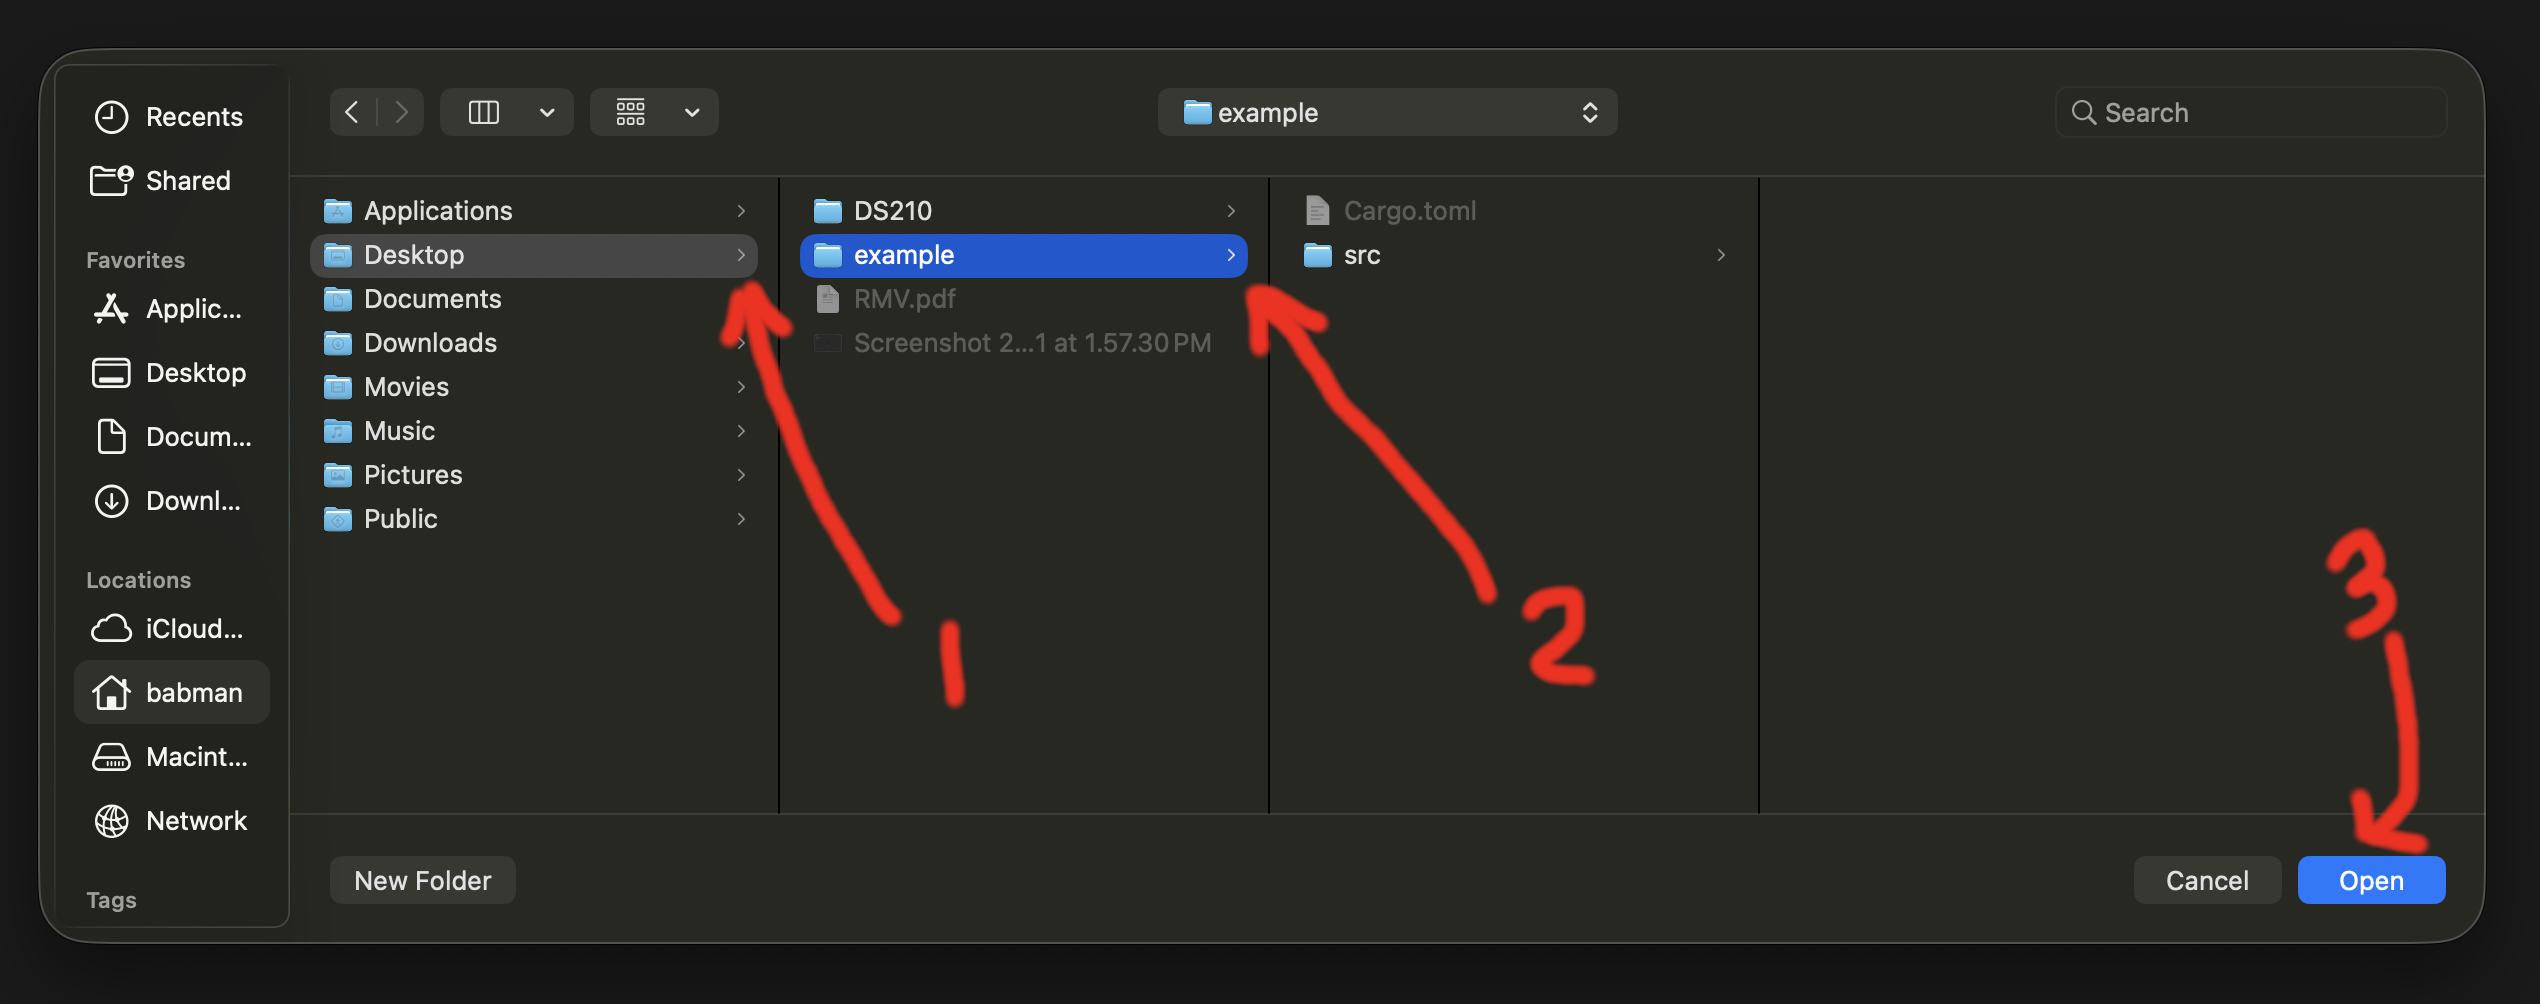
Then navigate to the location from step (4) above where you placed the project, and open the project’s folder.
Finally, use the left navigation panel to look inside src and open file main.rs to see the code. You should see the content of the file open, as well as a run button
right on top of the main function. Click run to confirm it works successfully.
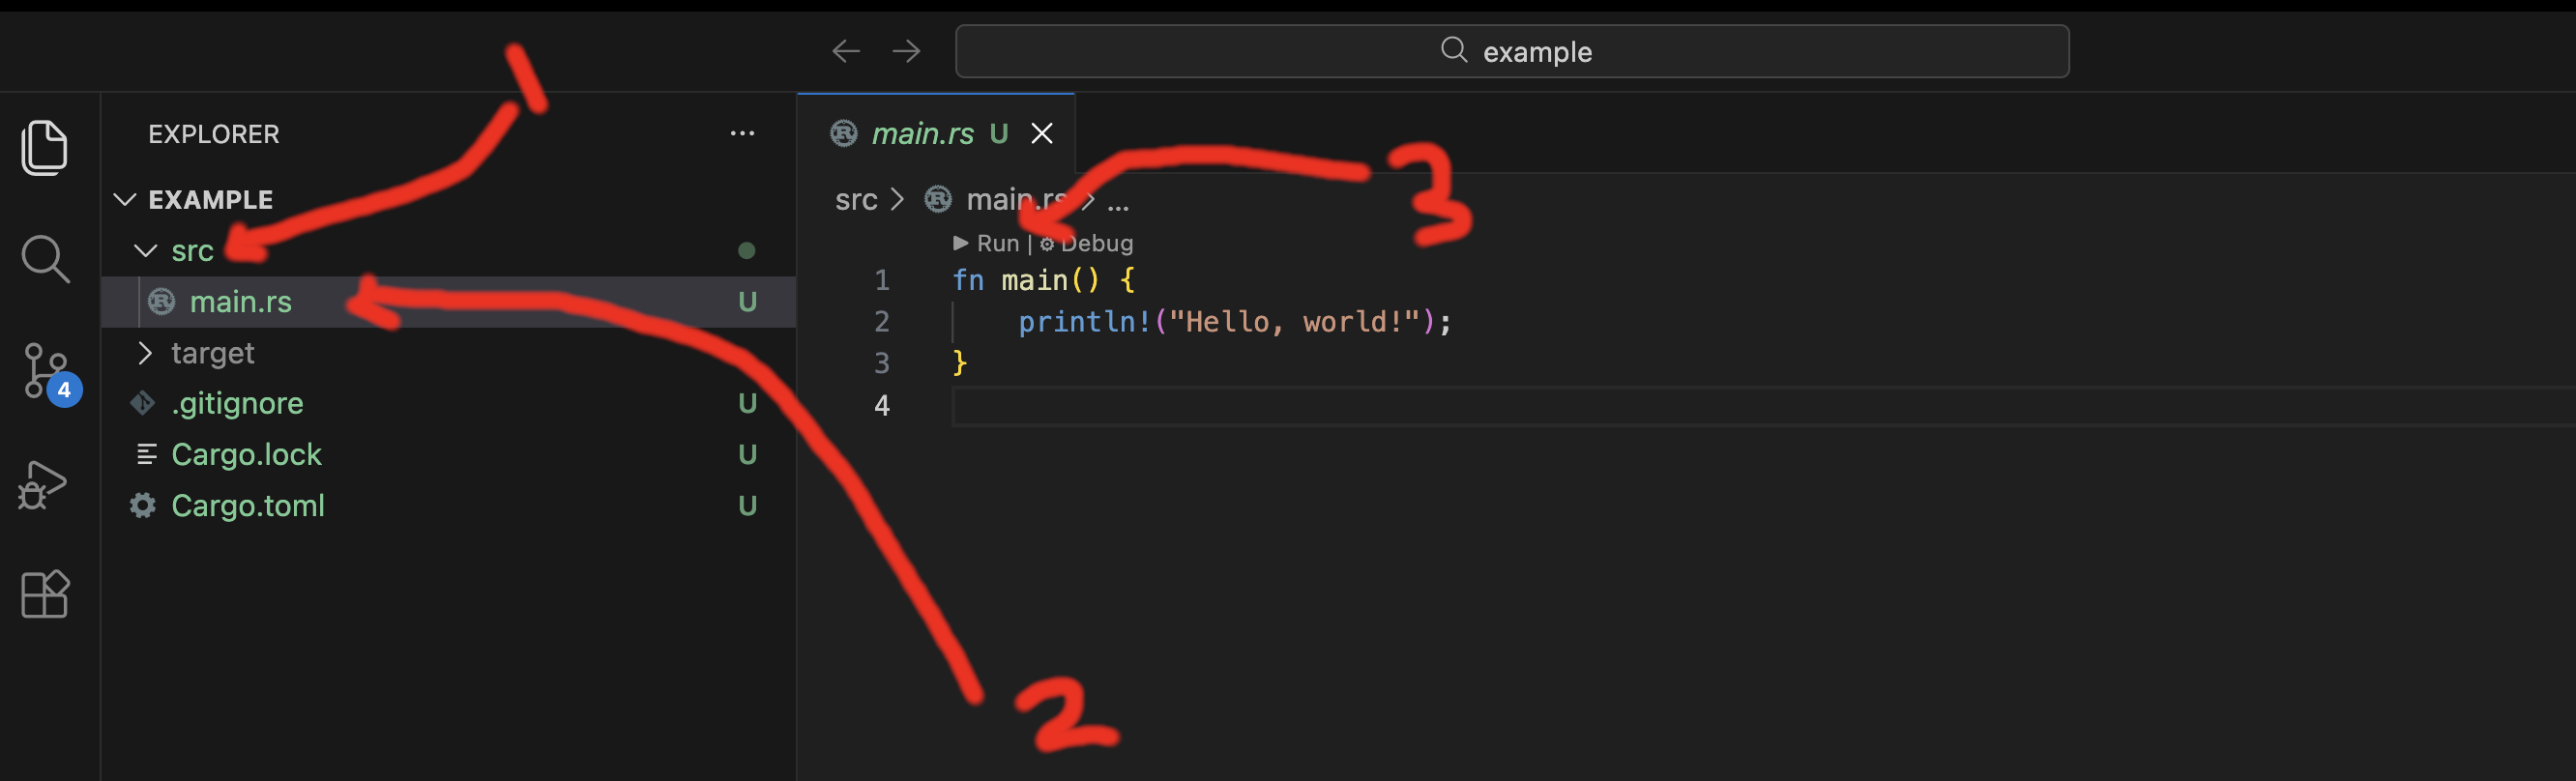
If you do not see the run button, double check that (1) rust analyzer is installed in VSCode, and (2) you used open folder and opened the correct folder – e..g, the example folder on your desktop.
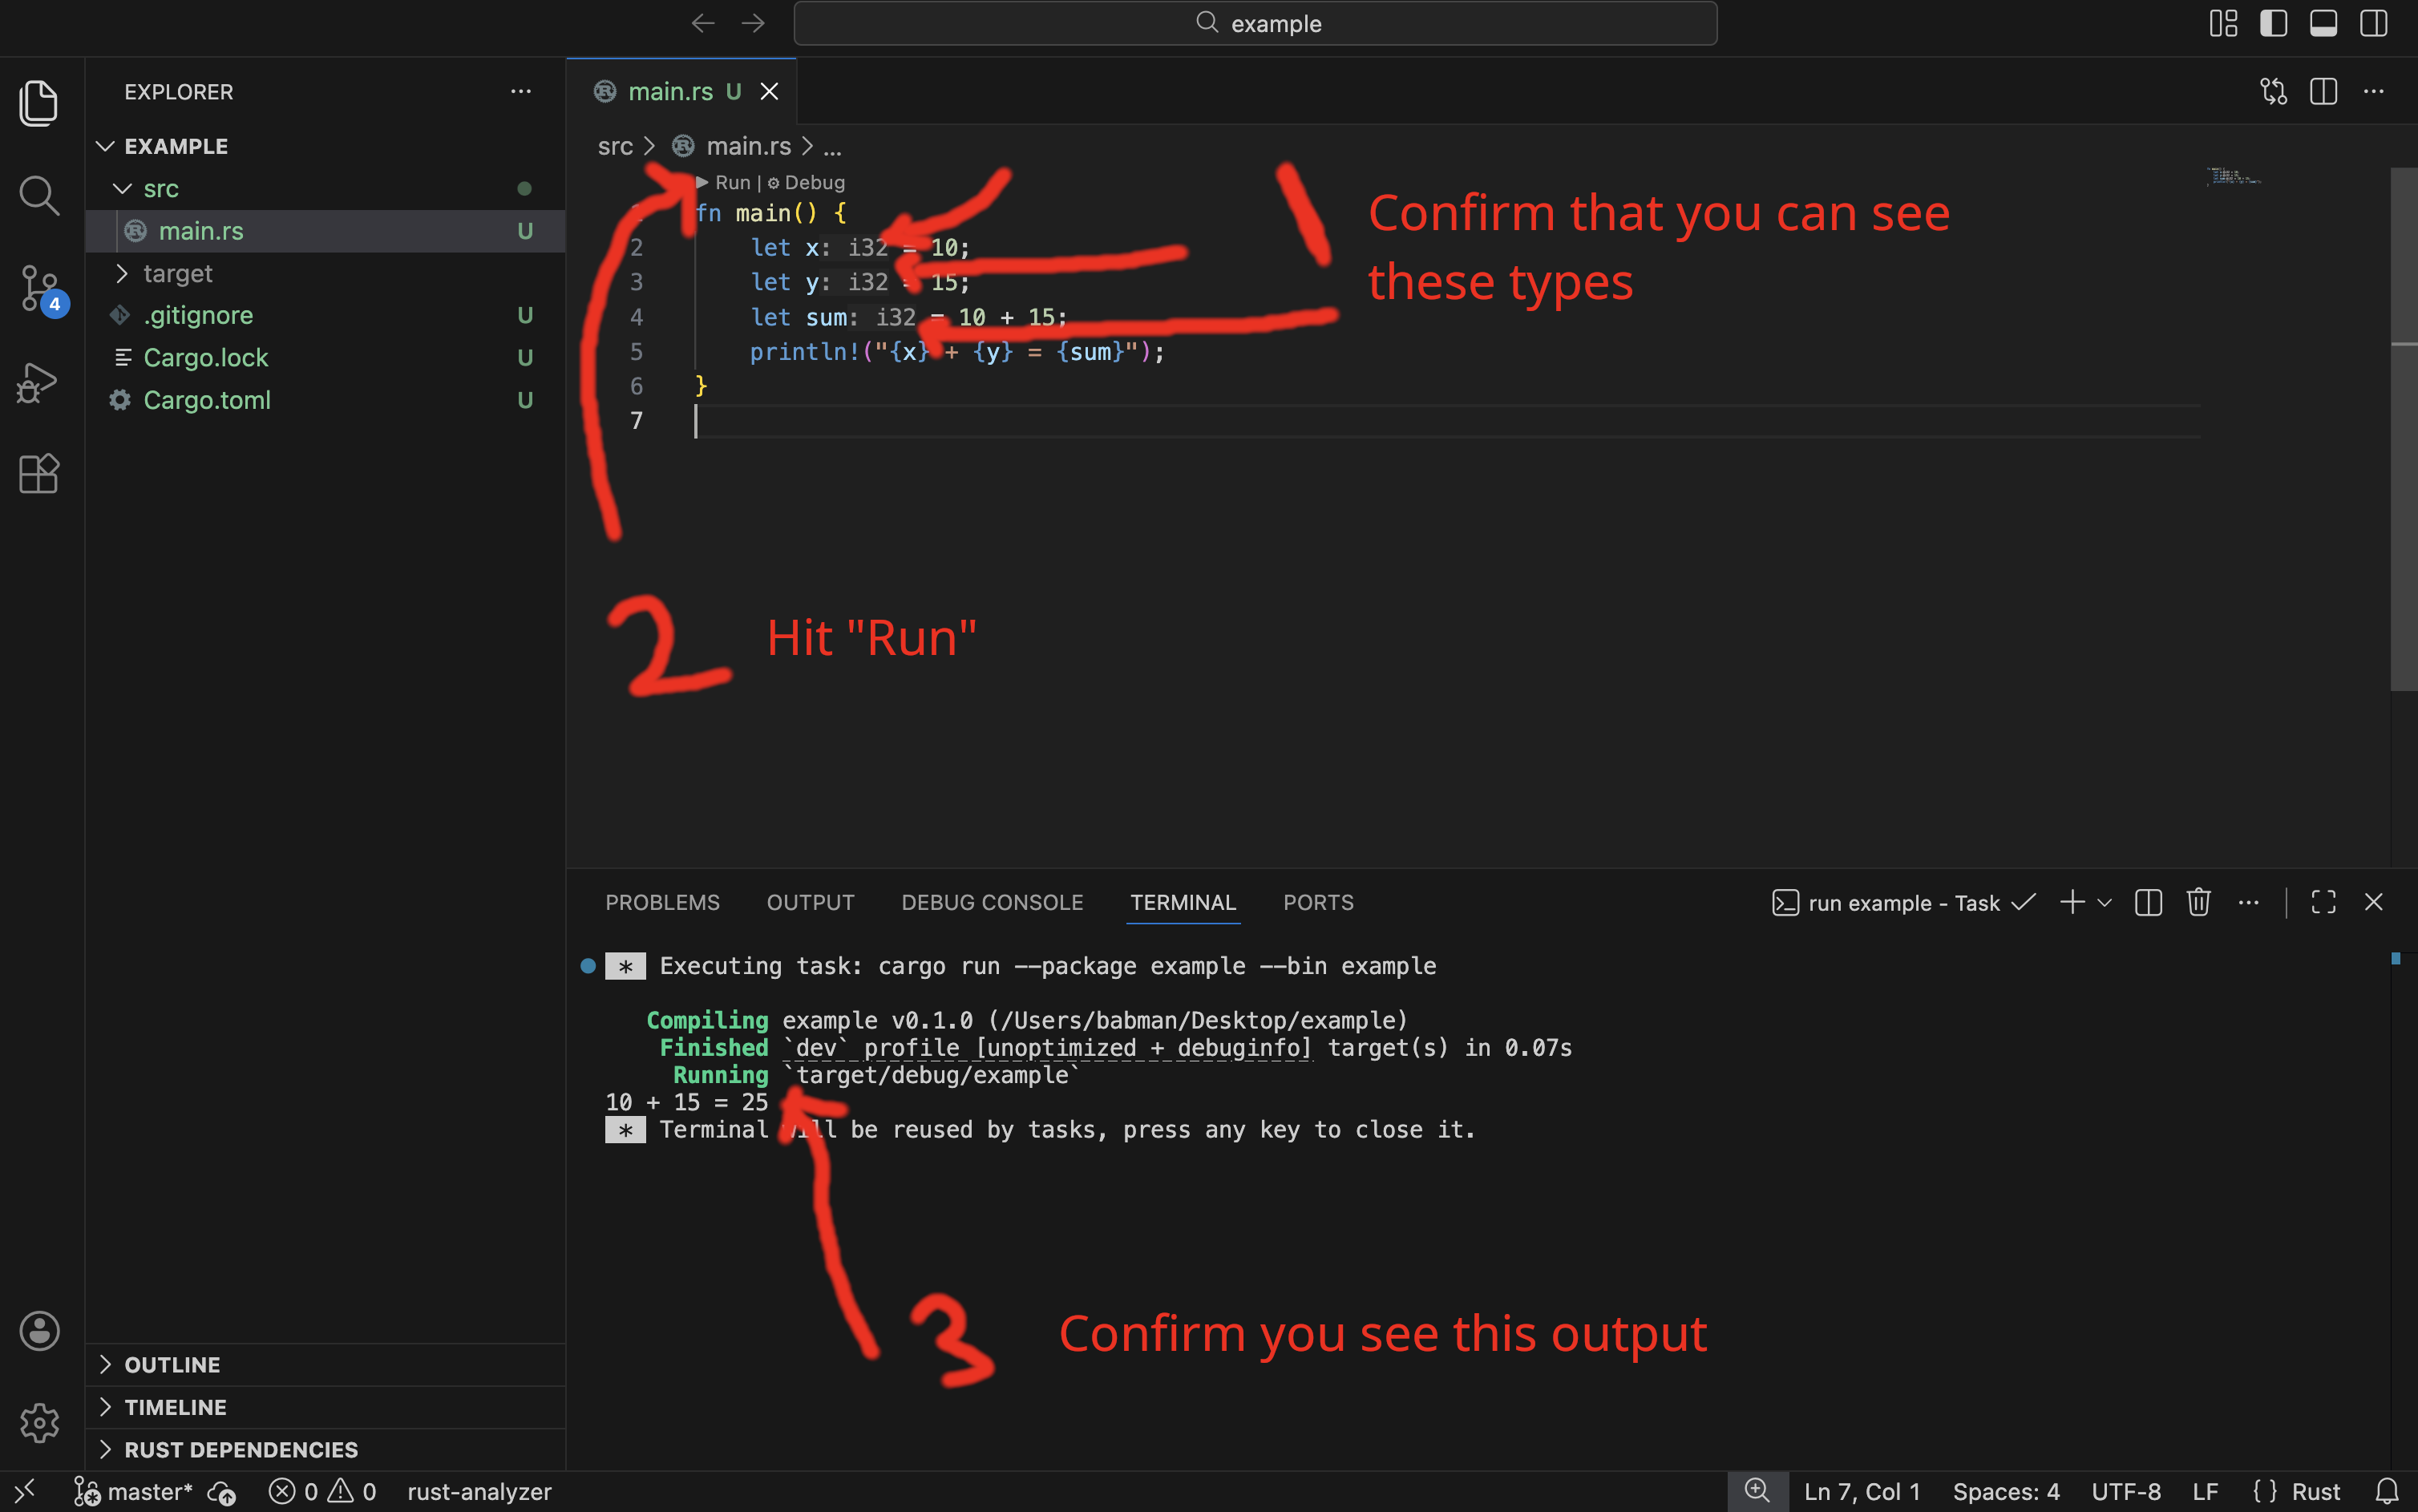
Step 3: Modify and run the code
Change the code to the following:
fn main() {
    let x = 10;
    let y = 15;
    let sum = 10 + 15;
    println!("{x} + {y} = {sum}!");
}
If you followed all the steps correctly, you will see VSCode add in the type of x, y, and sum automatically on your behalf, as shown in the screenshot below.
You can run the code from the command line using cargo run, and you can also run it from VSCode as below.